Do you have a question about the Empire RESURRECTION and is the answer not in the manual?
Key safety rules for carrying, handling, and pointing the marker.
Age (18+) and supervision requirements for marker operation.
Details the model, caliber, action, air source, and body material.
Explains setting the marker to "Safe Mode" with safety button and barrel blocking device.
Guides on adjusting marker velocity via HPR and Rear Velocity Adjuster.
Instructions for adjusting marker timing via Hammer Lug and 3-Way Shaft.
Details on adjusting the LPR for consistent marker re-cocking.
Steps to safely remove the air cylinder from the marker after unloading.
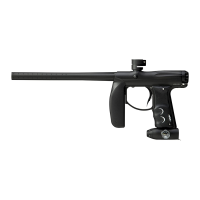
The Empire Resurrection Autococker is a paintball marker designed for reliable performance and precision engineering, crafted from aircraft-grade aluminum and high-grade materials. It is intended for frequent and hard play, offering a semi-automatic mechanical action and recommended for use with compressed air.
The Resurrection Autococker operates on a closed bolt system, meaning the bolt is in the forward position when the marker fires. The system activates during the latter half of the trigger pull. This action engages a 3-way valve, allowing air to enter the front of the Ram assembly, which pushes the bolt backward by approximately one inch. At this point, the Hammer Lug latches, and a paintball drops into the breach.
The bolt remains in the rearward position until the trigger is released. Releasing the trigger reverses the 3-way valve, venting air from the front of the Ram assembly and routing it to the rear, which then pulls the bolt into the forward position, making the gun ready to fire. The first half of the subsequent trigger pull releases the Hammer, firing the gun, and the second half repeats the cocking and loading sequence.
Prioritizing safety, the marker should never be carried uncased outside a playing field to avoid confusion with firearms. Always transport it in a suitable marker case or its original box. Treat the marker as if it were loaded at all times and never look down the barrel. Careless use can lead to serious injury or death. Keep the marker in "Safe" mode with the safety on and a barrel blocking device installed until ready to shoot. Keep your finger off the trigger and never point the marker at anything you don't intend to shoot, especially fragile objects, people's eyes, heads, or animals. Use only paintballs with the marker. Always remove paintballs and the air source before disassembly. After removing the air source, point the marker in a safe direction and discharge it until degassed. Store the marker unloaded and degassed in a secure place. Follow all warnings on the air source for handling and storage. Everyone within range must wear ASTM standard F1776 eye, face, and ear protection. Always measure velocity before playing, ensuring it does not exceed 300 feet-per-second. The product is not for sale to persons under 18 years of age, and operators must be 18 or older or supervised by an adult. Common sense and fun are encouraged.
To install the barrel, thread the tip into the chosen back section, being careful not to cross threads. Ensure the marker is degassed, loader removed, and free of paintballs, then thread the barrel into the front opening of the marker body, turning clockwise until it stops without overtightening. Install a barrel blocking device to prevent accidental discharge. To determine the correct bore size, select 5-10 paintballs of the type you will use. Place a ball into the end of the barrel back; if it rolls through without force, switch to a smaller back. If it barely fits and cannot be blown out easily, switch to a larger back. The goal is a good ball-to-bore match where the ball can be blown out with a small pop sound. Excessive moisture from exhaling into the barrel can affect testing, so clean and dry the barrel if paintballs start sticking or moisture builds up.
Check the feed neck and loader for debris. Flip the clamp lever to "Open," then press the loader into the feed neck opening until it stops. Align the loader so the lid points to the rear and the loader is parallel with the marker. Secure the loader by tightening the clamp lever, adjusting the thumb screw if necessary, but do not overtighten. The feed neck clamp may require adjustment for different loader types; turn the thumb nut clockwise to increase clamping force or counter-clockwise to decrease it.
Before pressurizing, consult your vendor or a competent air smith for safe handling of compressed-air cylinders. Ensure you and anyone within range are wearing paintball-specific eye protection. Double-check that all screws are tightened and no parts are loose before installing your tank. Ensure a barrel plug or blocking device is in place and that there are no paintballs in the marker. Set the marker to "Safe Mode" and cock it by pulling the bolt pin rearward until it stops. To pressurize, point the marker in a safe direction, locate the ASA (Air Source Adapter) on the bottom of the grip frame. Rotate the On/Off ASA lever forward, insert the threaded end of the air cylinder into the ASA, and twist clockwise until it stops, allowing threads to draw the cylinder in. Use caution not to strip threads. Flip the On/Off Lever back to the rear. The marker is now charged.
Use .68 caliber, water-soluble paintballs. Ensure the marker is in "Safe Mode" with safety on and a barrel blocking device. Wear eye protection, and ensure anyone within range does the same. Load quality .68 caliber paintballs into the loader, leaving room for movement. The marker is now loaded.
Always keep the marker pointed in a safe direction. Everyone within firing range must use paintball-approved eye and face protection. Ensure the marker is in "Safe Mode" before proceeding. Cock the marker by pulling the bolt pin rearward. Install the air cylinder and pressurize the marker. Install a paintball loader and put paintballs into it. Remove the barrel-blocking device. Aim the marker in a safe direction. Set the safety to the "Fire" position (Safety Off). Aim at the target, place your finger on the trigger, pull, then release. The marker will load a paintball and be ready.
Always check the velocity before playing. Different fields have different maximum velocity limits, and you should never shoot above 300 feet-per-second. The marker is factory inspected and test-fired, so it should only require velocity verification with a chronograph before use. After extended use, adjustments may be needed. When performing adjustments, check for paintballs in the barrel, marker, and loader, and ensure it is fully de-gassed. If you are uncertain of your skills, have adjustments performed by a qualified technician, as improper adjustment is not covered under warranty.
Velocity can be adjusted via the High Pressure Regulator (HPR) and the Rear Velocity Adjuster. The HPR adjusts air pressure into the marker, and the Rear Adjustment Screw adjusts the force by which the Hammer opens the valve. It is recommended to primarily adjust velocity via the inline regulator (HPR) and use the rear adjustment screw for fine-tuning. Turning input pressure too high may lower velocity. Barrel back bore size and marker timing also affect velocity.
Timing refers to the interval between the trigger pull and the cycling of the marker. Adjusting the Hammer Lug height and 3-Way Shaft/Timing rod will change the marker's timing.
The adjustable LPR controls cocking pressure through the 3-way and Ram. Adjustments should be small. The LPR does not control velocity. If the LPR setting is too low, the marker will not re-cock correctly; if too high, the 3-way will not function well. Adjust LPR pressure by turning the adjuster by hand or with a 3/16" Allen wrench. Turn clockwise to raise pressure, counter-clockwise to lower it. Ideally, the LPR pressure should be set slightly higher than needed to consistently re-cock the marker.
Wear eye protection and ensure anyone within range does the same. Ensure the barrel blocking device is properly installed and the marker is set to "Safe Mode." Remove the loader and all paintballs. While pointing the marker in a safe direction, remove the barrel blocking device and fire the marker several times to ensure no balls remain in the chamber or barrel. Properly re-install the barrel blocking device and set the marker safety to "Safe Mode."
Wear eye protection and ensure anyone within range does the same. Ensure the barrel blocking device is properly installed. While pointing the marker in a safe direction, remove the air cylinder by flipping the ASA On/Off lever forward, venting the air, and turning the air cylinder counter-clockwise until removed. The marker is now ready for cleaning and storage.
Before any maintenance, ensure all paintballs and propellant sources are removed. Install a barrel blocking device, and the marker must be unloaded and degassed before any disassembly or maintenance.
Once unloaded and the air cylinder is removed, use a damp cloth to wipe off paint, dirt, and debris from the outside. Once clean and dry, lubricate as needed with a light, premium marker oil. Do not use petroleum-based or aerosol products, as they can damage O-rings.
The marker performs best when properly maintained and lubricated. SL33K or Dow 33 grease, or premium paintball oil, is recommended. Some areas work best with marker oil or Dow 33 type grease.
These areas require less maintenance and should only be lubricated as needed:
Ensure the marker is unloaded and de-gassed. Slide the plastic clamp away from the end of the hose. Remove the hose from the barb fitting. Carefully cut the new hose to length. Slide the two hose clamps onto each end of the hose and slide them back slightly from the end. Place the hose over the barb fitting and push until fully seated. Then force the hose clamp down over the hose.
Before attempting any maintenance, ensure all paintballs and air sources are removed. Install a barrel blocking device, and the marker must be unloaded and degassed. Have a clean area to work on. When removing parts for the first time, do so carefully to avoid losing any. Visit PaintballSolutions.com for additional information.
Never carry your marker uncased on a playing field. Non-playing public and law enforcement personnel may mistake a paintball marker for a firearm. For your own safety and to protect the sport's image, always carry your marker in a suitable case or its original box. When finished using your marker, prepare it for storage to increase its life and assure optimum performance. The marker must be clear of all paint and air sources when not in use. Ensure the marker is de-cocked and in "Safe Mode." Make sure a barrel blocking device is in place. Store your marker and propellant in a cool, dry place, away from unsupervised children. Your marker must be free of all paint and not attached to a propellant source while being transported. Observe and obey all local, state, and federal laws concerning the transportation of paintball markers. Store the marker in a secure location when not in use to prevent access by unauthorized persons.
| Manufacturer | Empire |
|---|---|
| Model | Resurrection |
| Material | Aluminum |
| Barrel | Autococker Threaded |
| Air Source | High Pressure Air (HPA) |
| Caliber | 0.68 |
| ASA | On/Off ASA |