G
Gary BarberAug 23, 2025
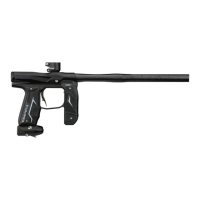
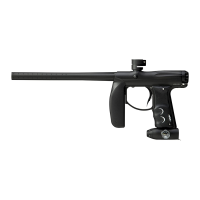
Why does the velocity drop off when firing multiple shots with my Empire Paintball equipment?
- UuchenAug 23, 2025
If your Empire Paintball equipment's velocity drops off during rapid firing, the air tank may not be fully screwed into the regulator ASA. Ensure the air tank is completely screwed in. If the gauge on the regulator drops significantly and recovers slowly after the first shot, this indicates insufficient screwing in of the air tank.