Regulator
Removal of Regulator
• Loosen the two regulator mount set screws located on the bottom of the grip frame
with a 3/32” Allen wrench by turning them counter-clockwise.
• The regulator and regulator mount can now be pulled down and removed from
the grip frame. Be careful not to lose the female air transfer tube bottom O-ring,
which sits on the bottom of the female air transfer tube.
Installation of Regulator Assembly
• Make sure the female air transfer tube O-ring is on the bottom of the air tube;
grease if necessary.
• Slide regulator and regulator rail back into the grip frame and tighten the regulator
mount set screws with a 3/32” Allen wrench.
Note: There are also two set screws in the regulator rail; they should only need to be
adjusted if the regulator becomes loose.
Warning: Do not take the regulator apart; it is not designed to be user serviceable.
Damage to the regulator will not be covered under warranty.
Air Transfer Plate
Removal of Air Transfer Plate
• Remove fore grip and grip frame.
• Carefully unplug the solenoid from the sensor board.
• Remove the solenoid and male air transfer tube from the air transfer plate by
unscrewing them counter-clockwise.
• Using a 5/64” Allen wrench, remove all of the air transfer plate screws (6 total).
Once the screws are removed the air transfer plate will then lift off.
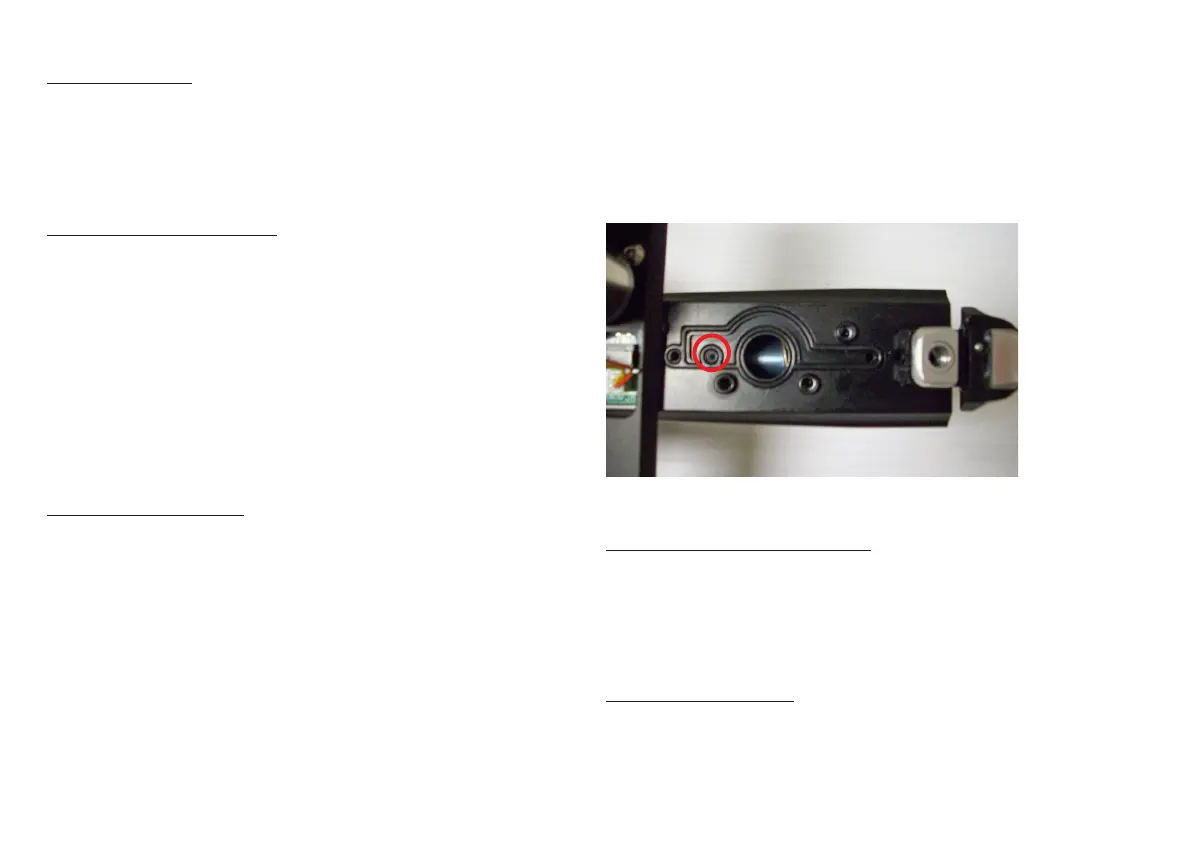
Note: Be careful not to lose the check valve (air restrictor). The check valve is a small
plastic piece located between the body and air transfer plate. Using grease on the
check valve will help hold it within the body.
Installation of Air Transfer Plate
• It is recommended that a small amount of factory-supplied grease or
Dow 33 grease is applied to the air transfer gasket before the air transfer plate
is reattached.
• Also make sure the check valve is in the body; see Fig. 15.3.
• Place transfer plate back on body and evenly tighten all seven screws.
• Plug the solenoid back into the sensor board.
Sensor Board
Removal and Cleaning of Sensor Board
• Remove fore grip, grip frame, and air transfer plate as described in the
steps above.
• Gently remove the sensor board from the body.
• Once board is removed, use a dry cloth to clean sensors, if paint is on the board,
use a dry cloth to wipe paint off the board.
Installation of Sensor Board
• When installing sensor board back in main body, be careful that the sensors lineup
correctly. The board should drop into the body very easily. Do not force the sensor
board into the body.
(Fig. 15.3)