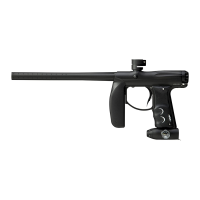
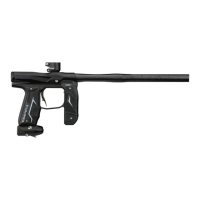
6. Installing a Loader and Paintballs
The Empire AXE comes equipped to accept standard-gravity feed loaders as well as most
agitating and force-feed loaders. Fit the loader directly into the feed neck. It might be neces-
sary to adjust the feed necks clamping screw to your loader.
The Empire AXE uses .68 caliber, water-soluble paintballs, readily available at paintball
pro-shops, commercial playing fields, and many sporting goods stores. The paintballs feed
from the loader through the neck and into the breech of the marker.
7. Firing the Empire AXE
Keep your nger out of the trigger guard and away from the trigger, point the muzzle of your
marker in a safe direction at all times during this process. Be sure your goggles are securely
in place and make sure the AXE marker is off.
Warning: Everyone within firing range should always use paintball approved eye and face
protection in the presence of live paintball markers.
• Place the empty loader onto the marker.
• Be sure that it is securely mounted in place.
• Apply the compressed gas, pressurizing the marker.
• Put the paintballs into the loader.
• Remove the barrel plug, sock or barrel-blocking device.
• Aim the AXE in a safe direction.
• Turn the AXE ON: Push the button for 2 seconds until the LED light changes to
solid GREEN, then release button and LED should display a flashing LED accor
ing to Eye Status.
• Aim the AXE at the target.
• Pull the trigger with a smooth squeezing motion.
Caution: When the game you are playing is over, remember to place the barrel
blocking device onto your barrel and turn the marker off.
8. Break Beam Eyes Operation
The AXE uses a break beam eye system to determine the absence or presence of a paint-
ball for the purposes of reduced paint breakage and optimum rates of fire. When
the Break Beam System is activated the marker will not re unless the Break Beam Eye Sys-
tem detects a paintball. The AXE board is pre-programmed to activate the eye system each
time the marker is powered up.
To turn the eyes OFF, ensure that there are no paintballs in the AXE breech or feed-neck, make
sure the marker is switched On, and then press the button once. A fast, flashing LED will indi-
cate that the eye system has been deactivated.
To turn the eyes back ON, tap the button one time.
A slow consistent single blinking Green LED indicates that the eyes are ON with no ball in the
breech and a double blink LED indicates that there is a ball in the breech.
If the Break Beam Eye System malfunctions, the marker assumes there was a ball broken and
the Rate of Fire (ROF) is limited to 8.0 balls-per-second (bps) to prevent further ball breaks.
The LED indicator will ash slowly. Turn the Break Beam Eye System OFF to allow ring at
Max ROF cap setting. Break Beam Sensor Status is indicated by blinking frequency of the
LED (See table below for explanation). Color would be determined by battery level, as listed
in the chart in Section 4.
Blink Frequency Break Beam (BB) Eye Status
Single Blink BB Sensor System active, no ball in breech
Double Blink BB Sensor System active, ball in breech
Flashing BB Sensor System has malfunctioned
Fast Flashing BB Sensor System Deactivated
For optimal performance of the AXE eyes, keep the inside of the AXE breech clean and clear
of broken paint, paint residue, or other debris. Although the eyes can be cleaned via cleaning
the breech of the AXE marker, if the eye board needs to be accessed, please follow the steps
outlined in the Main Body Assembly section of this manual.
TRIGGER PULL INDICATION
If the trigger is being pressed, the LED will display a dim Red LED which can be seen
between blinks of the Eye Setting LED.