7
Using the Appliance
Note: A scale for water level, based on the number of cups of rice used, is provided
on the side of the rice bowl for time saving when adding water direct from the tap
or large jug. Only use the supplied cup for the rice measurement, although for 2 cups
and below it is recommended to use the cup for the water as better accuracy will be
obtained.
1. Using the measuring cup provided in the box, measure and add rice to the rice
bowl.
2. Add the correct amount of water to rice ratio (a ratio guide has been provided
below). You are able to use either the supplied cup or you can fill the bowl by
using the scale marked inside the rice bowl. The amount of water can be varied
depending on the result required.
Cups of Raw Rice Water
1 cup 1 – 1 1/4 cups
2 cups 2 – 2 1/2 cups
4 cups 4 – 5 cups
5 cups 5 – 6 cups
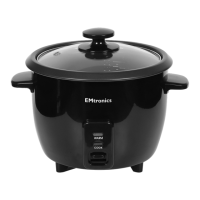
3. Place the rice bowl into the cooker. Turn the rice bowl gently to the right and left
to ensure it is securely positioned inside the cooker, then fit the lid securely.
4. Plug in power cord. Do not plug in until ready to cook otherwise the rice may be
spoiled. If the rice bowl is not in the cooker, cooking will not begin.
5. Push the power switch to the “I (Power On)” position.
Then press the “COOK” switch on the front of the cooker. The power indicator light
will illuminate when the cooking process has started.
6. When timed cooking process has completed, the switch will automatically pop up
to the “O (Power O)” position. After the switch pops up, leave the lid on for at
least 15 minutes to steam rice further.
The “KEEP WARM” function will operate whenever the cord is plugged in and the
power switch is positioned to “I (Power On)”. Never remove the lid during the
cooking process and do not stir the rice/food item whilst the cooking process
is ongoing, or in the process of steaming otherwise the rice/food item may be
spoiled.
7. Push the power switch to the “O (Power O)” position and unplug after each use.
When removing the plug from the socket, please grip the plug instead of the cord
to prevent damages and hazards.
8. To reduce the risk of scalding and burns, do not touch the ventilating holes.
During heat up and cool down the metal expansion ring round the glass lid can make a
‘pop’ sound, this is perfectly normal
 Loading...