GETTING TO KNOW YOUR EMU
V-EVO-MK1-1 www.emubikes.com
4. GETTING TO KNOW YOUR EMU
Stem, Handlebar & Display angle
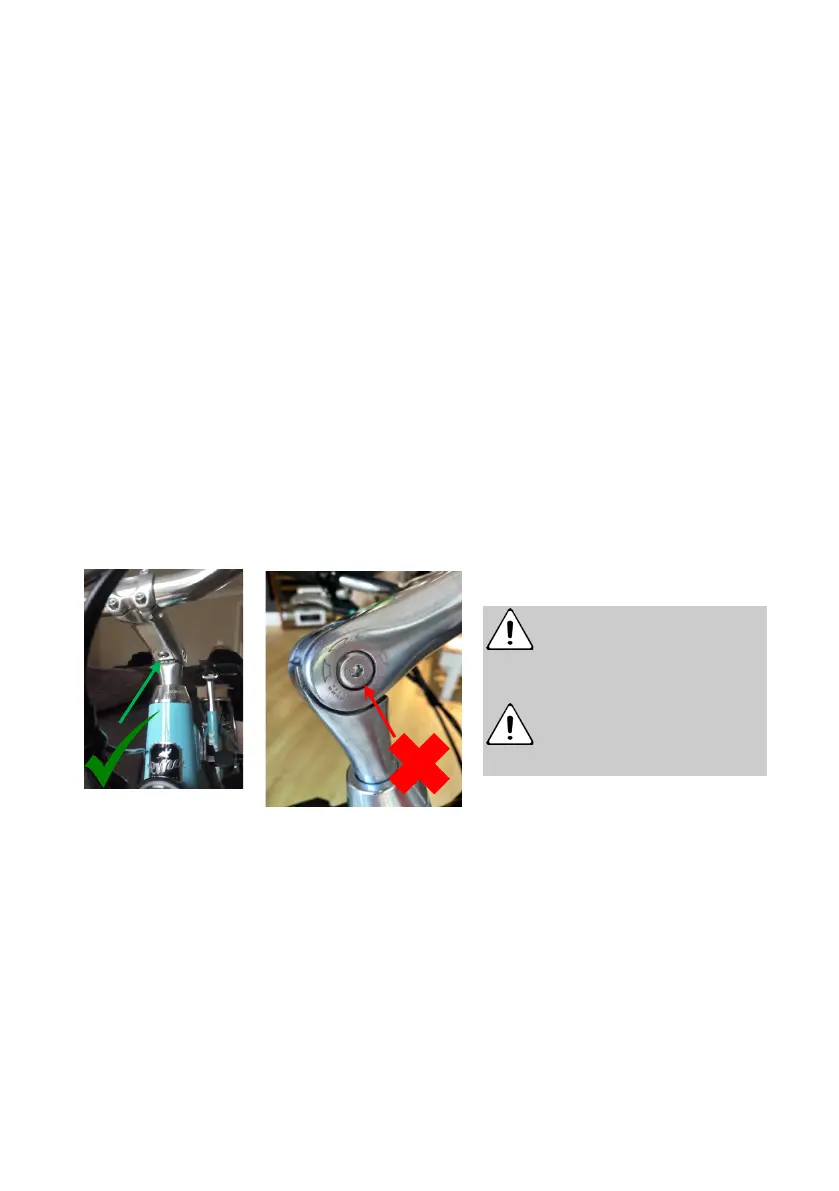
1. Stem angle – To adjust the tilt on the Emu quill stem you need to loosen the
single bolt located underneath the stem. Once the bottom bolt is loosened you
can adjust the angle of the stem to a more flat or upright riding position.
Retighten the bolt securely to the recommended torque.
2. Handlebar angle – To adjust the angle of the handlebars, loosen the
handlebar bolts using the 5mm Allen key and move the handlebars to a
comfortable riding position. Tighten the bolts to 10Nm
3. Display – Loosen the handlebar display clamp screw with the 3mm hex key
and adjust the handlebar display position as necessary. Tighten the screw
securely to 2-3Nm.
4. Brake lever angle – Loosen the brake lever clamp screw with the 5mm hex
key to adjust the brake lever position. The rider’s fingers, hand and lower arm
should be in a straight line when sitting on the saddle. Tighten screw to 6-
8Nm. The bell is integrated into the brake lever.
Saddle & Seat Post
1. Saddle height – To adjust the saddle height, loosen quick release clamp and
slide the post up or down. Ensure the post is extended no further than the
maximum mark shown on it. Tighten the quick release to finger tight. Do not
move the saddle beyond the minimum insert line as this will damage the bike
or cause potential injury.
Do not loosen the bolts on
the side of the stem;
these are pivot points and allow
the stem to tilt up and down.
Overtightening the display
mount bolt may break the
mount. Do not overtighten.