GETTING TO KNOW YOUR EMU
V-EVO-MK1-1 www.emubikes.com
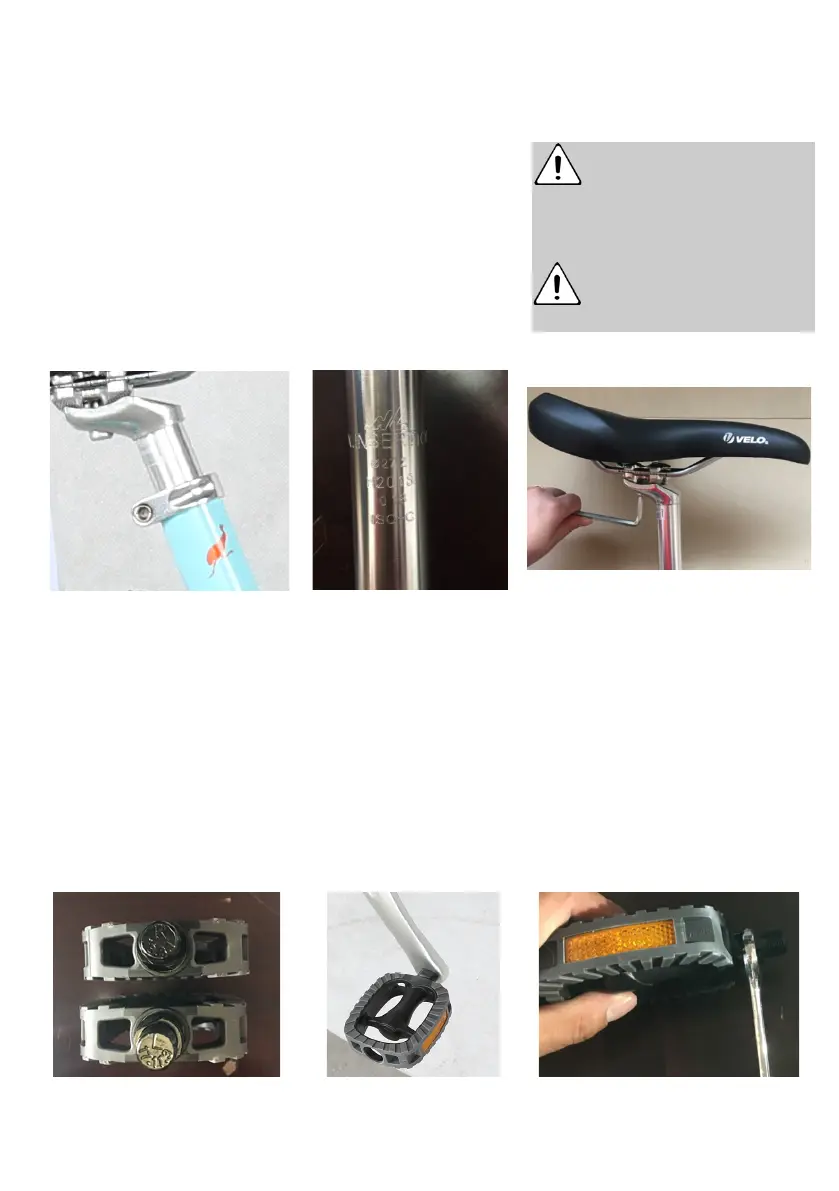
2. Saddle angle – The bike saddle is supported underneath by a ‘holder’. The
holder allows you to slide the saddle forward
or backwards. Use the 8mm Allen key to
loosen the clamp that secures the saddle to
the seat post. After positioning the saddle
correctly, re-tighten the bolt to 20Nm. The
seat clamp also allows you to raise or lower
the nose of the saddle. Set this initially so the
saddle is horizontal. Once you have ridden a
few miles you may wish to adjust the nose for improved comfort.
Pedals
1. Look closely at the pedal axles, you should see a small ‘R’ and ‘L’ for the
‘right’ and ‘left’ (when sitting on the bike).
2. Choose the appropriate pedal for each side and insert it into the correct crank
arm, turn the pedal axle towards the front of the bike (both pedals thread in
this direction, so the left pedal turns anti-clockwise, and the right pedal turns
clockwise). If it doesn’t turn easily, do not force it. Check you have the correct
pedal and are inserting it level at 90°to the crank
3. Thread both pedals into the crank arm as far as you can by hand. Then fully
tighten to 30Nm using the 15mm spanner.
4. Pedals are assigned to left and right, they are not interchangeable.
Do not move the saddle
beyond the minimum
insert line as this will damage
the bike or cause potential
injury.
Always ensure the saddle
is clamped within its limits
indicated on the rails.