Do you have a question about the ENCLO Richmond EC18008 and is the answer not in the manual?
Key advice for safe and proper assembly, including surface protection and force usage.
Guidance on obtaining replacement parts and contacting customer service for product issues.
Information on getting help with assembly and the process for returning the product.
Instructions on correctly orienting the left and right posts before inserting boards.
Guide on inserting the first board into the grooves of the assembled posts.
Using wood spacers to align boards with pre-drilled post holes for stability.
Attaching post anchors to posts using screws to secure the bottom board.
Inserting all remaining boards into the post grooves to build the screen structure.
Installing and fastening the top board to the posts for screen completion.
Instructions to repeat steps 2-4 for assembling the second screen unit.
Moving the screen to its location and using a hammer to drive posts into the soil.
Optional step to dig a hole if the ground is too hard for direct hammering.
Ensuring the screen is level, then backfilling and tamping the soil around posts.
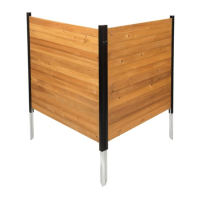
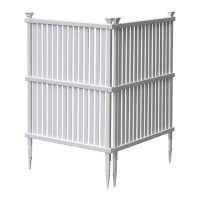
Connecting screens using joiner clips and screws for straight or corner applications.
Installing the post caps onto the top ends of the screen posts.
| Material | Steel |
|---|---|
| Color | Black |
| Finish | Powder-coated |
| Lockable | Yes |
| Hinge Type | Adjustable |
| Height | 1800 mm |