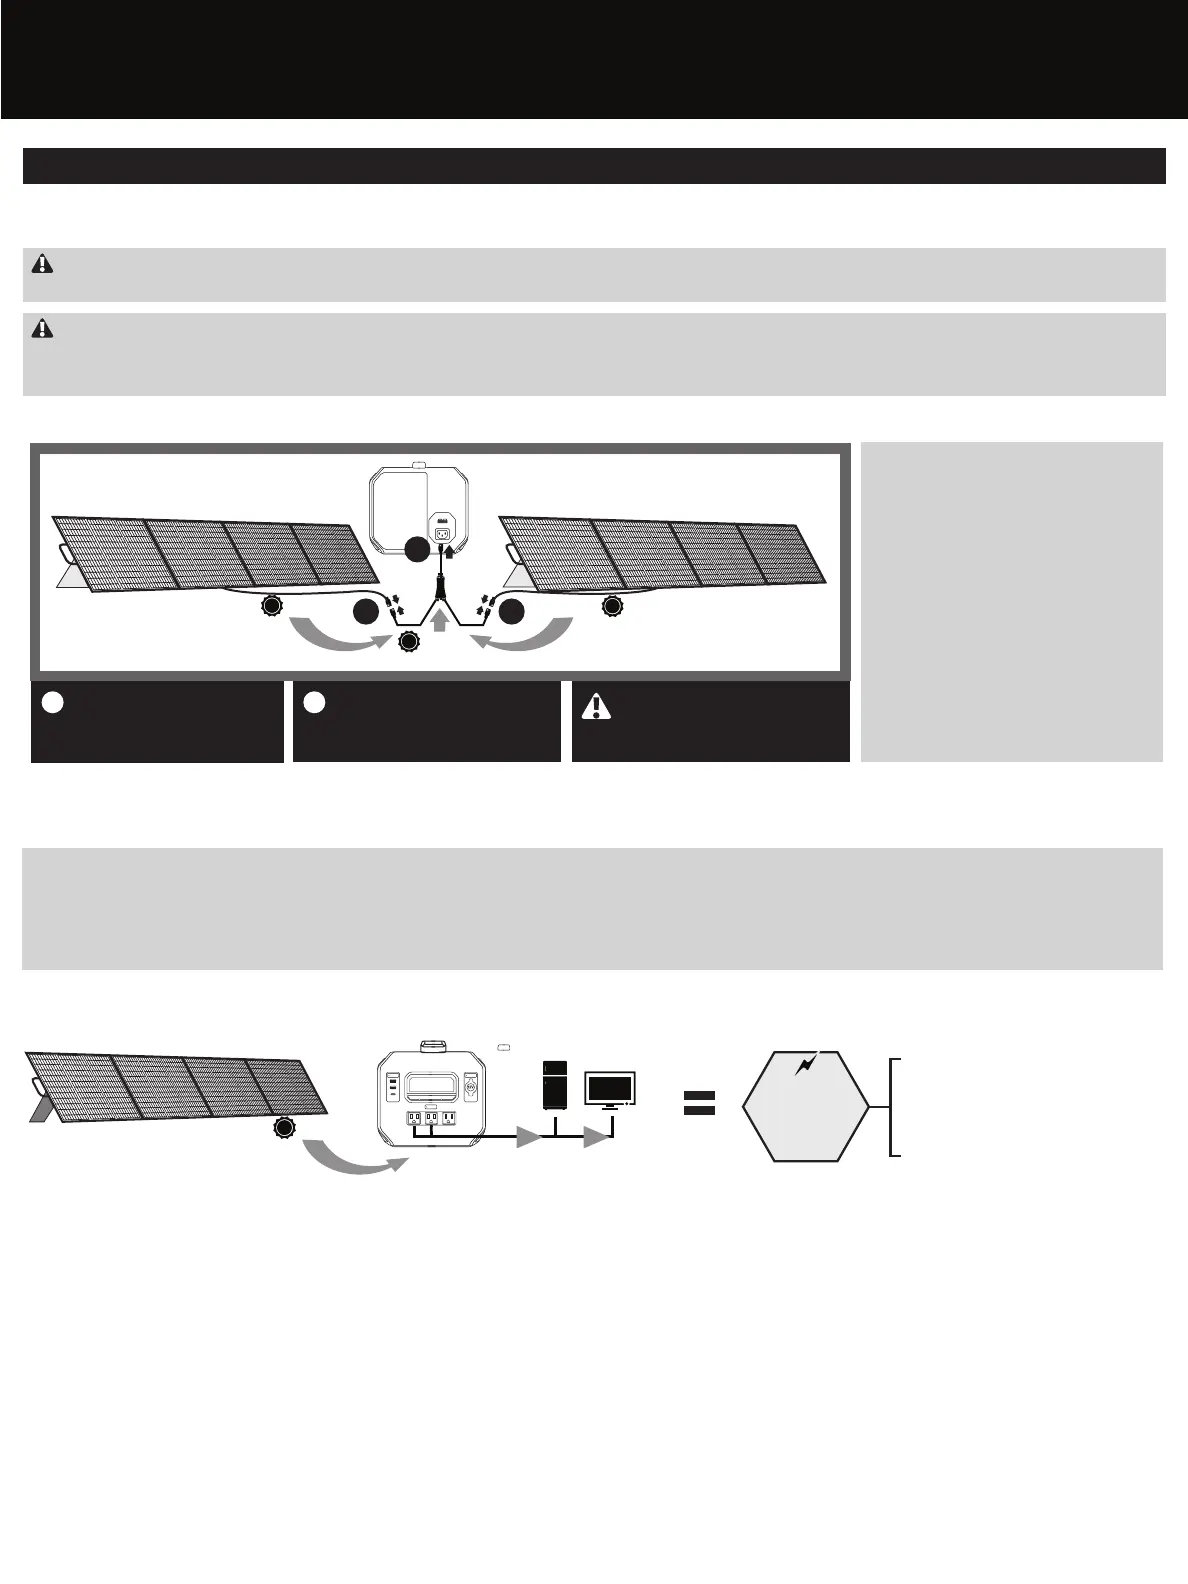
Two solar panels (additional panels sold separately) can be chained together using an Anderson combiner cable (sold separately) to increase the waמּage (parallel connection) and charge your PowerSource up to 50% faster.
Connecting Additional Solar Panels
IMPORTANT: CHECK VOLTAGE/POWER RATINGS
Please check the voltage and power ratings of the solar controller to determine the most efficient connection method. Please call our Customer Service number at 888-306-6890 for support or questions.
WARNING: RISK OF INJURY
Panel interconnection cables pass direct current (DC) and are sources of voltage when the panel is under load and when it is exposed to light. Direct current can arc across gaps and may cause injury or death if improper connection
or disconnection is made; or if contact is made with module leads that are frayed or torn. Do not connect or disconnect modules when a current source is energizing the conductors. Modules may contain high voltage when
interconnected with other modules.
The Energizer PowerSource has the capability to accept
up to 400 Waמּs of total solar charging power. You may
connect an additional solar panel up to 200 Waמּs
(200W + 200W = 400W).
Adding another solar panel to help provide power to
your PowerSource has significant advantages:
• Faster Charging: The PowerSource charges up to twice
as quickly when utilizing the combined power of two
panels.
• Longer Runtimes: While your PowerSource is charging
from both solar panels, the greater input power helps
to offset the total baמּery draw of the items plugged
into the PowerSource. When there is more power
coming in to the PowerSource than going out, your
devices can run for longer.
Why Add Another Solar Panel?
*Additional solar panel and combiner cable sold separately.
To obtain the fastest charge time, position your solar panel where it will receive the maximum exposure to direct sunlight. If the solar panel is placed in shade or is used in cloudy conditions, it may take significantly longer to charge your
PowerSource.
You may also keep your PowerSource connected to your solar panel for continued “maintenance” charging. It is recommended to keep the PowerSource charged so it is ready for use any time. One thing to note is that if the input power
from your solar panel(s) equals or exceeds the total power draw of all of the items connected to your PowerSource, there will be no drain on the PowerSource’s internal baמּery while it is being used to run and charge your devices.
Optimizing Your Solar Charging
Geמּing Started (cont’d)
200W
Because the solar power (input) to your
PowerSource equals the demand (output) of
your connected devices, there is no drain on
your PowerSource baמּery.
AC/UPS
USB
12V
DISPLAY
12W
12W
100W
100W + 100W
(200W Total)
Input From Solar Panel
Output Power To Connected Items
Net zero
drain on
PowerSource
baמּery
0
1
Connect each solar panel to
the Anderson Powerpole
15/45 combiner cable (sold
separately).
2
Connect the combiner cable to
the solar input port of your
PowerSource.
1 1
SOLAR INPUT
RED
200W
200W
400W
2
NOTE: The combiner cable must
be a PARALLEL type. Do not use
Series type combiner.