ENFORCER Power Supplies/Chargers
SECO-LARM U.S.A., Inc. 3
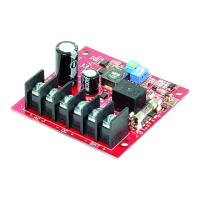
1. Mount the PC board in the desired location or enclosure. It should be easily accessible for future
servicing.
2. Set the DC power output:
a. Set the desired DC output voltage (6, 12, or 24VDC*) of the power
supply using the DIP switch as in Table 1 (for ST-1206-1.5AQ,
ST-2406-2AQ, ST-2406-3AQ, and ST-2406-5AQ), or Table 2 (for
ST-2406-7AQ, ST-2406-10AQ) on the right.
IMPORTANT: Disconnect power before changing these DIP
switches (Note the default voltage output setting is 12VDC).
b. Connect a transformer with appropriate specifications (See
Table 3 below):
ST-UV16-W100Q
16VAC/100VA
ST-UVDA-W180Q
24~28VAC/180VA
ST-UVDA-W180Q
24~28VAC/180VA
ST-UVDA-W100Q
24~28VAC/100VA
ST-UV16-W100Q
16VAC/100VA
ST-UVDA-W180Q
24~28VAC/180VA
ST-UVDA-W180Q
24~28VAC/180VA
ST-UVDA-W100Q
24~28VAC/100VA
ST-UVDA-W180Q
24~28VAC/180VA
3. Connect the wires to their respective terminals (see "Wiring Diagram," pg. 2).
1. Before connecting any external devices, temporarily power up the unit and measure the DC output
voltage to avoid damage to devices. Then disconnect power before connecting external devices.
2. LED status:
No VAC input and VDC output
3. The ST-1206-1.5AQ comes with a 3A fuse. The ST-2406-2AQ, ST-2406-3AQ, and ST-2406-5AQ models
come with a 5A fuse. The ST-2406-7AQ and ST-2406-10AQ models come with a 10A fuse. Use only the
correct fuses to prevent short circuits and damage to the power supplies/chargers or the alarm access
control panel.
4. The automatic low battery cutoff will cut power when battery voltage drops below 20% of the set output
voltage (ST-2406-2AQ, ST-2406-3AQ, and ST-2406-5AQ only).
Warning:
1. Using a higher AC input than recommended may damage the unit.
2. Avoid touching the heat sink to avoid injury. It may be very hot under full load.
3. DO NOT USE METAL SPACERS TO MOUNT THE POWER SUPPLY'S PC BOARD.
4. Connect these power supplies/chargers only to a rechargeable backup battery. Use of a non-
rechargeable backup battery could result in damage to the power supplies/chargers or the alarm access
control panel.
* ST-1206-1.5AQ is 6/12VDC only
 Loading...