INTRODUCTION
ank you for purchasing a new EOTECH magnier. ese
magniers oer users of the Holographic Weapon Sight (all
models) the additional advantage of vastly improved target rec-
ognition and increased lethality at medium range distances. e
STS mount allows the user the ability to engage the enemy with condence in a Close Quarters Battle (CQB)
situation or at distances out to 600 meters or more. is user manual describes the features of the EOTECH
Magniers and provides information on their use and maintenance. Please read the instructions carefully
before mounting and using the magnier. Always practice proper rearm safety.
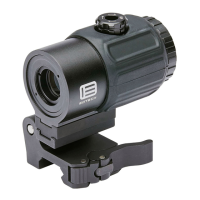
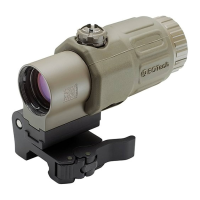
OPTIC CONFIGURATION
e EOTECH Holographic Weapon Sight (HWS)
product line has two dierent heights above the rail
based on user preference. For this reason, the mag-
nier does not come preassembled to the mount.
It is user congurable based on the specic model
HWS it will be mounted behind. e 7mm riser,
included, may be required to align the magnier
optical axis with the sight. Only HWS models with
side buttons or quick detach levers require the use of
the riser. For all other HWS models, the riser should
not be used.
e magnier system can be congured to switch to the le or to the right based on shooting preference.
Typically, right handed shooters prefer the mount to switch to the right, and le handed shooters to the le.
To congure your HWS you will need a screwdriver (not included). If the riser is not used, the shorter screws
should be selected. e longer screws are used with the riser only. If the riser is being used, place the riser
on the optic mounting interface. Open the STS mount. Position the mount on the optic mount interface (or
riser) so it opens either to the le or right (based on preference). Insert each screw through the components,
and tighten securely. If using a torque wrench, the screws should be tightened to 24 in-lbs. Note: If you
purchased the magnier as part of an HHS combo kit, the screw pack will not be included as the magnifer
comes preassmbled.
USER’S MANUAL FOR G-SERIES
MAGNIFIERS
is product is controlled under the Export Administration Regulations (EAR) ECCN 0A987, and may not be exported to a
foreign person, either in the U.S. or abroad, without a license or exception from the U.S. Department of Commerce
For use with G Series Magniers or HHS
systems containing the Switch to Side
(STS) mount. Images will vary by model.
SPECIFICATIONS
- Water-Resistant: 33 . (10m)
- Sealing: Fog-resistant internal optics
- Finish: Non reective / Rubber coated
- Optical Axis Adjustment: Internal adjustment
- Switch Orientation: Ambidextrous mount
- Flip Orientation to allow le or right ip
- Rail Interface: 1” Weaver or MIL-STD-1913 with Quick Detach lock
Included
• Magnier • Switch to Side (STS) Mount• 7mm Riser • 4 Screws
BASIC OPERATION
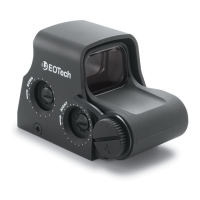
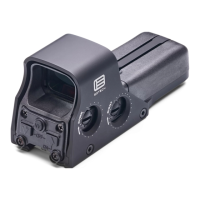
e G-Series magniers are designed to be used behind an EOTECH Holographic Weapon Sight (HWS). e
magnier can be mounted directly behind the HWS. Simply switch the magnier out of the way and operate
the sight. When used with HWS models 518, 558, 556, 517, EXPS or 516 HWS (with side button interface) the
user can easily operate the sight even with the magnier in the locked position.
Positioning the Reticle:
Once the magnier is installed properly behind the HWS, it may be necessary to re-zero the sight. is may
be due to the shooter’s ability to see the target and Point of Impact (POI) more accurately than without the
magnier. Re-zeroing the sight will prevent a perceived shi in POI when going from no magnication to
magnication.
RETICLE POSITION ADJUSTMENTS
Aer zeroing or re-zeroing the sight, it may be necessary to reposition the reticle image into the center of the
magnier window. is is aesthetic in nature and has no aect on the sight’s zero. Turn the horizontal and
vertical adjustments on the top or side of
the magnier by hand, with a coin or a
at head screwdriver to reposition reticle
to the desired position.
SWITCH OPERATION
To switch the magnier to the side,
simply push the optic to the right or le,
depending on how it is mounted. To close
the mount, push the magnier back into
its original position until a hard stop is
achieved.
ADJUSTABLE DIOPTER
e optic includes an adjustable diopter that allows the user to customize the
focus to their particular vision. is feature ensures a crisp, clean aiming dot
for more precision and shot placement. To adjust, simply grasp the diopter
with the thumb and fore nger and turn either clockwise or counter-clockwise
until a clear sight picture is achieved.
Note: Depending on the users vision, you may observe a small change to the
magnication during diopter adjustment.
M1960 Rev A
Figure 1
Figure 2
Figure 3