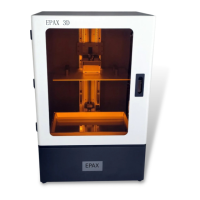
The EPAX LCD Resin 3D Printer is a sophisticated device designed for high-precision resin-based 3D printing. It utilizes an LCD screen to cure liquid resin layer by layer, forming detailed three-dimensional objects. The printer is suitable for a wide range of applications, from miniature sculptures and prototypes to dental models and jewelry casting, depending on the specific model and resin used.
Function Description:
The core function of the EPAX LCD Resin 3D Printer is to transform digital 3D models into physical objects using a process called stereolithography (SLA) or Digital Light Processing (DLP) with an LCD mask. The printer works by projecting UV light through an LCD screen onto a vat of photosensitive liquid resin. Each layer of the 3D model is displayed on the LCD, selectively curing the resin and solidifying it. The build platform then moves incrementally, allowing subsequent layers to be cured until the entire object is formed.
The printer's operation is managed through a touchscreen interface, providing access to various menus for control, monitoring, and maintenance. Users can select files for printing from a USB drive, adjust print settings, and perform essential calibration tasks. The device supports different file formats, primarily .ctb and .cbddlp, which are generated by slicing software.
Usage Features:
-
Intuitive Touchscreen Interface: The printer features a user-friendly touchscreen with a "New UI" (User Interface) that simplifies operation. The main menu provides quick access to "Tool," "System," and "Print" pages.
- Tool Page: This section offers manual Z-axis controls, exposure tests to ensure the screen is functioning correctly, and a cleaning feature for the resin vat. It also allows users to reset the Z=0 (logical zero) position.
- System Page: Provides essential information about the printer, including contact details, network settings, and a touchscreen calibration feature. It displays firmware version and screen resolution.
- Print Page: Enables users to select and manage files from a USB drive for printing. Firmware updates can also be performed from this page. Once a file is selected, users can choose to print or delete it. During printing, a layer preview is shown, and the print can be paused or stopped at any time. Users can also adjust bottom layer count and exposure settings mid-print if necessary.
-
Slicing Software Integration (ChiTuBox): The EPAX printer is designed to work seamlessly with ChiTuBox slicing software. This software is crucial for preparing 3D models for printing, allowing users to:
- Configure Machine and Print Settings: Adjust parameters such as machine volume, resolution, layer height, bottom layers, bottom exposure time, and regular exposure time. These settings are critical for successful prints and vary depending on the resin type and printer model.
- Generate Print Files: Slice 3D models into individual layers and save them as
.ctb or .cbddlp files, which the printer can read.
- Support Generation: For complex models, ChiTuBox allows users to add supports (Light, Medium, Heavy) to ensure stability during printing. These supports connect to the foundation or stable parts of the print and are removed after printing.
- Hollowing Feature: To save resin and reduce print weight, users can hollow out models within ChiTuBox. When using this feature, it's essential to create vent holes (near the build plate) and drainage holes (near the vat) to prevent vacuum effects and drain liquid resin.
-
Flexible Printing Options:
- USB Printing: The most common method involves saving sliced files to a USB stick and inserting it into the printer.
- Ethernet/Network Printing: For convenience, printers can be connected to a wireless router via an Ethernet cable, enabling remote sending of print files. The printer's network settings allow users to toggle Ethernet on, and once an IP address is assigned, files can be sent directly from ChiTuBox. It's recommended to use
.ctb files for network sending due to their smaller size compared to .cbddlp files.
-
Resin Compatibility: EPAX offers a range of proprietary resins tailored for different applications, including General Purpose Rapid, Hard, Hard and Tough, Porcelain-like, Dental Model, Water Washable, and Jewelry Castable resins. Each resin has specific print technology, material properties, resolution, layer thickness, and recommended exposure times. The printer is also compatible with other third-party resins, though users may need to experiment with settings or consult resin manufacturers for optimal results.
-
Print Process Management:
- Build Platform and Resin Vat Installation: The build platform slides into the Z-axis build arm and is secured with a knob screw. The resin vat is then inserted (sliding for X series, slotted for E series) and secured.
- Resin Loading: Users are advised to fill the vat to about 1/3 of its maximum capacity, especially for initial prints, to prevent overflow.
- Monitoring and Adjustments: It's recommended to check the print after about 30 minutes to ensure the first layers adhere correctly. If issues arise, adjustments to support, orientation, or bottom layer exposure time may be needed. During printing, if resin levels are low, the print can be paused, the build plate raised, and more resin slowly poured onto the angled platform.
Maintenance Features:
- Pre-leveled from Factory: EPAX printers are pre-leveled at the factory, eliminating the need for users to perform this initial calibration step.
- Resin Filtration: In case of failed prints or solid residue in the resin vat, it is crucial to filter the resin using provided filters or a paint filter. This prevents damage to the film and LCD screen when the build plate dips into the vat.
- Cleaning Procedures:
- Resin Vat Cleaning: The "Clean" feature on the touchscreen allows users to check for dead pixels and clean the vat.
- Post-Print Cleaning: After printing, residual resin on the build platform should be wiped off with a soft tissue soaked in IPA. The print itself should be soaked in at least 91% IPA (or water for Water Washable resins) for 5-10 minutes to clean off liquid resin.
- Curing: After cleaning, models should be placed in a cool, dry, well-ventilated area to dry. For final curing, a UV light machine can be used for a few minutes, or the print can be exposed to direct sunlight for a few hours (submerging in water is recommended for non-WW resins during sun exposure).
- User-Friendly Design: The printers are designed for easy maintenance, allowing users to open them and perform maintenance without voiding the warranty.
- Support Resources: EPAX provides extensive support resources, including:
- Tutorial Videos: Strongly recommended for first-time users, available on the EPAX website and YouTube.
- Online Documentation: Instructions, firmware updates, and troubleshooting tips are available on the EPAX website.
- Facebook Group: An active community for users to share knowledge, discuss slicer settings, and get advice.
- Customer Support: Email and Facebook messenger support are available for technical assistance and order-related inquiries.
Safety Precautions:
- Personal Protective Equipment (PPE): Always wear gloves, goggles, and a respirator mask when handling liquid resin or uncured prints. Resin can cause skin irritation and lung issues.
- Ventilation: Print in a well-ventilated area, ideally with a vent fan drawing air outside the building, to mitigate resin fumes.
- Temperature Shock: Avoid pouring room temperature resin directly into a warmed resin vat during a print, as this can cause temperature shock and lead to print failures or roughness.
The EPAX LCD Resin 3D Printer is a robust and versatile tool for creating high-quality 3D prints, supported by comprehensive user guidance and community resources.