Press the button and immediately press the button.
The red and green lights will ash quickly followed by a solid red light.
The RF1A receiver is now disconnected from the RFRP thermostat.
Press the button.
The thermostat will begin to search through the RF channels.
Press and hold the ‘COPY’ button for 10 seconds.
‘Addr’ will appear on the screen of the thermostat.
Press the ‘OK’ button twice to complete the unpairing process.
The thermostat RFRP is now disconnected from the receiver RF1A.
Operating Instructions
Page 3 of 3
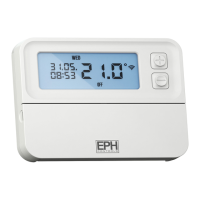
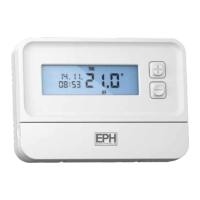
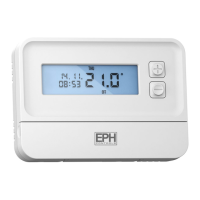
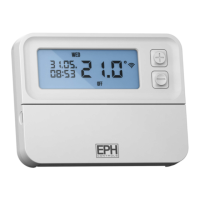
RFRP Room Thermostat Wireless
20. Battery low warning
When the batteries are almost empty, the symbol will begin to ash
on the screen.
The batteries must now be replaced or the unit will shut down.
21. Replacing the batteries
16. Holiday function
EPH Controls Ireland
Sitecast Industrial Estate, Pouladu,
Cork, T12 W665, Ireland
sales@ephcontrols.com www.ephcontrols.com
EPH Controls UK
Unit E4, Welland Business Park, Valley Way, Market Harborough,
Leicestershire, LE16 7PS, United Kingdom
sales@ephcontrols.co.uk www.ephcontrols.co.uk
15. Boost function
20170816_RFRP_OpIns_JW
The thermostat can be boosted to a specic temperature for 1, 2 or 3
hours while the thermostat is operating in all modes except for holiday
mode.
Press the ‘BOOST’ button 1, 2 or 3 times, the time that the boost will be
activated to will ash on the screen.
If you do not press any other button the boost will activate to the
temperature displayed on the screen after 5 seconds.
If you press the ‘OK’ button the temperature will now ash. You can edit
the temperature if you press the or buttons.
Press the ‘OK’ button or wait for 5 seconds to enter BOOST Mode.
‘BOOST TO’ will now be displayed on the screen with the time that it is
activated to displayed above this text.
Press the ‘BOOST’ button again to deactivate the boost.
This will switch your heating system o between the start and end times
you select .
Press the ‘HOL’ button, ‘HOLIDAY FROM’ will appear on screen.
Press the or buttons to adjust the day. Press the ‘OK’ button.
Press the or buttons to adjust the month. Press the ‘OK’ button.
Press the or buttons to adjust the year. Press the ‘OK’ button.
Press the or buttons to adjust the hour. Press the ‘OK’ button.
‘HOLIDAY TO’ will appear on screen.
Press the or buttons to adjust the day. Press the ‘OK’ button.
Press the or buttons to adjust the month. Press the ‘OK’ button.
Press the or buttons to adjust the year. Press the ‘OK’ button.
Press the or buttons to adjust the hour. Press the ‘OK’ button.
The thermostat will now return to the mode it was in before the Holiday
settings were entered.
To cancel Holiday mode, press the ‘HOL’ button.
Press the button on the RF1A receiver.
The red and green light will begin to ash.
17. To connect the RFRP thermostat to an RF1A
receiver
Connect
Connect
Press the button.
The thermostat will begin to search through the RF channels.
Once an RF connection has been established the thermostat will show ‘r01’
on the LCD screen.
Press the ‘OK’ button to nish the process.
The thermostat is now connected to the RF1A receiver.
CONNECT
CONNECT
RESET
18. To disconnect the RFRP thermostat from an
RF1A receiver
On the RFRP thermostat:
On the RFRP thermostat:
On the RF1A receiver:
On the RF1A receiver:
Please note, If you are installing a CombiPack4 the RFRP thermostat and the
RF1A receiver will have a pre-established RF connection so it is not necessary
to carry out the RF connection process below.
There are two settings for selection. The factory default setting is AUTO.
OFF The backlight is permanently OFF.
AUTO On pressing any button the backlight stays on for 5 seconds.
To adjust the backlight setting, lower the cover on the front of the unit.
Press the ‘OK’ button for 5 seconds.
Press either the or buttons to select the OFF or AUTO mode.
Press the‘OK’ button.
AUTO
19. Backlight mode selection
Lower the ap at the front of the thermostat.
There is a battery compartment located below the buttons.
Using your 2 thumbs, apply pressure and pull downwards to remove
the cover.
Insert the 2 x AA batteries and the thermostat will turn on.
Close the battery compartment.
 Loading...