Leveling the Fusion Pro 48 Table
3
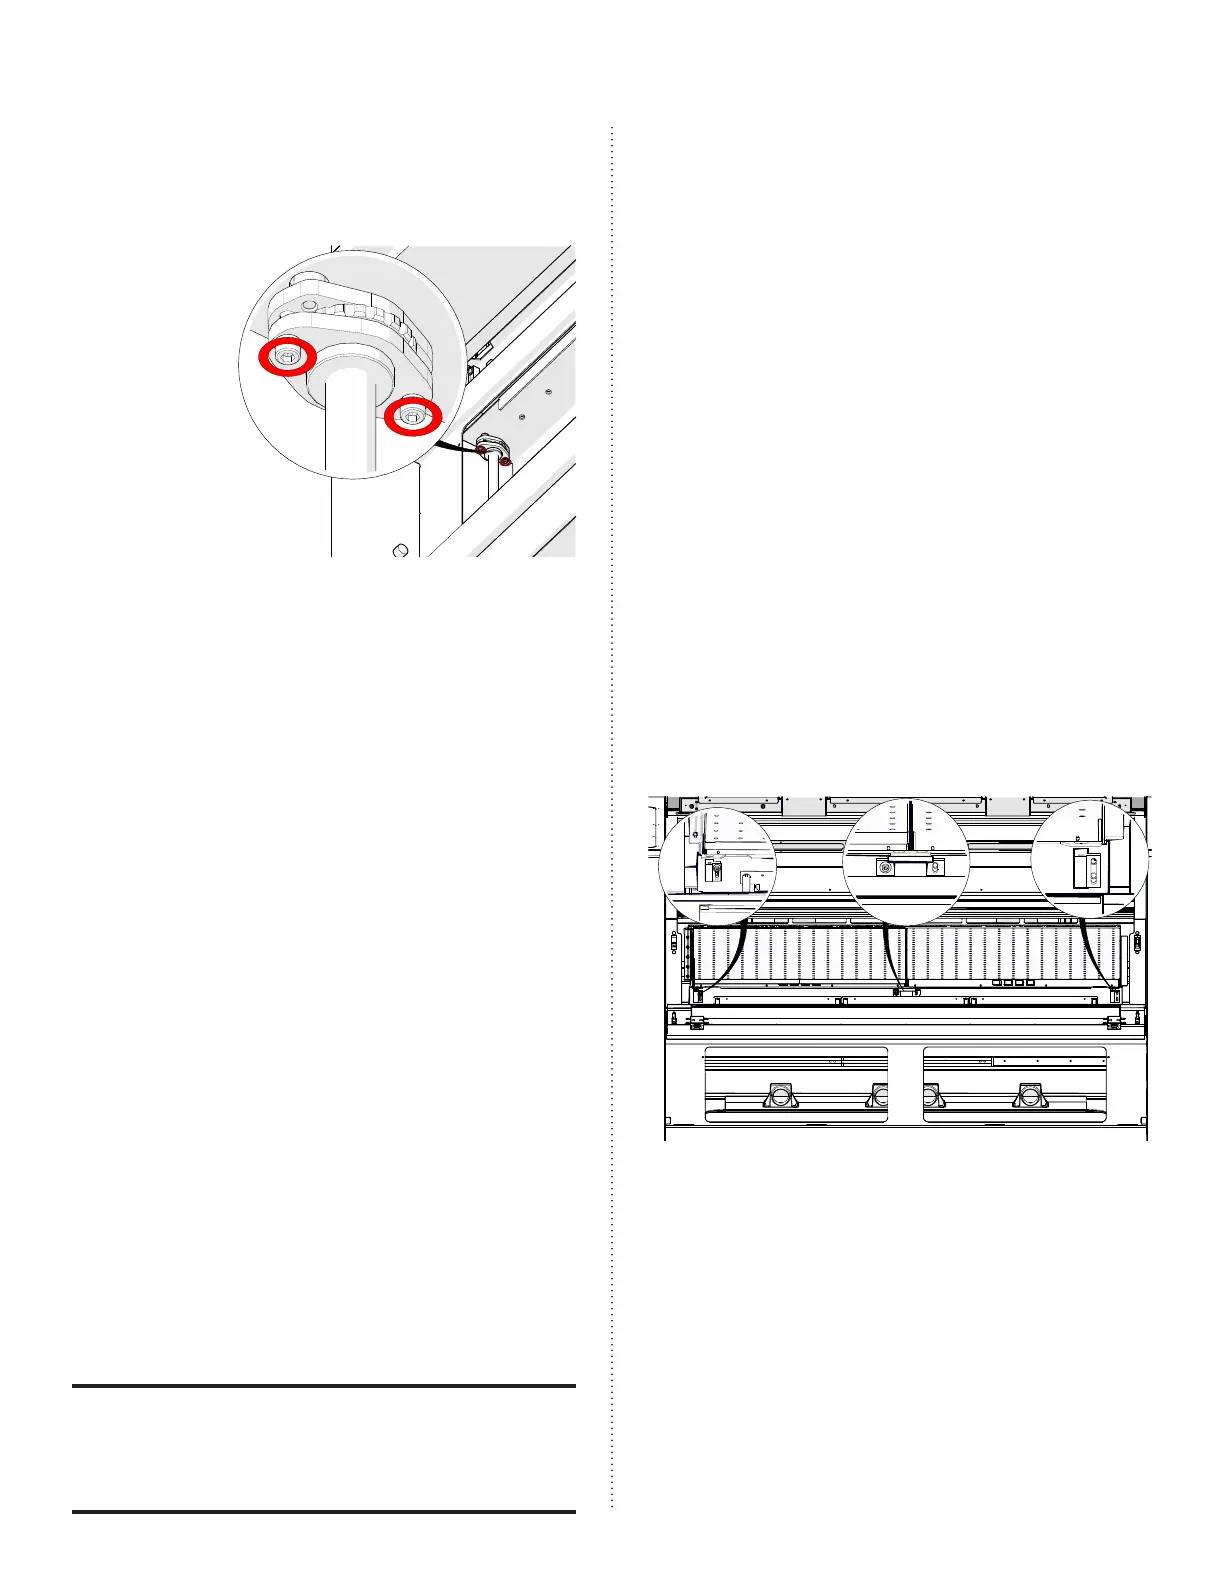
8. To adjust the table levelers, loosen
the two (2) Allen screws on either side
of the lead screw and twist the lead
screw nut:
9. Turn the lead screw nut until the table
corner is in contact with the manual
focus gauge.
10. Once the table has been adjusted the
appropriate amount, tighten the two
(2) Allen screws on either side of the
lead screw to lock in the table leveler.
11. Use the Jog menu to move the lens
carriage to each corner of the table
to ensure that each corner is level. The
manual focus gauge should touch the
table at each table corner.
Leveling the Engraving Table
Inserts - Overview
Before beginning this procedure,
remove the engraving table and ensure
that there is no damage to the table,
especially to the edges of the table. A
damaged or warped engraving table
can prevent you from completing this
procedure. Aer inspection, place the
engraving table back into the engraver.
While this procedure can be used to level
the engraving tables in both the Fusion
Pro 32 and Fusion Pro 48 engravers, there
are slight dierences.
The Fusion Pro 32 allows for adjustments
in four (4) locations.
The Fusion Pro 48 allows for adjustments
in eight (8) locations. This is due to the
modular table assembly design in the
Fusion Pro 48 engraver.
Adjustment screws are located under
the front access panel and the exhaust
plenum.
The procedure shown here contains
images and certain instructions specific
to the Fusion Pro 48; however, the
concepts are directly applicable to the
Fusion Pro 32 engraver.
There are eight (8) leveling points at both
the front and rear of the Fusion Pro 48
engraver.
Front Table Adjustment Screws
While facing the leveling adjustment
points at the front of the engraver:
• The le screws adjust the le side of
the le table.
• The center screws adjust the right side
of the le table and the le side of the
right table.
• The right screws adjust the right side
of the right table.
 Loading...