E
piphone Amplifiers are the result of years of extensive research and development by some
of the music industry’s finest musicians and engineers. For decades, Epiphone has provided world class
products to musicians everywhere. The Epiphone name stands for quality and this product has been
designed to provide years of lasting musical pleasure.
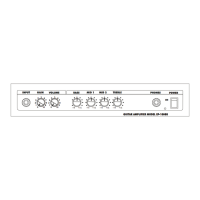
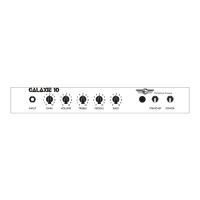
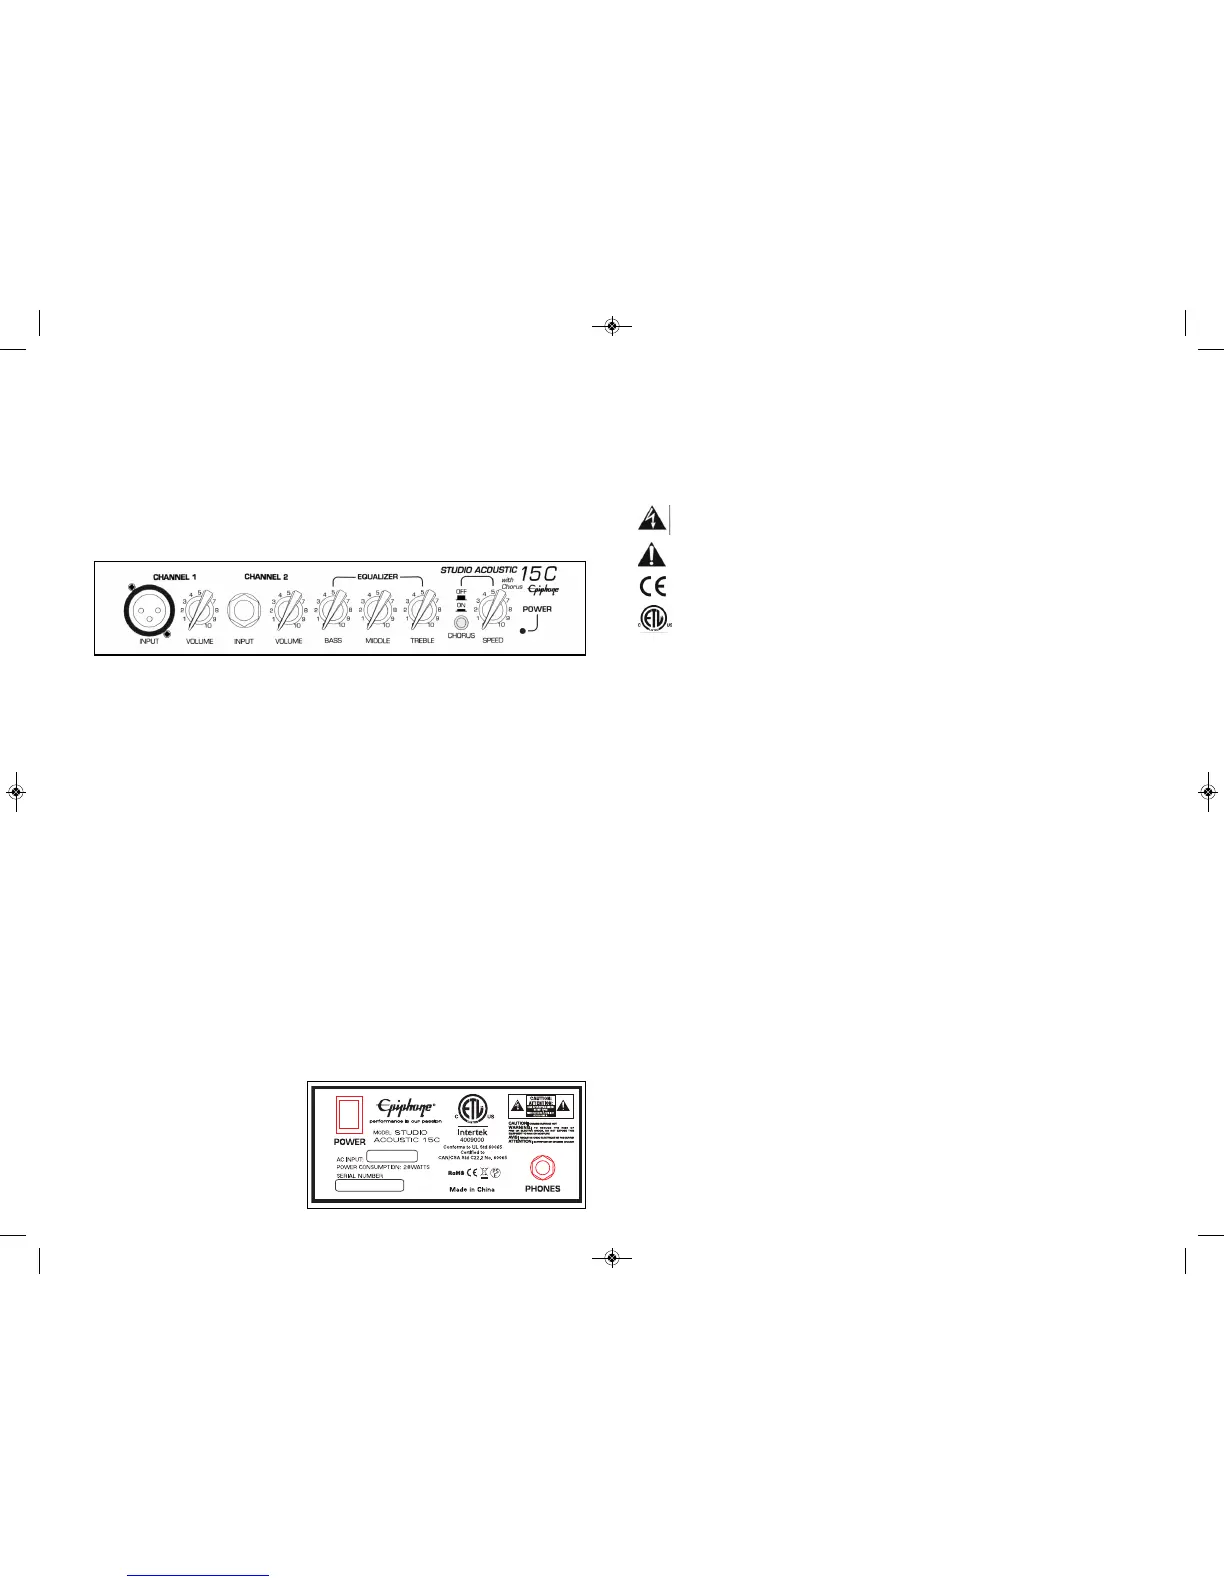
C O N T R O L P A N E L
CHANNEL 1
1. XLR Input Jack - Connect your microphone using a standard XLR cable to this input.
Connect the other end of the cable to your microphone.
2. Volume - Adjusts the overall level or volume of the microphone.
CHANNEL 2
3. Input Jack - Connect your guitar using a standard 1/4” instrument cable to this input.
Connect the other end of the cable to your guitar.
4. Volume - Adjusts the overall level or volume of the guitar.
EQUALIZER
5. Bass - Controls the boost and cut of the low frequencies. The bass control will
make the sound darker.
6. Middle - Controls the boost and cut of the mid-range frequencies.
7. Treble - Controls the boost and cut of the upper frequencies. The treble control will make the
sound brighter.
8. Chorus - Turns the chorus effect on or off.
9. Chorus Speed - This controls the ripple speed of the chorus effect.
BACK
10. Power Switch - Turns the AC Power on and off.
11. Headphone Jack - For connecting headphones with a mini 1/4” stereo plug. Always turn the
Volume control to 0 BEFORE engaging
headphones. When using the headphone
jack, the speaker is disconnected allowing
for private listening.
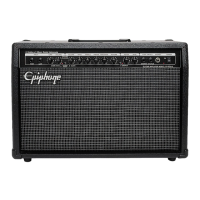
STUDIO ACOUSTIC 15C
AMPLIFIER OWNERS MANUAL
IMPORTANT SAFETY INSTRUCTIONS
WARNING: To reduce the risk of fire or electric shock, do not expose this apparatus to rain or moisture.
Objects filled with liquids, such as vases, should not be placed on this apparatus.
CAUTION: Your amplifier is not disconnected from the mains when the Power Switch is in the OFF posi-
tion. The power cord plug is the designated mains disconnect device. “Mains” is the official term for the
electrical power source. Visually inspect the power cord plug for damage before each use. Do not use it if it
appears damaged. Keep the power cord plug accessible at all times.
The lightning bolt warns of the risk of shock from high voltage.
Do not tamper with or attempt to open any areas where this warning is present.
The exclamation point alerts the user to an important operating or maintenance instruction.
Conforms to EU directives.
Conforms to North American standards.
1. Read these instructions.
2. Keep these instructions.
3. Heed all warnings.
4. Follow all instructions.
5. Do not use this apparatus near water.
6. Clean only with dry cloth.
7. Do not block any ventilation openings. Install in accordance with the manufacturer's instructions.
8. Do not install near any heat sources such as radiators, heat registers, stoves, or other apparatus
(including amplifiers) that produce heat.
9. Do not defeat the safety purpose of the polarized or grounding-type plug. A polarized plug has two
blades with one wider than the other. A grounding type plug has two blades and a third grounding
prong. The wide blade or the third prong are provided for your safety. If the provided plug does not fit
into your outlet, consult an electrician for replacement of the obsolete outlet.
10. Protect the power cord from being walked on or pinched particularly at plugs, convenience receptacles,
and the point where they exit from the apparatus.
11. Unplug this apparatus during lightning storms or when unused for long periods of time.
12. Refer all servicing to qualified service personnel. Servicing is required when the apparatus has been
damaged in any way, such as power-supply cord or plug is damaged, liquid has been spilled or objects
have fallen into the apparatus, the apparatus has been exposed to rain or moisture, does not operate
normally, or has been dropped.
13. No user serviceable parts. Refer all service to an authorized Epiphone Warranty Center.
TROUBLE SHOOTING
NO SOUND - Power Indicator light is OFF
• Check if the Power Switch is ON.
• Make sure AC outlet is active by plugging into another electrical outlet.
• Is the AC cord from the amplifier properly plugged in?
NO SOUND - Power Indicator light is ON
• Make sure the Volume control is set past 3.
• All controls should be set above 3.
• Try a different instrument cord.
WARNING: To prevent fire or electric shock, DO NOT expose this equipment to rain or moisture.
No user serviceable parts. Refer all repairs to an Authorized Epiphone Warranty Center.
Your Epiphone Amplifier comes with a Limited 5-Year Warranty. Visit www.epiphone.com for details.
Void where prohibited.
 Loading...