Restoring, Cropping, or Copying Photos 13
■ To cha ng e th e c o py quality, select Quality, press OK, then press u or d to
choose
Draft, Standard Quality, or Best. Then press OK.
For more information about copy settings, see your online User’s Guide.
8. After you finish selecting your settings, press x
Menu.
9. Press x
Start to begin copying. To cancel copying, press y Stop/Clear
Settings
.
Restoring, Cropping, or Copying Photos
You can copy one or two photos onto 4×6-inch, 5×7-inch, 8×10-inch, or
letter-size photo paper for instant photo reprints. You can also restore colors in
faded photos, print with or without borders, convert photos to black and white,
and crop your photos.
1. Place one or two photos on the scanner glass. Place them at least 1/4 inch
(5 mm) apart.
2. Load 4 × 6-inch or 5 × 7-inch paper in the photo tray or 8 × 10-inch or letter-
size Epson photo paper in the main tray. Load it printable side down.
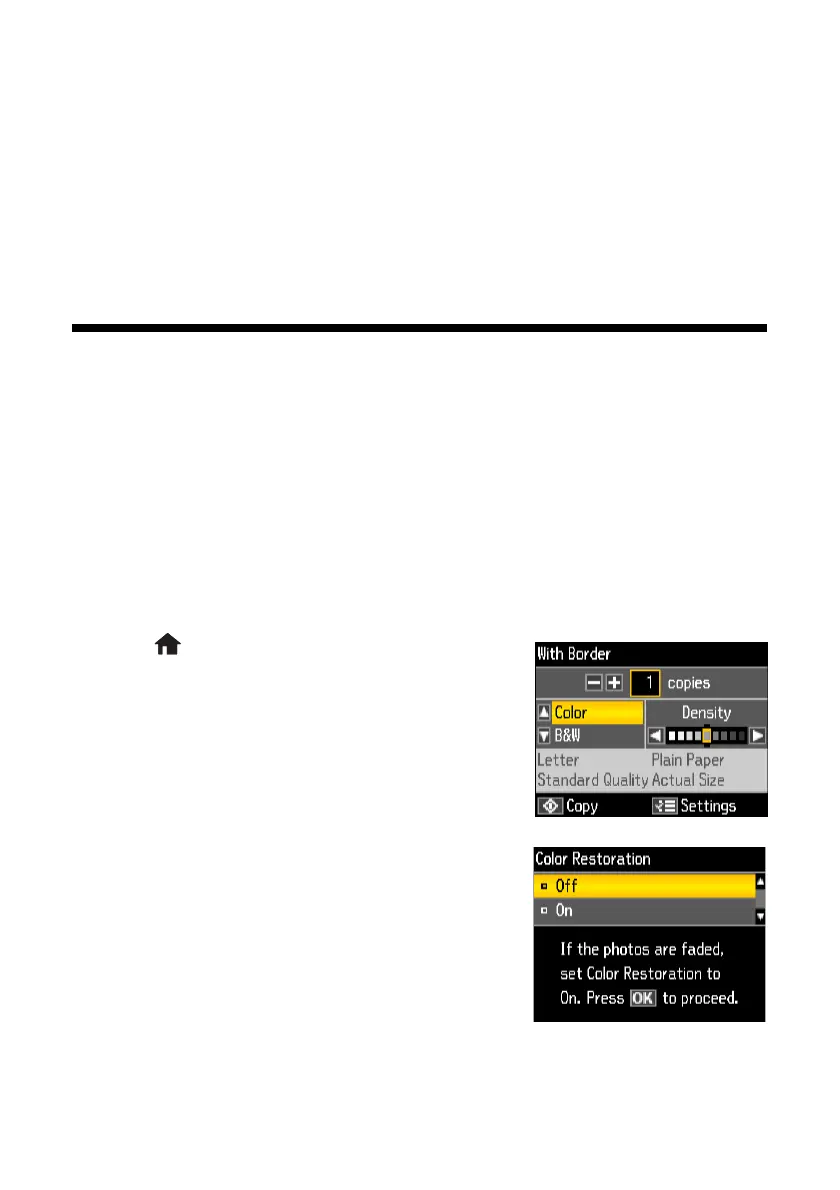
3. Press
Home until Copy is selected, then
press
OK. You see this screen.
4. Press x Menu, press u or d to select Copy/
Restore Photos
, then press OK.
5. To turn on Color Restoration to restore colors in
faded photos as you copy, press
u or d to select
On. (If your photos are not faded, select Off.)
Then press
OK.

 Loading...