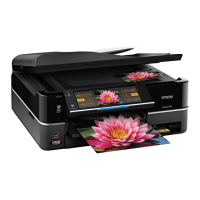
Do you have a question about the Epson Artison 800 and is the answer not in the manual?
Signals a precaution which, if ignored, could result in serious or fatal personal injury. Great caution should be exercised.
Signals a precaution which, if ignored, could result in damage to equipment. Measures should always be observed.
Provides an overview of the manual's structure, consisting of six chapters and an appendix.
Explains various symbols used to provide additional information or warn of possible dangers during procedures.
Overview of printer capabilities and functions, including printer, scanner, copy, USB, and network features.
Core technical details of printing, including basic specifications and ink cartridge information.
Details on various color print modes, resolution, dot size, and paper compatibility.
Lists paper types, sizes, thickness, weight, and regional support for printing.
Defines the printable area, margins, and printing area diagrams for different paper sizes.
Details scanner type, scanning method, document sizes, and scanning range.
Covers electrical specifications, safety approvals, acoustic noise, durability, and environmental conditions.
Specifies details for USB, FAX, Network, and Memory Card Slot interfaces.
Identifies and describes the operation buttons, LEDs, and functions of the printer's control panel.
Details specifications for various printer functions like copy, memory card print, and PictBridge.
Describes the operating principles of the printer mechanism, including motors and sensors.
Explains the construction of the printer mechanism, detailing motors and sensors.
Details printhead specifications, colors, nozzle configuration, and nozzle layout.
Identifies and describes the motors and sensors used in the printer.
Explains PG (Platen Gap) settings for different positions and their applications.
Details the four different methods for initializing the printer.
Provides an introduction to solving printer problems.
Lists essential conditions and checks to be verified before starting troubleshooting.
Covers troubleshooting procedures for various printer issues.
Explains how to troubleshoot errors based on messages displayed on the LCD.
Provides troubleshooting steps for issues not accompanied by specific error messages.
Offers solutions for issues related to the duplex unit, including open errors and paper jams.
Addresses troubleshooting steps for network-related functions and connectivity issues.
Provides guidance for troubleshooting FAX functions and errors.
Details procedures for checking fax and external connection functions after repairs.
Introduces the procedures for disassembling main printer components.
Lists essential safety precautions to be observed during disassembly and assembly.
Lists specified tools required for printer disassembly to avoid damage.
Provides a checklist to verify all works are completed properly after service.
Highlights differences in disassembly/reassembly procedures between printer models.
Provides a flowchart guiding the disassembly of various printer units.
Lists parts that need to be transferred from the old printer mechanism to the new one.
Details the process of removing various housing components of the printer.
Outlines the procedures for removing circuit boards, starting with the panel unit.
Provides detailed steps for disassembling the printer mechanism components.
Details the procedures for disassembling the scanner unit.
Provides disassembly steps for the ADF unit components.
Highlights disassembly procedures specific to the Artisan 700/PX700W/TX700W models.
Provides an overview of adjustments required after disassembly/reassembly.
Lists all servicing adjustment items, their purpose, method outline, and required tools.
Table listing required adjustments based on parts repaired or replaced.
Explains how to perform adjustments using the adjustment program.
Details adjustment procedures that do not require the adjustment program.
Describes the manual platen gap (PG) adjustment procedure.
Details the procedure for adjusting CR Timing Belt tension.
Explains how to adjust PF Timing Belt tension.
Details touch panel calibration for specific models.
Describes additional functions available in the adjustment program.
Explains the I/S Decompress function to discharge ink, minimizing risks during servicing.
Details how to reset the AID SHK error counter to locate and cancel fatal errors.
Provides information to maintain the printer in its optimum condition.
Provides cleaning instructions for printer parts like exterior, interior, rollers, and touch panel.
Actions to clear printer errors and handle maintenance requests.
Details the types and amounts of grease for lubricating printer parts.
Shows the connections between the main components of the printer.
States that exploded diagrams or parts lists are not provided in this manual.


