Epson Artisan 800/Epson Stylus Photo PX800FW/TX800FW/Epson Artisan 700/Epson Stylus Photo PX700W/TX700W Revision C
ADJUSTMENT Adjustment Using Adjustment Program 226
Confidential
5.2.8 Case Open Sensor Check
Overview
This printer is equipped with a cover open sensor, and a scanner open error occurs
when the printer detects the scanner is opened during operation such as printing. This
check is to inspect the cover open sensor; which detects open/closed status of the
scanner, operates normally.
Required tools
Thickness gauge: 0.9 mm
3.0 mm
Checking procedure
Make sure to perform the operation check of the cover open sensor as follows:
CHECK 1
1. Start the printer in the special inspection mode.
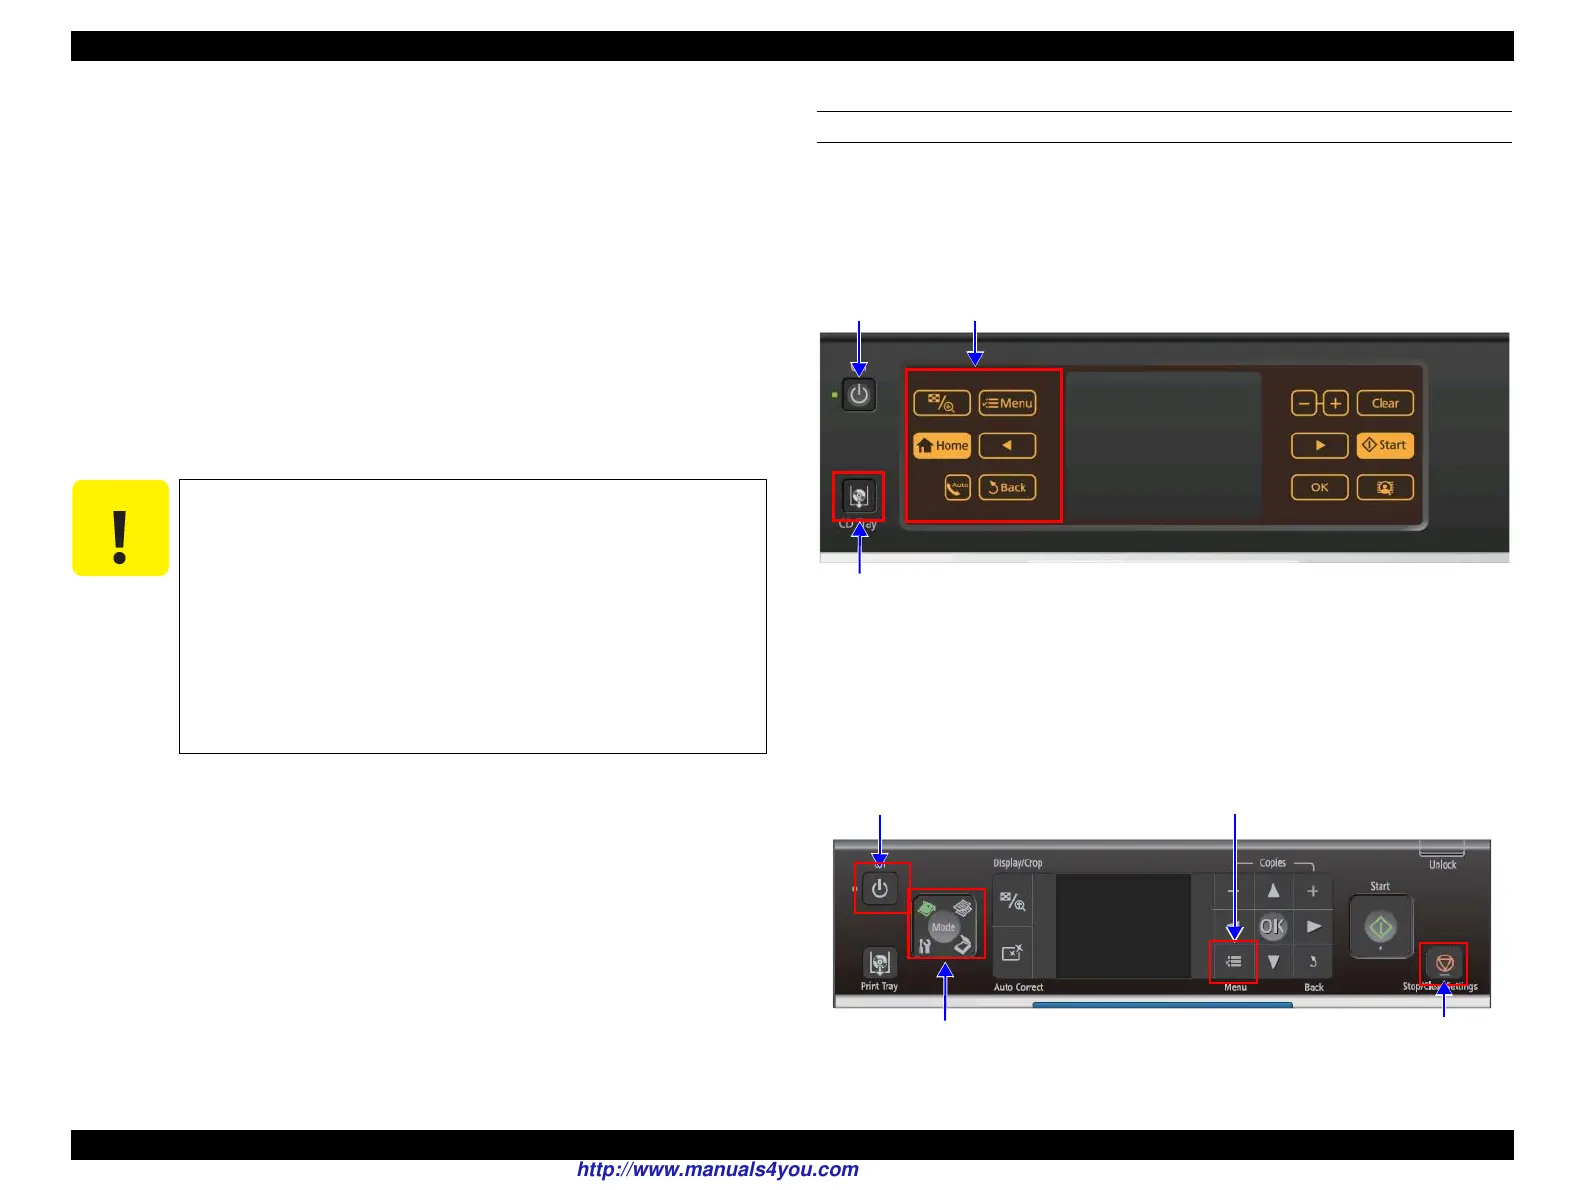
In the case of Epson Artisan 800/Epson Stylus Photo PX800FW/TX800FW
Turn the power on while pressing the panel within the frame on the left side and
“CD/DVD Tray” button at the same time for more than three seconds.
Figure 5-14. Starting the Special Inspection Mode
(Epson Artisan 800/Epson Stylus Photo PX800FW/TX800FW)
In the case of Epson Artisan 700/Epson Stylus Photo PX700W/TX700W
Turn the power on while pressing the “Stop/Clear Settings” button, “Menu”
button, and “Top Menu” button at the same time for more than three seconds.
Figure 5-15. Starting the Special Inspection Mode
(Epson Artisan 700/Epson Stylus Photo PX700W/TX700W)
Make sure to perform the Case open sensor check as described
below. Otherwise, it cannot be judged correctly for the sensor to
operate normally.
Do not perform any operation except those described below
when checking the cover open sensor.
Otherwise, return to Check 1 and perform this check all over
again from the start.
Make sure to perform Check 1 and Check 2 consecutively.
Never perform any other operation in between.
This check must be performed after the printer is completely
assembled.
Power
“CD/DVD tray” button
Left side of the touch panel
Power
“Menu” button
“Top Menu” button
“Stop/Clear Settings” button
http://www.manuals4you.com

 Loading...


