Epson Artisan 800/Epson Stylus Photo PX800FW/TX800FW/Epson Artisan 700/Epson Stylus Photo PX700W/TX700W Revision C
DISASSEMBLY/ASSEMBLY Disassembly Procedures 167
Confidential
4.2.5 Disassembling Scanner Unit
4.2.5.1 Scanner Upper Housing (Artisan 800/PX800FW/TX800FW)
Parts/Components need to be removed in advance:
Scanner Unit/ADF Unit
Removal procedure
1. Release the screws (x10) that secure the Scanner Upper Housing, and remove
the Scanner Upper Housing.
Figure 4-162. Removing the Scanner Upper Housing
The disassembly/reassembly procedures of Artisan 800/PX800FW/
TX800FW differ from those of Artisan 700/PX700W/TX700W.
(See 4.1.4 "Additional Procedure/Procedural Differences" (p97).)
Unless otherwise specified, this chapter describes Artisan 800/
PX800FW/TX800FW. Refer to procedures on the flowchart
(
Flowchart 4-2 Disassembling Flowchart (2) (p100)) for Artisan 700/
PX700W/TX700W.
It is recommended to remove the Scanner Upper Housing in a
clean room or on a clean bench to keep away from dust and dirt.
Be careful not to damage the document glass on the Scanner
Upper Housing.
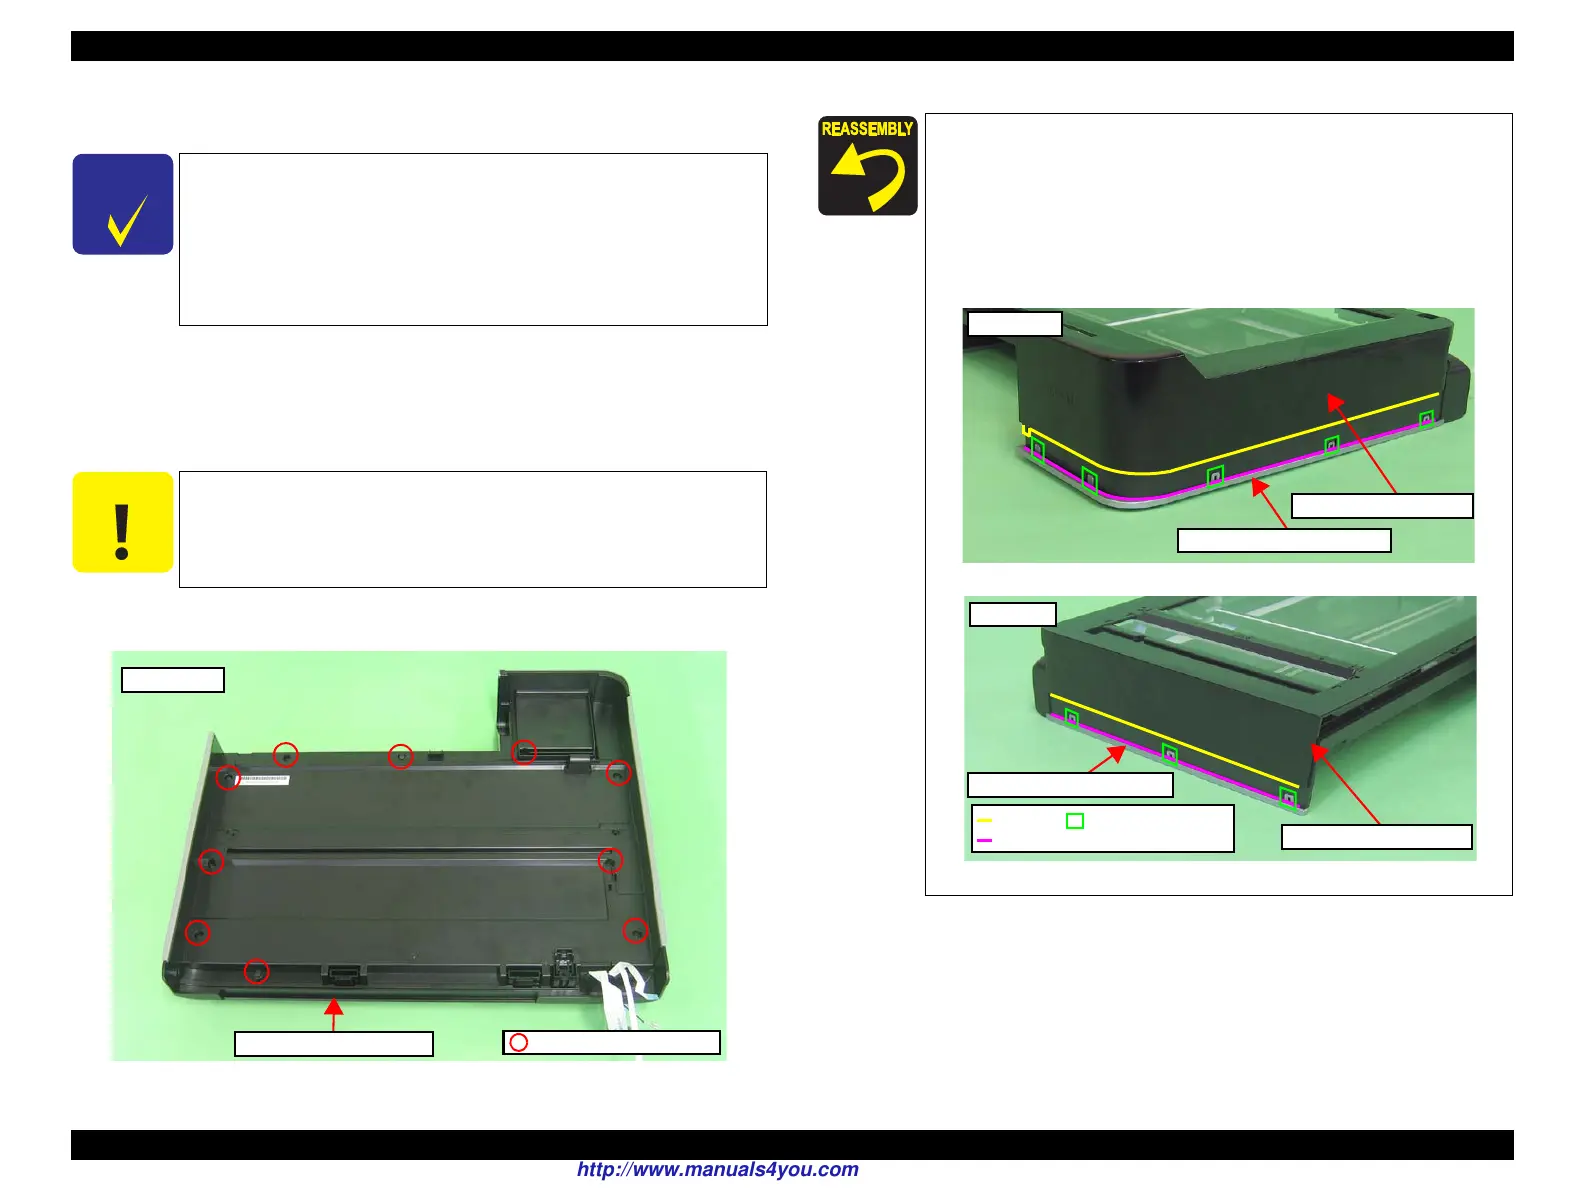
Bottom side
C.B.P. 3x10 (5±1kgfcm)
Scanner Upper Housing
When installing the Upper Scanner Housing, align the rib of the
Scanner Upper Housing and the groove of the Scanner
Decoration Belt L/R as shown in
Fig. 4-163.
When installing the Scanner Decollation Belt L/R, align the
Scanner Lower Housing with the positioning holes and dowels
(Left: x3, Right: x5) of the Scanner Decollation Belt as shown
below.
Figure 4-163. Installing the Scanner Upper Housing
Left side
Scanner Decoration Belt L
Scanner Upper Housing
Rib
Groove
Positioning hole and
dowel
Right side
Scanner Upper Housing
Scanner Decoration Belt R
http://www.manuals4you.com