EasyManua.ls Logo

Epson EASY FLOW IV R1900 - User Manual

Epson EASY FLOW IV R1900
8 pages
Print Icon
To Next Page IconTo Next Page
Loading...
Page | 1
Installation Instructions for
Epson R1900 Easy Flow IV
CONTENTS
1. Easy Flow IV Ink Reservoirs & Cartridges
2. Installation Manual and Instruction CD
3. Tube Support Bracket
4. Lid Support Bracket
5. Screwdriver
6. 10ml Syringe
7. Long Needle
8. Sharp Needle
9. Spare elbows and bungs
10. Air Filters
11. Spare Sticky Pads
Question and Answer IconNeed help?

Do you have a question about the Epson EASY FLOW IV R1900 and is the answer not in the manual?

Summary

Refilling the Bottles

Summary

Refilling the Bottles

Overview

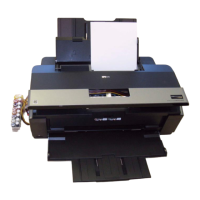
This document provides installation instructions for the Epson R1900 Easy Flow IV Continuous Ink Supply System (CISS) by Dye Sublimation. The system is designed to provide a continuous supply of ink to the Epson R1900 printer, which is particularly useful for applications like dye sublimation printing that consume significant amounts of ink.

Function Description:

The Easy Flow IV CISS replaces the standard individual ink cartridges with a system of external ink reservoirs connected to the printhead via tubes. This setup allows for a much larger ink capacity compared to traditional cartridges, reducing the frequency of ink replacement and potentially lowering printing costs. The system is specifically tailored for dye sublimation, suggesting it uses specialized inks designed for transferring images onto various substrates.

Important Technical Specifications (Inferred from the manual):

  • Compatibility: Epson R1900 printer.
  • Ink Type: Dye Sublimation ink (implied by "Dye Sublimation" in the title and the nature of the system).
  • Components:
    • Easy Flow IV Ink Reservoirs & Cartridges: These are the core components, with external bottles holding the bulk ink and cartridges that interface with the printer's printhead.
    • Installation Manual and Instruction CD: Provides guidance for setup and configuration.
    • Tube Support Bracket: Used to secure the ink tubes within the printer.
    • Lid Support Bracket: Allows the printer lid to be closed while the CISS is installed.
    • Screwdriver: A small tool provided for prying open printhead hinges.
    • 10ml Syringe: Used for ink management, specifically for drawing ink from chambers.
    • Long Needle: An attachment for the syringe, likely for accessing ink in the reservoirs.
    • Sharp Needle: Another needle, possibly for piercing or specific ink handling tasks.
    • Spare Elbows and Bungs: Replacement parts for the tubing and reservoir seals.
    • Air Filters: Essential for allowing air into the reservoirs as ink is consumed, preventing a vacuum, and filtering out dust.
    • Spare Sticky Pads: For securing brackets or other components.
  • Ink Capacity: Not explicitly stated, but the external reservoirs indicate a significantly higher capacity than standard cartridges.
  • Ink Management: The system relies on gravity or siphoning to feed ink from the external reservoirs to the cartridges. Air filters are crucial for proper ink flow.

Usage Features:

  • Initial Setup:
    • Turning on the printer and moving the printhead to the cartridge removal position.
    • Unplugging the mains cable to allow manual printhead movement.
    • Removing the printhead lid using the provided screwdriver.
    • Removing any existing cartridges.
    • Removing small rubber bungs from the ink bottles (these are crucial for refilling).
    • Using the syringe and long needle to draw ink from the center chamber of the cartridges (if present) and returning it to the reservoir. This step is repeated for all chambers.
    • Fitting air filters to the ink bottles after initial ink management.
    • Positioning the ink bottles to the left of the printer, ensuring they are not placed higher than the printer itself to prevent siphoning issues.
    • Moving the printhead to the far left.
    • Feeding the CISS cartridges under the printer housing and placing them on the housing while moving the printhead back to the cartridge removal position.
    • Firmly pressing the CISS cartridges into the cartridge housing, ensuring each clicks into place.
    • Attaching the tube support bracket around the printer button housing, ensuring the plastic tab fits into the slot.
    • Placing the ink tubes into the support, ensuring they are taut and without slack.
    • Attaching the small support bracket.
    • Attaching lid support brackets if the printer lid is to be closed.
    • Plugging in the mains power cable and turning on the printer.
    • The printer will undergo an initial head charge.
    • If an orange ink light appears, press the ink button to move cartridges, ensure they are firmly in place, and hold one of the chip reset buttons for 5 seconds.
    • Pressing the ink button again will initiate chip reading and the final head charge.
    • The system is then ready for use.
  • Nozzle Check and Head Cleaning:
    • After installation, a nozzle check should be performed to verify all colors are printing correctly.
    • If the nozzle check is imperfect, head cleans can be performed (one or two initially).
    • Caution is advised against overusing head cleans; up to 5 can be performed, with checks after each.
    • If the pattern improves but isn't perfect, leaving the printer to sit for at least an hour can sometimes resolve remaining issues.
    • If only a few nozzles are missing, a test print might "kick in" the remaining nozzles.
    • Excessive head cleans on an almost perfect nozzle check can be counterproductive.
  • Installation CD Contents:
    • Profile Installation: Likely color profiles for accurate dye sublimation printing.
    • Epson Driver Configuration: Instructions for setting up printer drivers.
    • Graphic Software Configuration: Guidance for using the system with graphic design software.

Maintenance Features:

  • Refilling Ink:
    • Remove air filters and replace them with the small rubber bungs (which were saved during initial setup).
    • Remove the large rubber bungs from the reservoirs. This sequence is critical to prevent the internal chambers from filling with ink prematurely.
    • Refill the bottle through the large opening.
    • Crucially, replace the large rubber bung FIRST.
    • Then, remove the small bung and replace the air filter.
    • If the center chamber accidentally fills with ink due to incorrect refilling sequence, the procedure on page 3 (drawing ink out with the syringe) should be used to correct it.
  • Troubleshooting Nozzle Checks: The manual provides guidance on how to address imperfect nozzle checks, including performing head cleans and allowing the printer to rest. This is a key maintenance aspect for ensuring print quality.
  • Component Replacement: The inclusion of "Spare elbows and bungs" and "Spare Sticky Pads" suggests that these components may need occasional replacement due to wear or damage.

Epson EASY FLOW IV R1900 Specifications

General IconGeneral
BrandEpson
ModelEASY FLOW IV R1900
CategoryPrinter Accessories
LanguageEnglish

Related product manuals