10 Getting Started
4. Adjust the neck strap so that the top of the
microphone is just below your collarbone.
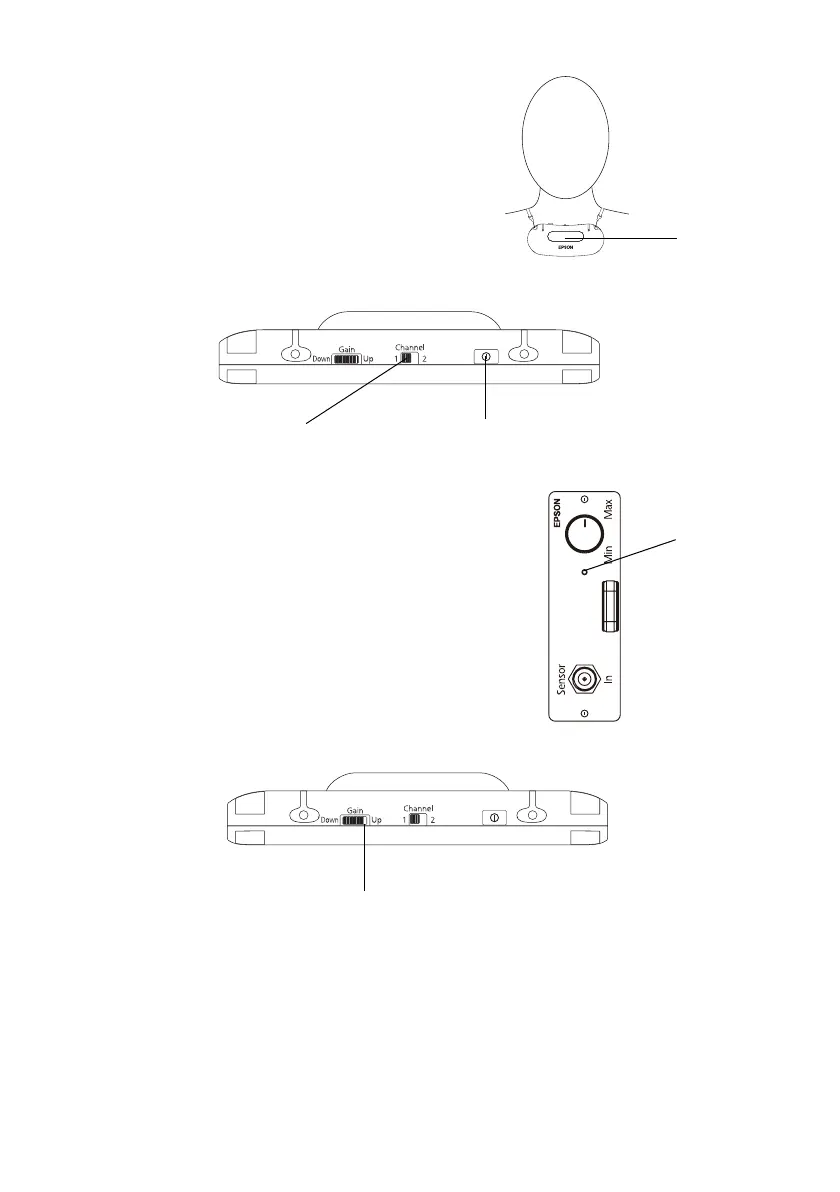
5. Set the
Channel switch to 1.
Note: The channel must be set to 1 when the
microphone is used with the Connection &
Control Box. Channel 2 is not available.
6. Press the power button until it clicks into place.
The power button turns green.
Note: If the power button turns red or doesn’t
illuminate, replace the batteries in the pendant
microphone.
7. Verify that the light on the IR receiver module is lit
(green).
Note: If the light on the IR receiver module is red,
the microphone is not recognized.
8. Adjust the microphone sensitivity by rotating the Gain
control wheel until the white line is next to
Up, but
still visible.
Note: The sound from the microphone is transmitted from the black dome on the
front of the microphone. Be sure to keep this part of the microphone free of
obstructions when in use.
Audio from the microphone may not be transmitted reliably when the microphone
is used up against a wall or in a corner.
Emitter
Power buttonSet to Channel 1
IR receiver
light
White line