Do you have a question about the Epson GO ET-15000 SP and is the answer not in the manual?
Unpack and prepare the ink bottle by removing the cap and protective foil.
Insert the prepared ink bottle into the corresponding filling port.
Wait for ink to fill the tank automatically; do not squeeze the bottle.
Connect the power cord and turn on the product.
Set language, country, date, and time, and initiate ink charging.
Start ink charging via the LCD screen and allow approximately 10 minutes.
Insert the product CD or download and run the software package from the website.
This document provides comprehensive instructions for setting up, using, and maintaining the GO ET-15000 SP printer, an imaging partner product from Graphics One. It covers everything from initial unpacking and ink filling to software installation, troubleshooting, and paper loading.
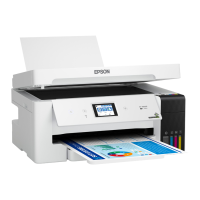
The GO ET-15000 SP is designed for high-quality printing, offering features that cater to both standard document printing and specialized tasks. Its core function is to produce prints from digital sources, connecting to computers via various methods and supporting different paper sizes and types.
The first step in setting up the GO ET-15000 SP involves carefully unpacking the device. Users are instructed to remove all protective materials from both the exterior and interior of the product. This includes lifting the scanner unit until it locks into place to access and remove internal packing materials. A crucial caution is provided regarding sensitive internal components: users should avoid touching the flat white cable or the ink tubes and their translucent cover to prevent damage.
The printer utilizes an ink tank system, which requires manual filling with ink bottles. Before starting, users are warned to keep ink bottles out of reach of children and to avoid drinking the ink. The process begins by ensuring the transportation lock is in the down position. The ink tank cover is then opened, followed by the cap for the black ink tank. A specific note highlights that black ink is to be filled into both the BK (Black) and CMY (Cyan, Magenta, Yellow) tanks.
To fill the ink, users must unpack the black ink bottle, hold it upright, and slowly turn the bottle cap to remove it. After removing the filling cap and protective foil, the filling cap is reattached by slowly turning it until it is tightly secured. A stern caution advises against shaking or squeezing the ink bottles and against touching the top of the ink bottle once its cap is removed. The ink bottle is then inserted into the filling port. Users are reminded not to force the bottles into position and to use black ink for both BK and CMY tanks.
The ink filling process is automatic; ink flows into the tank and stops when it reaches the upper line. Users are instructed not to squeeze the bottle. If ink does not flow, lifting and reinserting the bottle is recommended. After setup, periodic inspection of ink levels is crucial to ensure they do not fall below the lowest line, as prolonged use with low ink can damage the product. Once the tank is full, the ink bottle should be removed and securely capped, with any remaining ink set aside for later use. It is important not to leave the ink bottle inserted, as this could damage the bottle or cause ink leakage. The ink tank cap is then closed. These steps are repeated for the other colors. Finally, the ink tank cover is closed.
After ink filling, the scanner unit is lifted slightly and lowered. If it catches, it should be lifted again and then lowered completely. The power cord is then connected to the back of the product and to an electrical outlet, with a caution not to connect to a computer yet.
To power on the device, the control panel is raised, and the power button is pressed. If an error message appears, users are advised to turn off the product and check for any remaining protective materials. The next step involves selecting the language, country, date, and time. These settings can be changed later via the product's control panel.
The setup continues with ink charging. When the "Start Here" message appears on the LCD screen, the help button must be pressed and held for 5 seconds. Upon seeing the ink confirmation message, "Done" is selected to initiate ink charging, which takes approximately 10 minutes. During this process, it is critical not to unplug or turn off the product, raise the scanner unit, or load paper, as doing so will waste ink. The included ink bottles are specifically designed for reliable printer setup and are not for resale; any remaining ink after setup is available for printing. To complete the ink tank filling, steps 1 through 7 of the ink filling process are repeated using the remaining ink. Bottle caps should be replaced before disposing of the bottles. The ink tank cover and scanner unit are then closed. Users are guided to select "Next" and follow on-screen instructions to reset ink levels and adjust print quality. Paper loading is required before adjusting print quality, and these settings can also be changed later via the control panel.
The GO ET-15000 SP supports various paper sizes, including Letter, Legal, and 13"x19". For Letter and Legal sizes, users must ensure the product is not charging ink. The front of the paper cassette is opened, and the cassette is pulled out. The side edge guides are slid all the way out. Paper is then inserted with the printable side down, ensuring it is loaded against the front edge guide and not sticking out from the end of the cassette. The side edge guides are slid against the paper (not too tightly), and the front of the cassette is closed. The cassette is inserted all the way, keeping it flat. The output tray is pulled out, and paper settings are selected on the product's driver.
For 13"x19" paper, the Rear Tray is pulled out, and the edge guides are slid. Paper is inserted with the printable side up. The output tray is pulled out, and paper settings are selected on the product's driver.
Installing the software is crucial for the printer's functionality. Users are advised that if they are using a Mac or a computer without a CD/DVD drive, an Internet connection is required to obtain the software. Before installation, it is essential to ensure the product is NOT CONNECTED to the computer. For Windows users, if a "Found New Hardware" screen appears, "Cancel" should be clicked, and the USB cable disconnected.
The software can be installed by inserting the product CD (Windows only) or by downloading and running the software package from the Epson support website (www.epson.com/support/et15000 for U.S. or www.epson.ca/support/et15000 for Canada). Users then follow the on-screen instructions to run the setup program.
During the "Select Your Connection" screen, users can choose from three options:
The GO ET-15000 SP is capable of mobile and voice-activated printing. Interested users can contact Graphics One for more information via phone or email.
The manual includes a troubleshooting section for common issues:
For further assistance and detailed information, users can access the online User's Guide:
For film and ink needs, users are directed to the Graphics One website (www.graphicsone.com) or can contact them via phone or email.
The manual emphasizes several safety precautions, particularly when using telephone equipment integrated with the printer:
These instructions ensure safe operation and proper maintenance of the GO ET-15000 SP printer, guiding users through every step from initial setup to advanced troubleshooting and resource access.
| Functions | Print, Scan, Copy, Fax |
|---|---|
| Scan Resolution | 1200 x 2400 dpi |
| Duplex Printing | Yes |
| Input Capacity | 250 sheets |
| Scanner Type | Flatbed |
| Connectivity | USB, Ethernet, Wi-Fi |
| Mobile Printing | Yes |
| Ink Type | EcoTank |
| Borderless Printing | Yes |
| Paper Sizes | A4, A5, A6, B5, Legal, Letter, Envelopes |