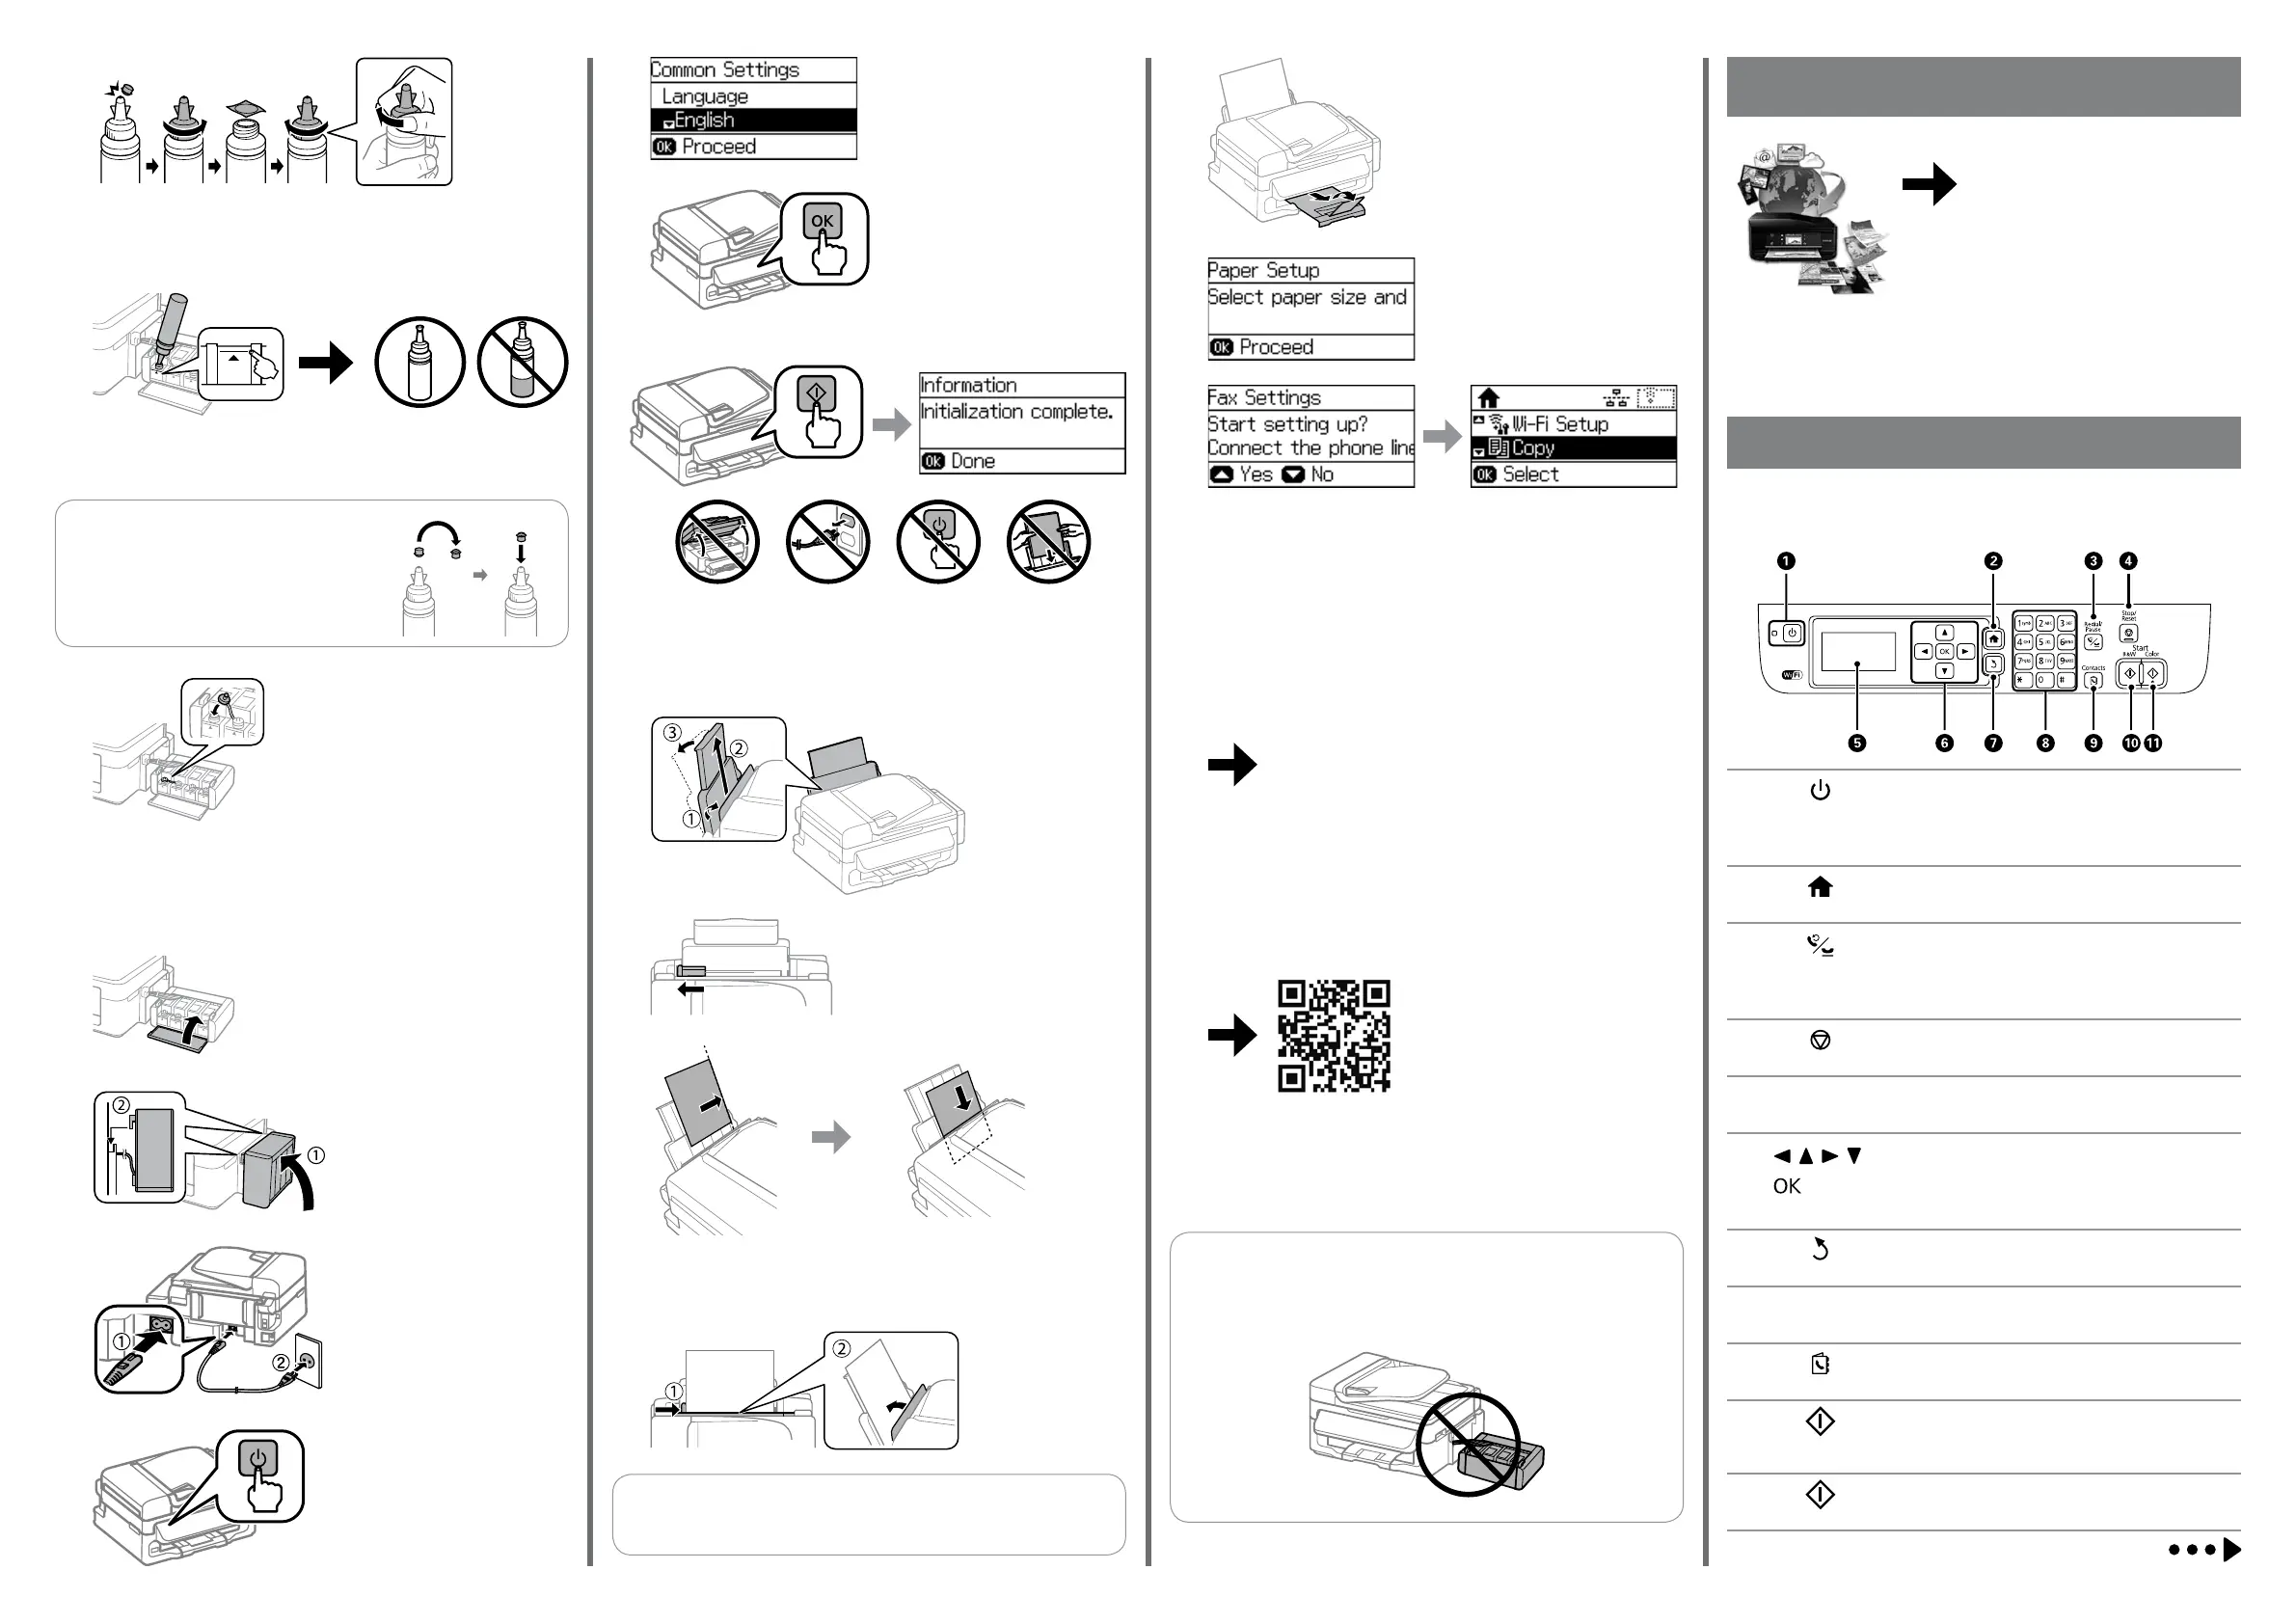
Basic Operations /
Guide to Control Panel
A
Turns the printer on or o.
Unplug the power cord when the power light is o.
B
Displays the home screen.
C
Enter the last dialed number or enter a pause when
entering a fax number.
D
Stops the current operation.
E
-
Displays menus and messages.
F
, , , ,
Press l, u, r and d to select menus. Press OK to
conrm your selection or run the selected feature.
l, u, rdOK
G
Returns to the previous screen.
H
0-9
*, #
Enters numbers, characters, and symbols.
I
Opens the contacts list.
J
Starts printing, copying, scanning, and faxing in black
and white.
K
Starts printing, copying, scanning, and faxing in color.
http://epson.sn
Windows (No CD/DVD drive)
Mac OS X
Visit the website to start the setup process, install software, and congure
network settings.
c
Make sure to hook the tank unit before printing. Do not lay the unit
down, or position it higher or lower than the printer.
R�
Connect and plug in.
Turn on.
Close.
Hook onto the printer.
K�
L�
Conrm that the tanks are lled with ink, and then press x to start charging ink.
Charging ink takes about 20 minutes.
x
O�
Select a language, country and time.
M�
N�
When the message of seeing the
setup manual is displayed, press OK
for 3 seconds.
OK
P�
Q�
Repeat steps E to H for each ink bottle.
EH
J�
S�
T�
U�
Pull out.
Load paper with the printable side face-up.
Slide the edge guide
then close the feeder
guard.
Pull out.
V�
Set the paper size and paper type.
W�
Make the fax settings. You can change these settings later. If you do not want to
make settings now, close the fax settings screen.
X�
http://ipr.to/c
iOS / Android
Visit the website to install Epson iPrint application, start the setup process, and
congure network settings.
Epson Connect
Using your mobile device, you can print from any location worldwide to your
Epson Connect compatible printer. Visit the website for more information.
https://www.epsonconnect.com/
Q
Do not load paper above the arrow mark inside the edge guide.
Slide the edge guide to the left.
Y�
Match the ink color with the tank, and then ll with all of the ink.
Q
Install.
H�
Close securely.
I�
Snap o, remove, and then close tightly.
G�
 Loading...