Do you have a question about the Epson L355 and is the answer not in the manual?
Configure the printer's control panel, including button functions and position adjustments.
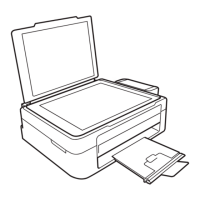
Identify the location of key external and internal parts of the EPSON L355 printer.
Adjust the default paper size used for copying operations via the control panel.
Set the automatic power-off delay to manage energy consumption and extend product life.
Explore options for printing and scanning using mobile devices and cloud services.
Load plain paper for standard document printing tasks.
Load photo paper for high-quality image printing.
Properly load envelopes for printing addresses and other mail-related content.
Information on the maximum number of sheets the printer can hold for different paper types.
Guidance on sourcing genuine EPSON ink and paper from authorized resellers.
Configure the printer's software settings to match the loaded paper type for optimal results.
Detailed steps for positioning originals on the scanner glass for accurate scanning.
Step-by-step process for performing copy operations for various types of originals.
Specific procedures for printing from a Windows-based computer system.
Specific procedures for printing from a Mac OS X-based computer system.
How to cancel an active print job using the physical buttons on the printer.
Initiate the scanning process using different methods available with the product.
Scan documents directly using the printer's control panel buttons.
Launch the EPSON Scan application from the computer desktop icon to start scanning.
Begin the scanning process from a third-party application integrated with the printer.
Select from Full Auto, Home, Office, and Professional modes for varying scanning needs.
Choose the desired operating mode within the EPSON Scan application.
Scan documents and photos automatically with pre-configured settings.
Scan documents and photos with user-selectable settings suitable for home use.
Define the specific region of the original to be captured during the scan.
Adjust the dimensions of the scanned image or select a predefined target size.
Perform quick scans of text documents with adjustable settings and preview capabilities.
Specify the area of the previewed image to be scanned in Office Mode.
Access advanced manual controls for all scan settings in Professional Mode.
Select image types such as 24-bit Color, Grayscale, or Black & White for scanning.
Define the scan area for originals in Professional Mode for precise image capture.
Scan multiple pages into a single, universally compatible PDF document.
Enhance faded colors in photographs during the scanning process.
Transform scanned documents into editable text using Optical Character Recognition software.
Critical safety guidelines for handling ink bottles and preventing spills during refilling.
Monitor ink levels visually and through status lights to ensure optimal printing.
Interpret various light indicators to diagnose ink status and potential errors.
Information on acquiring genuine EPSON ink and supplies for your printer.
Detailed step-by-step procedure for correctly refilling the printer's ink tanks.
Perform essential print head maintenance tasks, including nozzle checks and cleaning.
Print a nozzle check pattern to diagnose clogged print head nozzles.
Execute print head cleaning cycles to resolve print quality issues.
Flush ink tubes to clear blockages when print head cleaning is insufficient.
Align the print head to correct vertical line misalignments and improve print accuracy.
Clean the exterior surfaces, scanner glass, and control panel of the printer.
Prepare the printer for safe transport by securing internal components and protecting against leaks.
Check for and install the latest software updates to ensure optimal performance and features.
Interpret the printer's status lights to diagnose and resolve operational problems.
Perform a diagnostic check to verify the printer's operational status.
Troubleshoot and resolve issues encountered during the initial setup and installation process.
Understand potential noises from the printer after refilling ink tanks.
Resolve difficulties encountered during the installation of printer software.
Address and resolve issues related to the printer's network connectivity and operation.
Troubleshoot and fix issues preventing the printer from connecting to a wireless network.
Resolve problems where network discovery or setup software cannot locate the printer.
Troubleshoot the visibility of the printer in the Mac OS X printer settings.
Resolve issues preventing printing when the printer is connected via a network.
Troubleshoot errors or failures when attempting to scan over a network connection.
Print a network status sheet to diagnose connectivity and configuration issues.
Address and resolve common issues encountered during the copying process.
Troubleshoot situations where the printer makes noise but fails to complete a copy job.
Resolve issues where copied pages are incompletely printed or cut off.
Address and resolve issues related to paper feeding, jamming, and ejection.
Troubleshoot and fix problems with the printer not feeding paper correctly.
Clear paper jams and implement preventive measures to avoid recurrence.
Resolve issues where paper is not ejected properly from the printer.
Troubleshoot common printing errors and performance issues when printing from a computer.
Resolve issues where no output is produced after sending a print job to the printer.
Troubleshoot the missing printer icon in the Windows taskbar.
Improve slow printing performance by adjusting settings or optimizing system resources.
Address and resolve issues related to the layout, formatting, and content of printed pages.
Correct printed images that appear inverted or mirrored due to incorrect settings.
Ensure the correct number of copies is printed by verifying the 'Copies' setting.
Prevent blank pages from printing unexpectedly by checking settings and nozzle condition.
Adjust print settings to ensure correct page margins and proper paper positioning.
Troubleshoot issues causing incorrect characters to appear in printouts.
Correct printed images that are misaligned or have incorrect dimensions.
Fix slanted printouts by aligning the print head and ensuring proper paper feeding.
Troubleshoot and resolve issues affecting the visual quality of printed output.
Address banding or lines in printouts by checking nozzle status and print head condition.
Improve blurry or smeared printouts by checking paper type, settings, and handling of prints.
Resolve faint printouts or gaps by checking ink levels and performing nozzle checks.
Enhance grainy printouts by selecting higher quality settings and performing print head maintenance.
Correct inaccurate colors in printouts by adjusting color management and ink levels.
Troubleshoot common issues encountered during scanning operations and software usage.
Resolve problems where the scanning software is unresponsive or malfunctioning.
Troubleshoot and fix issues that prevent the EPSON Scan application from launching.
Address and resolve issues affecting the visual fidelity and clarity of scanned images.
Fix scanned images that appear with minimal detail or only scattered dots.
Clean the scanner glass to remove persistent lines of dots in scanned images.
Ensure originals are placed straight on the scanner glass to avoid skewed lines in scans.
Correct distorted or blurry scanned images by ensuring the original is flat and stable.
Fix patchy color distribution at scan edges by blocking external light during the scanning process.
Adjust scanner settings like brightness and exposure to correct overly dark scanned images.
Prevent the reverse side of thin originals from appearing in scans by using a black backing.
Reduce ripple patterns (moiré effect) in scanned images by adjusting Descreening and Resolution.
Correct upside-down scanned images by adjusting the Auto Photo Orientation setting.
Improve color accuracy in scans by adjusting color matching and management settings.
Troubleshoot issues with adjusting the scan area when using Thumbnail preview mode.
Prevent cropped image edges by correctly positioning originals on the scanner glass.
Follow the procedure to uninstall printer software on Windows operating systems.
Follow the procedure to uninstall printer software on Mac OS X operating systems.
| Printer Type | Inkjet |
|---|---|
| Print Method | On-demand inkjet (Piezo electric) |
| Functions | Print, Scan, Copy |
| Maximum Print Resolution | 5760 x 1440 dpi |
| Print Speed (Black) | 33 ppm |
| Print Speed (Color) | 15 ppm |
| Scanner Type | Flatbed color image scanner |
| Scan Resolution | 1200 x 2400 dpi |
| Connectivity | USB 2.0, Wi-Fi |
| Ink Type | Dye Ink |
| Ink Colors | Black, Cyan, Magenta, Yellow |
| Dimensions (W x D x H) | 472 x 300 x 145 mm |
| Weight | 4.4 kg |
| Paper Handling | 100 sheets |
| Compatible Operating Systems | Mac OS |
| Copy Resolution | 600 x 600 dpi |
| Paper Sizes | A4, A5, A6, B5, Letter, Legal, Envelopes (DL, C6) |