EasyManua.ls Logo

Epson Perfection 3490 Photo User Manual

Epson Perfection 3490 Photo
4 pages
To Next Page IconTo Next Page
Page #1 background imageLoading...
Page #1 background image
Start Here
4100814_b0_00.fm A2 size
9/16/05
Epson
®
Perfection
®
3490 Photo
Epson
®
Perfection
®
3590 Photo
Place film
Placez une bande de film
Perfection 3490
Perfection 3590
Slide in the film with the shiny base side facing
down. The scanner automatically feeds the film into
position.
Chargez le film côté support (brillant) vers le bas. Le
film est alimenté automatiquement dans le scanner.
Note:
Make sure the film strip contains between 2 and 6 photos. Don’t load
folded or creased film.
Remarque : La bande de film doit contenir entre 2 et 6 photos. Ne chargez pas
de film plié ou plissé.
Printed in XXXXXX XX.XX-XX XXX
Pays d’impression : XXXXXX XX.XX-XX XXX
Start Here
Point de départ
Unpack
Déballez le scanner
Perfection 3490 Photo
Perfection 3590 Photo
Note: Do not connect the USB cable yet.
Remarque : Ne branchez pas le câble USB tout de suite.
Note:
Do not connect the USB cable yet.
Remarque :
Ne branchez pas le câble USB tout de suite.
Note:
The setup illustrations show the Perfection 3590 Photo scanner, but the instructions are the same for the Perfection 3490 Photo.
Remarque : Les illustrations montrent le scanner Perfection 3590 Photo, mais les instructions sont les mêmes pour le modèle Perfection 3490 Photo.
Unlock and assemble
Déverrouillez et assemblez le scanner
Unlock the transportation lock.
Connect the cover cable.
Mettez le verrou de transport en
position déverrouillée.
Branchez le câble du capot.
Note:
Do not connect the USB cable yet.
Remarque : Ne branchez pas le câble USB tout de suite.
Install software
Installez les logiciels
Click Install and follow the on-screen
instructions.
Sélectionnez Français. Cliquez sur Installer et
suivez les instructions à l’écran.
Insérez le CD du scanner dans le lecteur.
Windows
®
: L’installation démarre automatiquement.
Macintosh
®
OS X : Double-cliquez sur l’icône du CD sur le bureau.
Insert the scanner software CD.
Windows
®
: The installer starts automatically.
Macintosh
®
OS X: Double-click the CD-ROM icon on the desktop.
Connect and turn on
Connectez et allumez le scanner
Connect the USB cable.
Connectez le câble USB.
Connect the AC adapter and power cable.
Connectez l’adaptateur CA et le cordon dalimentation.
Place a document or photo
Placez un document ou une photo
Question and Answer IconNeed help?

Do you have a question about the Epson Perfection 3490 Photo and is the answer not in the manual?

Epson Perfection 3490 Photo Specifications

General IconGeneral
Scanner TypeFlatbed
Color Depth48-bit
Grayscale Depth16-bit
Optical SensorCCD
Max Document Size8.5 x 11.7 inches
InterfaceUSB 2.0
Maximum Resolution9600 x 9600 dpi
Light SourceCold Cathode Fluorescent Lamp
CompatibilityWindows, Mac
Scanning Resolution3200 x 3200 dpi
Dimensions11.0 x 16.9 x 3.4 inches

Summary

Unpack Scanner

Scanner Models and Setup Notes

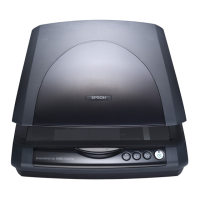
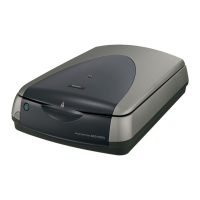
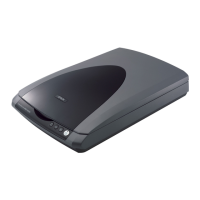
Illustrations show the Perfection 3590 Photo scanner, but instructions apply to both 3490 and 3590 models. Do not connect the USB cable yet.

Install Software

Insert Scanner Software CD

Insert the scanner software CD and follow on-screen instructions for Windows or Macintosh OS X.

Run Software Installation

Click 'Install' and follow the on-screen prompts to complete the software installation.

Unlock and Assemble Scanner

Unlock Transportation Lock

Unlock the transportation lock by moving it to the unlocked position.

Connect Cover Cable

Connect the cover cable to the scanner assembly.

Connect and Turn On Scanner

Connect USB and Power Cables

Connect the USB cable and the AC adapter with power cable to the scanner and computer.

Place Document or Photo

Place Film

Perfection 3490 Film Placement

Place film strips (2-6 photos) into the film holders for the Perfection 3490 model.

Perfection 3590 Film Placement

Place film strips (2-6 photos) into the film holders for the Perfection 3590 model.

Film Loading Instructions

Slide film with the shiny base side down; the scanner automatically feeds it.

Place Slides

Perfection 3490 Slide Placement

Place slides into the film holders for the Perfection 3490 model.

Perfection 3590 Slide Placement

Place slides into the film holders for the Perfection 3590 model.

Scan Document

Start Scanning Process

Press the 'Start' button on the scanner to begin the scanning process.

Select Scan and Save Settings

Click 'Scan' in the software, then select file settings and click 'OK' to save.

Scanning in Progress

EPSON Scan performs the scan in Full Auto Mode; wait for completion or click 'Pause'.

Advanced Scanning Options

Restore Color

Access 'Customize' in EPSON Scan to restore color to scanned images.

Remove Dust and Scratches

Use EPSON Scan's 'Customize' option for dust and scratch removal on film/slides.

Help and Support

Access User's Guide

Double-click the User's Guide icon on your desktop for comprehensive information.

Scanner Software Help

Click the 'Help' or '?' button within the scanner software for assistance.

Epson Technical Support

Contact Epson for 24-hour technical assistance via web or automated telephone services.

Related product manuals