Printing Photos in Windows 17
7. Select your paper
Size setting.
8. Select Portrait or Landscape as the orientation setting.
9. Do one of the following:
■ Click OK, then click OK or Print.
■ If you want to print at the highest resolution possible, or use special
settings, continue with the steps in the next section.
Customizing Your Photo Settings
1. On the Main tab, click the Advanced button in the bottom right corner of
the window. If you see a warning note, click
Continue.
2. Select the following advanced settings as necessary:
Note: For the highest print quality, select Photo RPM. Please note that printing will
take longer in this mode.
3. Once you’ve finished selecting advanced settings, you can:
■ Click OK to save your settings, return to the Print window, and print.
■ Click the Basic button to return to the Basic settings.
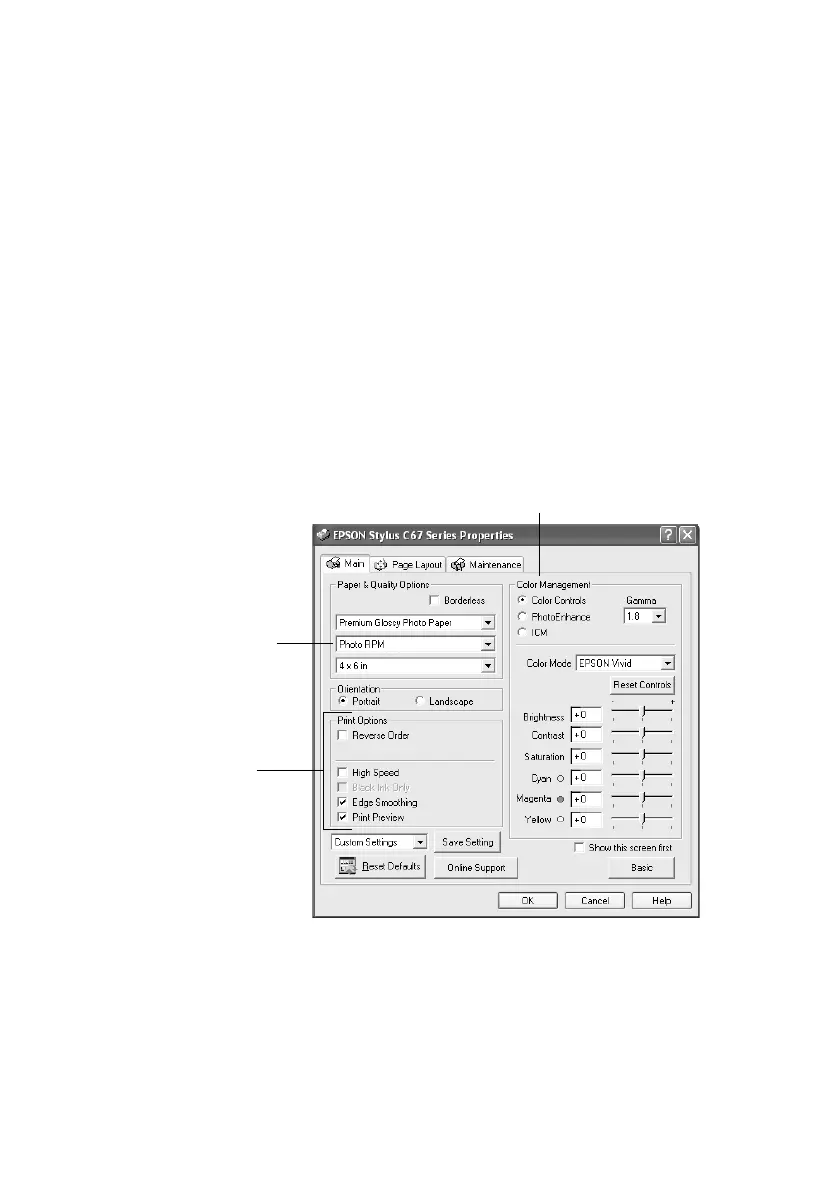
Click here to select
Photo RPM (5760 × 720)
for the best print quality
on certain paper types
Select a color management method
(To choose No Color Adjustment, click ICM first)
Select Print Options
as necessary