EPSON Stylus COLOR 440
6 -
EPSON Stylus COLOR 440
7/98
Installing an Ink Cartridge for the First
Time
1. Plug the power cord into a grounded outlet.
Caution:
Don’t use an outlet controlled by a wall switch or timer,
or one that uses the same circuit as a large appliance.
This may disrupt the power, which can erase the
printer’s memory or damage its power supply.
2. Remove the ink cartridges from their foil packages. Then
pull off only the yellow part of the tape seal on the top of
each cartridge. It is okay if a bit of the yellow tape remains
on the cartridge. Do not pull off the blue part.
Caution:
You must remove the yellow tape seal from the top of
the cartridge or you will permanently damage it. Don’t
remove the tape seal from the bottom.
Warning:
If ink gets on your hands, wash them thoroughly with
soap and water. If ink gets in your eyes, flush them
immediately with water.
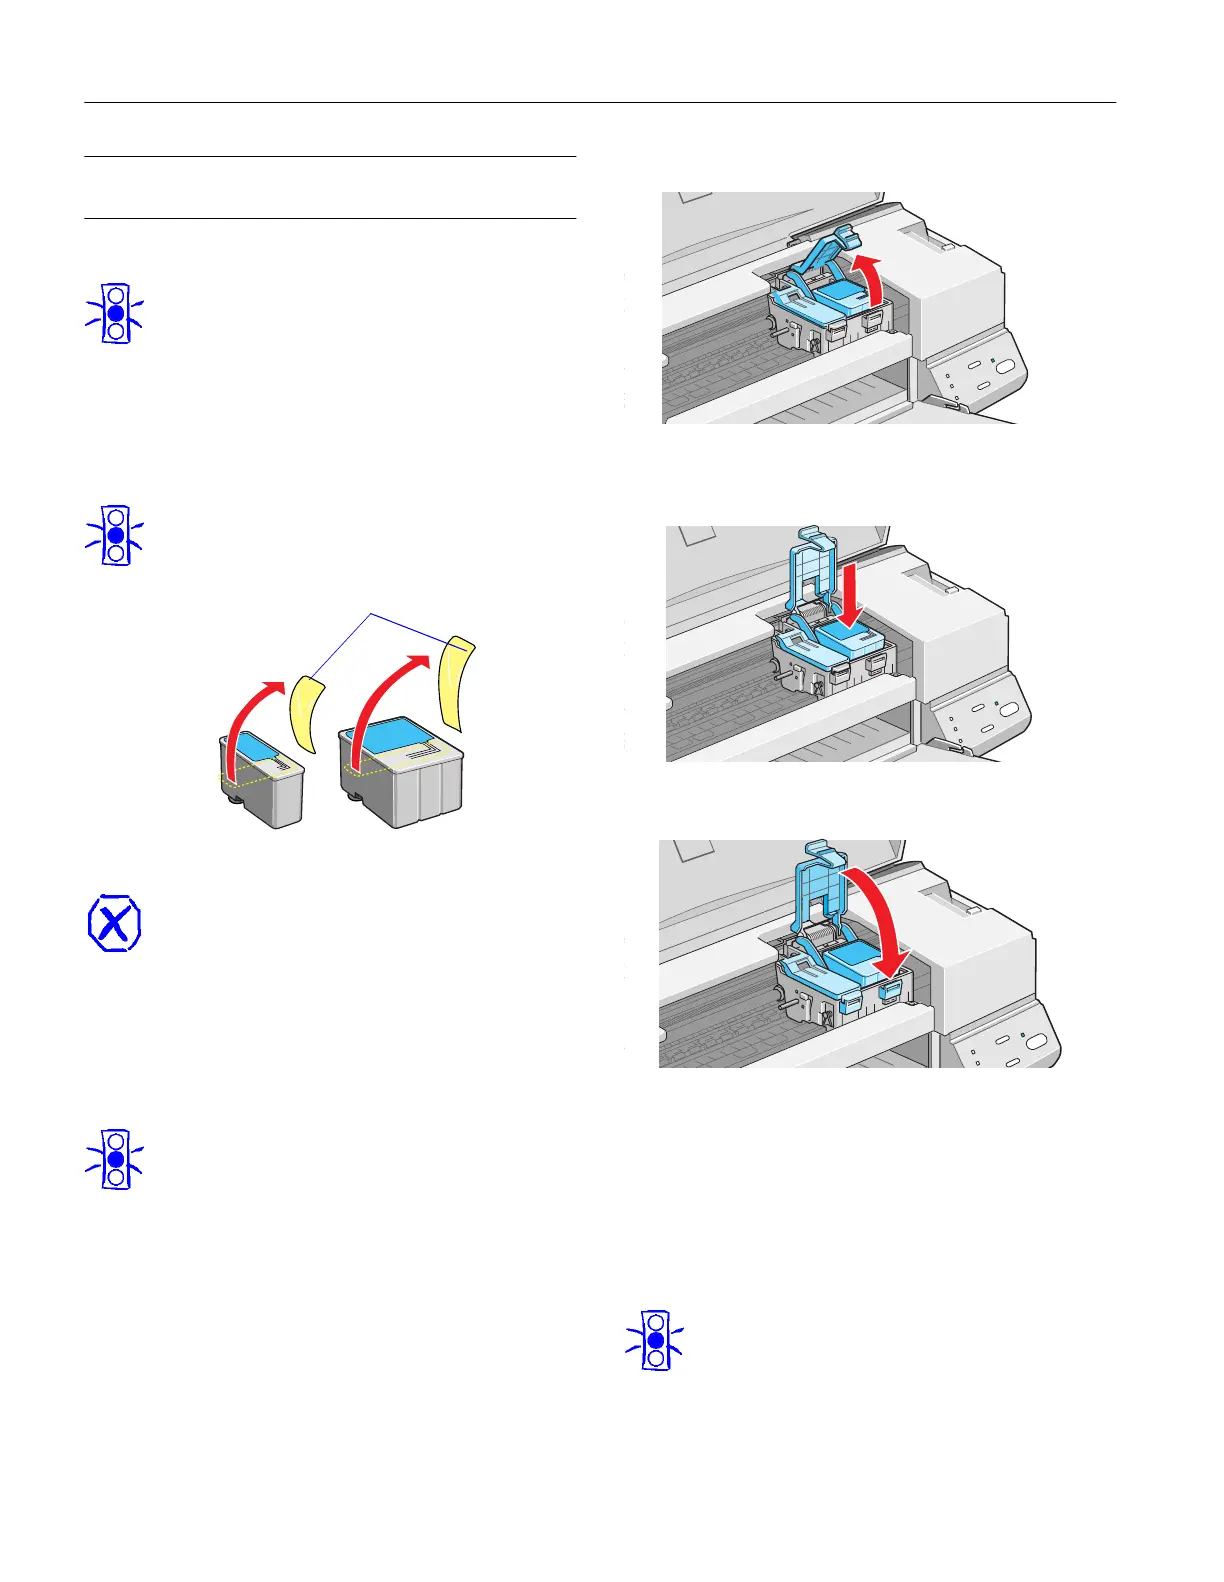
3. Lower the output tray and open the printer cover.
4. Press the
P power button to turn on the printer. The
P power light flashes, the
B black and
A color ink out
lights come on, and the ink cartridge holders move left to
the installation position.
Caution:
Always use the
P power button to turn the printer on or
off. Never use an external switch, such as a power strip.
5. Pull up the two ink cartridge clamps.
6. Insert the ink cartridges into their holders with the blue
labels facing up and toward the back of the printer.
7. Push down the clamps until they lock in place.
8. Press the
R cleaning button and close the printer cover.
The printer moves the print head and begins charging the ink
delivery system. Charging can take two to three minutes.
During this time, the
P power light flashes, and the printer
makes various sounds. Don’t turn off the printer or interrupt
the charging process or you’ll use more ink than necessary.
Charging is complete when the
P power light stops flashing
and is stays on.
Caution:
Never turn off the printer when the
P power light is
flashing, unless the printer hasn’t moved or made any
noise for more than five minutes.
black cartridge color cartridge
remove

 Loading...


