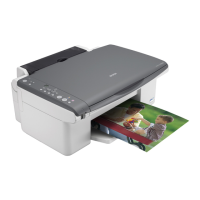
EPSON Stylus CX4900/CX4905/CX5000/DX5000/DX5050/CX5900/CX6000/DX6000/DX6050 Revision A
DISASSEMBLY/ASSEMBLY Overview 123
4.1 Overview
This section describes procedures for disassembling the main components of the
EPSON Stylus CX4900/CX4905/CX5000/DX5000/DX5050/CX5900/CX6000/
DX6000/DX6050. Unless otherwise specified, disassembly units or components can be
reassembled by reversing the disassembly procedure. Things, if not strictly observed,
that could result in injury or loss of life are described under the heading “Warning”.
Precautions for any disassembly or assembly procedures are described under the
heading “CAUTION”. Tips for disassembling procedures are described under the
heading “CHECK POINT”.
If the assembling procedure is different from the reversed procedure of the
disassembling, the procedure is described under the heading “REASSEMBLY”.
Any adjustments required after reassembling the units are described under the heading
“ADJUSTMENT REQUIRED”. When you have to remove any units or parts that are
not described in this chapter, refer to the exploded diagrams in the appendix.
Read precautions described in the next section before starting work.
4.1.1 Precautions
See the precautions given under the heading “WARNING” and “CAUTION” in the
following column when disassembling or assembling EPSON Stylus CX4900/
CX4905/CX5000/DX5000/DX5050/CX5900/CX6000/DX6000/DX6050.
4.1.2 Tools
Use only specified tools to avoid damaging of the printer.
Note *: Available in the market
W A R N I N G
Disconnect the power cable before disassembling or assembling
the printer.
If yo
u need to work on the printer with power applied, strictly
follow the instructions in this manual.
W
ear protective goggles to protect your eyes from ink. If ink gets
in your eye, flush the eye with fresh water and see a doctor
immediately.
A
lways wear gloves for disassembly and reassembly to avoid
injury from sharp metal edges.
To protec
t sensitive microprocessors and circuitry, use static
discharge equipment, such as anti-static wrist straps, when
accessing internal components.
Never touch the ink or wasted ink with bare hands. If ink comes
into contact with your skin, wash it off with soap and water
immediately. If irritation occurs, contact a physician.
C A U T I O N
When transporting the printer after installing the ink cartridge,
be sure to pack the printer for transportation without removing
the ink cartridge.
Use only recommended tools for disassembling, assembling
or
adjusting the printer.
Observe the s
pecified torque when tightening screws.
Apply
lubricants as specified. (Refer to “6.1.3 Lubrication
(p193)” for details.)
Make the s
pecified adjustments when you disassemble the
printer. (Refer to Chapter 5 ADJUSTMENT for details.)
Make sure the tip of the waste
ink tube is located at correct
position when reassembling the waste ink tube. Otherwise it will
cause ink leakage.
When
using compressed air products; such as air duster, for
cleaning during repair and maintenance, the use of such
products containing flammable gas is prohibited.
Table 4-1. Tools
Name Supplier
*
Part No.
Phillips Screwdriver (No.1)
EPSON
1080530
Phillips Screwdriver (No.2)
EPSON 1080532
Flathead Screwdriver
EPSON
1080527
Precision Screwdriver #1 (-)
EPSON 1080525
Tweezer
EPSON
1080561
Longnose pliers
EPSON 1080564
Acetate Tape
EPSON
1003963
Nipper
--- ---

 Loading...


