Epson Stylus Photo PX650/TX650/TX659/PX660/PX660 Premium/Artisan 635 Revision C
DISASSEMBLY AND ASSEMBLY Disassembling the Printer Mechanism 90
Confidential
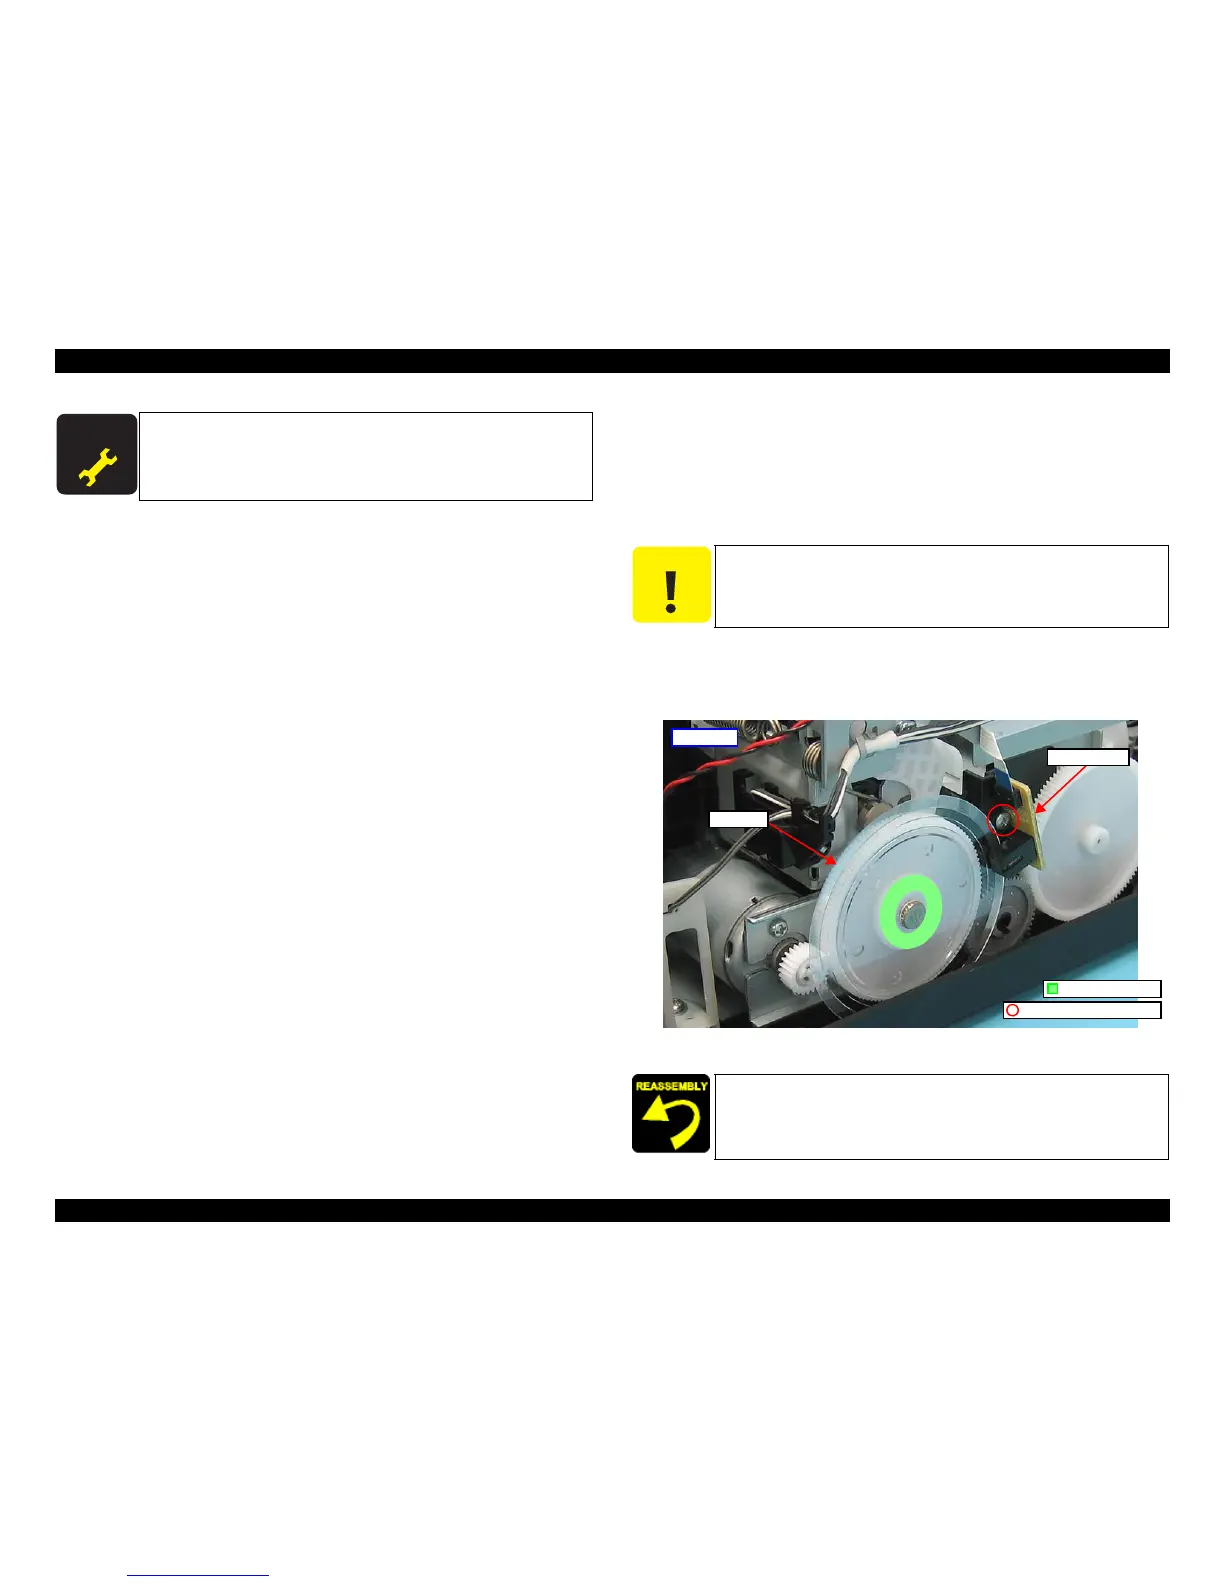
4.4.4 PF Encoder/PF Scale
Parts/Components need to be removed in advance
Upper Housing / Scanner Unit / Panel Unit / M/B Cover / Waste Ink Tray Assy /
Middle Housing
Removal procedure
1. Disconnect the FFC of the PF Encoder, remove the screw, and remove the PF
Encoder.
2. Peel off the double-sided tape that secure the PF Scale, and remove the PF Scale.
Figure 4-63. Removing the PF Encoder/PF Scale
After removing/replacing the Printer Mechanism, make the
specified adjustments. (See Chapter 5 "ADJUSTMENT".)
After replacing the Printer Mechanism, be sure to perform the
required lubrication. (See Chapter 6 "MAINTENANCE".)
Handle the PF Scale with care not to scratch or contaminate it. Do
not touch it with your bare hand.
When installing the PF Encoder, confirm that the reading area
does not come in contact with the PF Scale.
 Loading...