Do you have a question about the Epson SureLab D1070 and is the answer not in the manual?
Select a suitable location considering environmental factors and space requirements.
Remove packaging materials and verify included items before setup.
Power on the printer and follow LCD prompts for initial setup and configuration.
Detailed steps for installing ink packs, including handling trays and securing the packs.
Ensure the printer is ready and remove the scrap paper box before loading paper.
Steps for preparing and loading roll paper onto the spindle and into the printer.
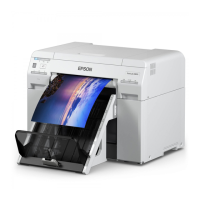
Reattach paper box, confirm paper type on LCD, and extend output tray.
Download and run the software package, connecting the printer via USB if prompted.
Information on technical support, online guides, recycling, and replacement ink packs.
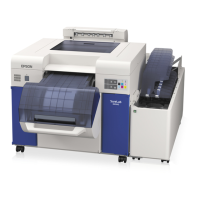
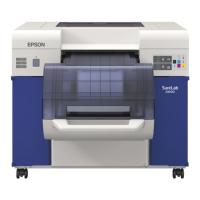
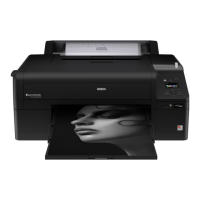
The Epson SureLab D1070/D1070DE is a professional printing device designed for high-quality photo and document output. This manual provides comprehensive instructions for setting up, operating, and maintaining the printer, ensuring optimal performance and longevity.
The SureLab D1070/D1070DE serves as a versatile printer capable of producing vibrant and detailed prints. It utilizes ink supply units (ink packs) to deliver ink to the printing system, supporting both roll paper and cut sheets for various printing needs. The device is designed for professional environments, offering features that ensure consistent quality and efficient operation. It includes a duplex unit in the D1070DE model, allowing for automatic two-sided printing, which enhances productivity and reduces paper consumption. The printer is equipped with an LCD screen that guides users through setup, operation, and maintenance tasks, making it user-friendly even for complex processes. Its core function is to transform digital images and documents into physical prints with exceptional color accuracy and sharpness, suitable for a wide range of applications from photo labs to retail printing.
The printer's usage begins with careful placement in a suitable location, away from direct sunlight, strong light, and areas with rapid temperature or humidity changes, to ensure stable operation. It requires a flat, stable surface with adequate space around it for ventilation and access. The initial setup involves unpacking the printer, removing all packaging materials and tape, and ensuring all covers are closed. The power cord is then connected, and the printer is turned on using the dedicated power button. The LCD screen guides the user through selecting initial printer settings.
A critical step in preparing the printer for use is installing the ink supply units. The process is clearly outlined: opening the ink pack covers, pressing an ink pack tray to release and pull it out, removing a protective piece, placing the ink pack into the tray until it clicks, and then inserting the tray into the printer. The ink packs are color-coded and keyed to fit into specific slots, preventing incorrect installation. After all ink packs are installed and covers are closed, the printer initiates an ink charging process, which is essential for preparing the printing system. During this process, it's crucial not to turn off or unplug the printer.
Paper loading is another key usage feature. The printer supports both roll paper and cut sheets. For roll paper, the process involves releasing the roll paper unit, removing the spindle, and then preparing the paper roll by removing its packaging and wiping its edges to remove dust. The paper roll is then inserted onto the spindle, ensuring no gaps between the paper and the media edge guides. The spindle is then placed into the printer, and the leading edge of the roll paper is fed into the paper feed slot until a beep is heard, indicating proper engagement. The media edge guides are then adjusted to match the paper width. For cut sheets, users are directed to the online User's Guide for detailed instructions. The printer also includes an output tray that needs to be attached and extended before printing.
After paper and ink are ready, the printer's LCD screen will display the paper type. Users can confirm or change the paper type as needed. The final step before printing is to install the necessary software. This involves downloading the software package from the Epson support website and following the on-screen instructions. An Internet connection is required for this step. It's important that the printer is not connected to the computer during the initial software download and installation, and only connected via a USB 2.0 cable when prompted.
The SureLab D1070/D1070DE incorporates several features to facilitate maintenance and ensure consistent print quality. One of the primary maintenance tools is the Maintenance Tool software utility, which provides access to various functions:
The manual emphasizes the importance of using genuine Epson branded ink packs, noting that the printer is designed to work exclusively with them. It also highlights that Epson periodically provides firmware updates to address security, performance, and bug fixes, which may affect the functionality of third-party ink.
During the ink pack installation, users are advised that liquid may drip into the ink trays, which is normal and indicates excess fluid discharged from the ink nozzles, not a malfunction. This insight helps users understand the printer's normal operation and avoid unnecessary concern.
For roll paper handling, the manual recommends wearing gloves to prevent marking the paper with dirt or oils from hands, which can affect print quality. It also advises wiping the edge of the paper roll with a soft, clean cloth to remove dust, further contributing to clean prints. Ensuring the leading edge of the paper is cut straight across is also crucial to avoid paper feeding problems.
The printer also includes a scrap paper box, which needs to be removed and reattached during certain operations. This box collects waste paper, contributing to a cleaner printing environment.
Epson also provides resources for recycling end-of-life hardware and ink packs, promoting environmental responsibility. Users can find information on how to return their products for proper disposal through Epson's recycling program.
In summary, the Epson SureLab D1070/D1070DE is a robust professional printer with a focus on high-quality output, user-friendly operation, and comprehensive maintenance support. Its design and accompanying resources aim to provide a reliable and efficient printing solution for demanding applications.
| Number of Inks | 6 |
|---|---|
| Ink Colors | Cyan, Magenta, Yellow, Black |
| Print Resolution | 1440 x 1440 dpi |
| Print Speed (4x6) | about 12 seconds |
| Media Types | Photo paper, roll paper |
| Media Sizes | 4 x 6 inches, 5 x 7 inches |
| Paper Handling | Roll paper |
| Connectivity | USB, Ethernet |
| Power Consumption | Approx. 1.5W (sleep) |