This document outlines the process for removing and installing ink cartridges in a printing device, ensuring proper maintenance and functionality. The device is designed for ease of use, allowing users to replace cartridges efficiently and safely.
Function Description
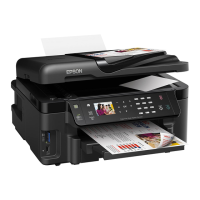
The device is a printer that utilizes ink cartridges for its printing operations. It is designed to notify the user when an ink cartridge is expended, prompting a replacement. The process involves accessing the cartridge compartment, removing the old cartridge, and inserting a new one. The device also includes a scanner unit, which needs to be lifted to access the ink cartridge area. Once new cartridges are installed, the device initiates an ink priming process to prepare for printing.
Usage Features
The device incorporates several features to facilitate user interaction and ensure correct cartridge replacement:
- LCD Screen Notifications: The device features an LCD screen that displays messages, including notifications when an ink cartridge is expended. This guides the user on which cartridges need replacement.
- Guided Replacement Process: When a cartridge needs replacement, the LCD screen provides instructions, which can be followed by pressing the "OK" button.
- Manual Replacement Option: Users can choose to replace a cartridge even before a notification appears. This is done by accessing the "Setup" menu, then "Maintenance," and finally "Ink Cartridge Replacement" via the home button.
- Easy Access to Cartridges: The scanner unit can be easily lifted to provide access to the ink cartridge compartment.
- Cartridge Cover: A dedicated cartridge cover protects the ink cartridges and needs to be opened to remove or insert them.
- Secure Cartridge Installation: New cartridges are inserted into a holder and pushed down until they audibly "click" into place, ensuring a secure connection. The cartridge cover then closes, also clicking into place.
- Automatic Ink Priming: After the scanner unit is lowered following cartridge replacement, the device automatically begins an ink priming process, preparing the system for printing.
Maintenance Features
The manual emphasizes several maintenance aspects to ensure the longevity and proper functioning of the device and its cartridges:
- Immediate Replacement: Users are advised to have replacement cartridges ready and to install new cartridges immediately after removing the old ones. This prevents the print head nozzles from drying out, which can impair printing quality.
- Cartridge Packaging Integrity: It is crucial not to open new ink cartridge packages until they are ready for installation. Cartridges are vacuum-packed to maintain their reliability, and opening them prematurely can compromise their quality.
- Print Head Protection: Leaving old cartridges in the printer until ready for replacement is recommended to prevent the print head nozzles from drying out.
- Proper Cartridge Handling:
- Shaking New Cartridges: Before installation, new cartridges should be gently shaken four or five times to ensure the ink is properly distributed.
- Removing Yellow Tape Only: Only the yellow tape on the new cartridge should be removed. Other labels or seals should remain intact to prevent ink leakage.
- Avoiding Contact with Green Chip: Users are cautioned not to touch the green chip on the cartridge, as this could affect its functionality.
- Prompt Installation: New cartridges should be installed immediately after removing the old one. Delaying installation can cause the print head to dry out, rendering it unable to print.
- Safety Precautions:
- Ink Contact: If ink comes into contact with skin, it should be washed thoroughly with soap and water. If ink gets into the eyes, they should be flushed immediately with water. If ink is ingested, the user should spit it out and seek medical attention.
- Child Safety: Ink cartridges should be kept out of the reach of children.
- Disposal of Used Cartridges: Used cartridges should be disposed of carefully. Users are explicitly warned not to take them apart or attempt to refill them.
- Error Correction: In case of an "ink cartridge installed incorrectly" message, the manual provides a clear troubleshooting step: lift the scanner unit, open the cartridge cover, press the ink cartridge down until it clicks, then close the cover and lower the scanner unit. This ensures proper seating and functionality.