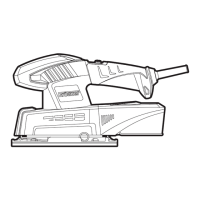
240W 1/4 SHEET SANDER
6
7
8
11
OPERATING INSTRUCTIONS
Note: Before using the tool, read the
instruction book carefully.
1.CHANGING THE SANDING PAPER (See Fig.
1-1, 1-2)
To remove the sanding paper, lift up the clamp lever
(8) and move away from the clamp lever lock (6).
The sanding paper clamp (7) is now loose. Repeat
with the other clamp on the opposite side of your
sander.
To t new sanding paper, insert approximately 5mm
of one end of the sanding paper under the sanding
paper clamp (7) until the paper contacts the housing
wall. Lift up the clamp lever (8) and move it to the
lever lock position. Press the sanding paper around
the base plate shape as tight as possible and x the
end under the other sanding paper clamp (7).
Check the sanding paper is square to the base
plate. If not correct, remove and ret it again.
Always, ensure the sanding paper is tight over the
base plate and secured underneath both locked
clamps(7). This will ensure safe and efcient
sanding performance.
For hoop & loop sanding paper, align the sanding
sheet and press it onto the sanding pad by hand.
Firmly press the power tool with the sanding sheet
against a at surface and briey switch the power
tool on. This provides for good adhesion and
prevents premature wear.
2. PAPER PUNCH
If using sanding paper without dust holes, use the
paper punch (9) to perforate the holes to ensure
correct dust extraction. Position the punch over the
base-plate (5) with the punch sides on the edges of
the base-plate.
Press the punch into the base-plate to punch holes
into the sanding paper. Then remove the punch and
check all the holes have been formed correctly.
3. USING THE DUST BAG (See Fig. 2)
Your sander is equipped with a dust collection bag.
To attach, insert the dust collection bag into the
back of the sander until it is secure.
Caution:To prevent the possibility of sanding
dust or foreign body being thrown into your
face or eyes, never attempt to use your sander
Fig. 1-1
Fig. 1-2
Fig. 2
Fig. 3-1
 Loading...