EasyManua.ls Logo

Ergotron Mini PC User Manual

Ergotron Mini PC
46 pages
To Next Page IconTo Next Page
Page #1 background imageLoading...
Page #1 background image
1 of 23
888-97-341-G-01 rev. G • 10/19
Mini PC
www.ergotron.com | USA: 1-800-888-8458 | Europe: +31 (0)33-45 45 600 | China: 400-120-3051 | Japan: japansupport@ergotron.com
English, Español, Français, Deutsch, Nederlands, Italiano, Svenska, 日本語, 汉语
最新のユーザー インストール ガイドは、www.ergotron.com でご確認いただけます。
Die aktuellste Anleitung für die Montage durch den Benutzer fi nden Sie hier: www.ergotron.com
Pour la dernière version du Guide d’installation de l’utilisateur, visitez : www.ergotron.com.
Para acceder a la última versión de la Guía de instalación para el usuario, ingrese a www.ergotron.com
For the latest User Installation Guide please visit: www.ergotron.com
Question and Answer IconNeed help?

Do you have a question about the Ergotron Mini PC and is the answer not in the manual?

Ergotron Mini PC Specifications

General IconGeneral
BrandErgotron
ModelMini PC
CategoryRacks & Stands
LanguageEnglish

Summary

Safety Information

Hazard Symbols Review

Overview of hazard symbols and their meanings for user safety.

Important Installation Safety Notes

Key safety precautions and warnings regarding installation and product handling.

Features & Specifications

Maximum Weight Capacity

Information on the maximum weight the product can support and associated risks.

Weight Reduction for Monitor/Mini PC Mounting

Guidance on reducing monitor weight capacity when mounting Mini PCs.

Components and Assembly Overview

Component Identification

List of all included parts and hardware for installation.

Walltrack Mounting Method

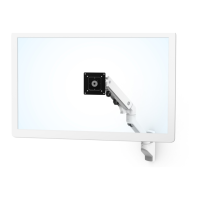
Details on the preferred Walltrack mounting method for specific areas.

Standard VESA Mounting

Step 1: Attach Bump-Ons

Instructions for attaching protective bump-ons to the mounting bracket.

Step 2: Install Rotation Stop Screw

Securing the monitor to prevent unwanted portrait/landscape rotation.

Step 3: Attach Bracket to VESA Mount

Connecting the mounting bracket to the VESA mount, with optional strap use.

Step 4: Attach Bracket to Monitor

Mounting the bracket to the monitor, considering VESA sizes and optional strap.

Step 5: Attach Brackets

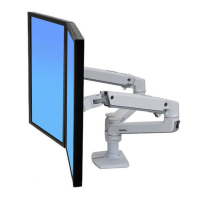
Attaching the main mounting brackets.

Step 6: Attach Mini PC

Placing the Mini PC into the secured brackets.

Step 7: Secure Mini PC

Locking the Mini PC in place using knobs and pliers.

Step 8: Optional Strap and Buckle

Using the optional strap and buckle for added security.

Wall Track Mounting

Wall Track Step 1: Attach Bump-Ons

Attaching bump-ons for the wall track mounting system.

Wall Track Step 2: Attach Bracket to Wall Track

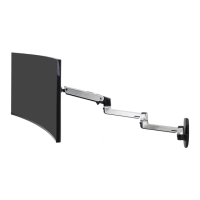
Connecting the bracket to the wall track system.

Wall Track Step 3: Secure Brackets to Wall Track

Fastening the brackets to the wall track at the desired height.

Wall Track Step 4: Tighten Screws

Ensuring brackets are securely fastened to the wall track.

Wall Track Step 5: Attach Brackets

Attaching secondary brackets to the wall track assembly.

Wall Track Step 6: Mount and Secure Mini PC on Wall Track

Attaching and securing the Mini PC to the wall track brackets.

Wall Track Step 7: Optional Strap and Buckle

Using the optional strap and buckle with the wall track setup.

Pole Mounting

Pole Step 1: Attach Bump-Ons for Pole

Attaching bump-ons for pole mounting configurations (35-38mm & 40mm).

Pole Step 2: Attach Bracket to Pole/Clamp

Connecting the bracket to the pole and pole clamp.

Pole Step 3: Mount and Secure Mini PC on Pole

Attaching and securing the Mini PC to the pole-mounted brackets.

Pole Step 4: Optional Strap and Buckle for Pole

Using the optional strap and buckle with the pole mounting setup.

Direct Wall Mounting

Step 2: Mark Mounting Holes

Marking the wall for drilling mounting holes using the bracket as a template.

Step 3: Drill Mounting Holes

Drilling pilot holes into the wall at marked locations.

Step 4: Attach Bracket to Wall Surface

Securing the bracket to the wall surface using appropriate hardware.

Step 5: Attach Brackets

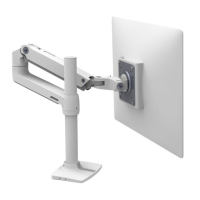
Connecting the main mounting brackets.

Step 6: Attach Mini PC

Placing the Mini PC into the secured brackets.

Step 7: Secure Mini PC

Locking the Mini PC in place on the wall-mounted brackets.

Step 8: Optional Strap and Buckle for Wall

Using the optional strap and buckle with the wall mounting setup.

Related product manuals