Do you have a question about the ES SYSTEM K LCC CARINA 01 and is the answer not in the manual?
This document serves as a user manual for the LCC CARINA 01 and LCC CARINA 02 pastry counters manufactured by ES SYSTEM K SP. Z O.O.
The refrigerated cabinet LCC Carina is designed for the display and direct sale of pastries and fruits/vegetable salads, maintaining a temperature range of +3 to +8 °C. A specialized version is available for chocolates, equipped with a hygrostat to ensure a correct level of humidity and protect against humidity spikes. This version operates within a higher temperature range, specifically +14 to +18°C, which is ideal for chocolates. It's important to note that the hygrostat helps lower humidity inside the cabinet; it does not increase it. The cabinet is not intended for refrigerating products but rather for displaying them for sale purposes. Products placed inside should already be at or below the set temperature of the cabinet.
The cabinet operates using a refrigerated system that includes a condensing unit, an evaporator dosage element (capillary tube/valve), and an electric heater for the evaporator. Some versions can be prepared without an internal condensing unit for remote connections to a cooling installation. Cooling is achieved by an evaporator through which air is blown by fans. Cooled air is distributed through an air outlet in the bottom shelf to all levels of the exposition area, then sucked back through an air inlet on the bottom shelf and directed to the evaporator, repeating the cycle. The cabinet is equipped with an electric controller on the control panel to manage various parameters, including temperature, defrosts, and alarms.
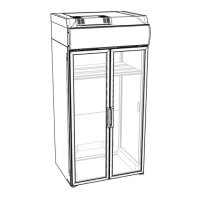
The cabinet is a self-supporting construction built on a metal frame with adjustable feet for proper leveling. Internal elements are made from powder-painted metal, inox, and a waterproof MDF worktop. External surfaces are also made from MDF and powder-painted metal. Polyurethane foam provides insulation. The display area features a waterproof MDF bottom and glass shelves, each illuminated by warm T8 light tubes. The cabinet boasts panoramic bent front glass (double-glazed), double-glazed side glasses, and double-glazed doors in a metal frame at the back, ensuring excellent insulation and minimal heat loss. The front glass can be opened for easier cleaning access. An anti-mist heater is located at the bottom edge of the front glass to prevent condensation when environmental humidity rises.
The cabinet is designed to operate within specific environmental conditions: relative humidity of 60%RH, temperature of +25°C, and air flow less than 0.2 m/s. These conditions may vary for the tropic version of the cabinet. The maximum loading limit for glass shelves is 25 kg/m². The cabinet is prepared to be powered by 230 V, 50 Hz, via a cable with a plug.
Before initial use, it is crucial to read the entire user manual. The cabinet must be installed and launched in accordance with manufacturer's directions and local laws. In case of malfunction, the cabinet should be turned off, and service should be contacted.
In standard mode, the display shows the current internal temperature and information about the working condensing unit. It also displays defrost alerts, alerts for probe malfunctions, and alerts for cabinet malfunctions. Temperature settings can be adjusted within the manufacturer's specified ranges, as described in the controller manual.
The controller manages automatic defrosting. Defrost water is directed through a drain in the bottom of the mold and a pipe to a container in the bottom of the frame or directly to canalization drains. It's essential to regularly check that the drain is clear and water flows smoothly. In high humidity environments, additional defrost cycles may be necessary; refer to the controller manual for details.
After a power shortage or unplugging/plugging, the cabinet will turn on automatically. Check if the water container has overflowed and if the cabinet is working properly after power is restored.
It is absolutely necessary to defrost and clean the cabinet fully once a week. This ensures optimal performance for the following week. During defrost, the internal temperature will rise slightly but will not affect products due to the short duration.
At least twice a year, perform the following:
Regularly check:
A dirty condenser is a common cause of malfunctions.
Regularly check:
If the cabinet or any component malfunctions, or if it doesn't work properly, first check if it poses a danger to people or property. If necessary, contact service.
Before calling service, check:
Cabinet characteristics are on the label plate. When contacting service, always provide the serial number and cabinet type. For more technical data, contact service or your distributor. Only qualified staff should perform service duties on electric and mechanical parts. The evaporator should only be cleaned by authorized service. It is strongly suggested to use manufacturer's spare parts.
At the end of its service period, the cabinet must be disposed of according to local laws. Professional advice on dumping is necessary to avoid environmental harm and ensure recyclable materials are processed correctly. The manufacturer reserves the right to make changes in the cabinet's construction.
| Brand | ES SYSTEM K |
|---|---|
| Model | LCC CARINA 01 |
| Category | Commercial Food Equipment |
| Language | English |