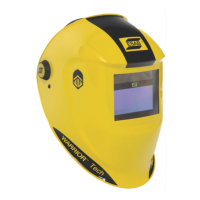
The ESAB WARRIOR TECH is a welding helmet designed for arc welding applications, offering reliable eye protection against UV/IR rays, heat, and sparks. It provides permanent protection in all states, from clear to dark, with protection shades chosen to prevent eye damage from the welding arc. The helmet is not suitable for use with laser systems or oxy-acetylene (gas welding) applications and should not be used as sunglasses.
Function Description:
The WARRIOR TECH welding helmet automatically darkens the filter when an arc strikes and returns to a clear state when the arc stops. This auto-darkening feature allows the welder to see the point of arc strike more precisely, leading to real-time savings and reduced fatigue as the helmet does not need to be flipped up and down during welding. The helmet is equipped with two sensors on the front of the filter that must not be covered for proper operation.
Important Technical Specifications:
- Protection Shades: Available in shades 9-13 (adjustable via a knob on the outside of the helmet).
- Light State Scale Number: 4
- Dark State Scale Numbers: 9 (lightest) - 13 (darkest)
- Optical Class: 1
- Diffusion of Light Class: 2
- Variation in Luminous Transmittance Class: 1
- Angle of Dependence Classification: 2
- Delay Adjustment: Manually adjustable between 0.1 seconds (fast clear) and 1.0 seconds (slow clear).
- Sensitivity Adjustment: Adjustable via a knob to optimize for surrounding light conditions.
- Operating Temperature: -10°C to +65°C.
- Welding Processes: Suitable for Electrode, MIG, MAG, and TIG (>=5A).
- Certifications: Complies with EC regulations (Directive 89/686/EWG), ANSI Z87.1, AS/NZS, CSA Z94.3, EN 175:1997, EN 166 B:2001.
Usage Features:
- Shade Setting: The shade level is set by turning a knob on the outside of the helmet. Turning clockwise makes the shade darker, while turning anti-clockwise makes it clearer. A chart is provided to guide the selection of the most suitable shade level based on the welding process and current internally in amperes.
- Sensitivity Adjustment: To set the optimum sensitivity, the knob is turned clockwise to the maximum setting. If the filter flickers or switches to the dark state in low ambient light, the knob is turned back until the filter returns to the clear state.
- Delay Setting: The clearing delay, which is the time it takes for the filter to return to the clear state after welding stops, can be adjusted manually. A fully anti-clockwise turn sets a fast clear (0.1 sec), and a fully clockwise turn sets a slow clear (1.0 sec).
- Headgear Adjustment: The helmet features a comfortable headgear that can be adjusted in three ways:
- Head height: Push and move.
- Longitudinal adjustment.
- Rake adjustment.
- Head size: Push and turn.
- Pre-use Testing: Before use, the auto-darkening filter (ADF) and helmet should be checked. This involves ensuring the outer protection lens is clean and transparent, and that the sensors are not covered. The ADF can be tested by setting the shade to the darkest (13) and sensitivity to the highest, then pointing the sensor towards a light source. The ADF should switch to the dark state. Shade variation can be checked by turning the shade knob anti-clockwise, observing the shade getting lighter. Delay function is tested by setting the delay to maximum, moving the filter away from the light source, and timing its return to clear (should be 1 second), then repeating with minimum delay (should be 0.1 second). Sensitivity is tested by setting it to minimum, pointing at a light source, and slowly turning the sensitivity clockwise until the filter switches to dark. If any function fails, the ADF should not be used, and the local distributor should be contacted.
Maintenance Features:
- Protection Lenses: The helmet must always be equipped with an outer spatter lens (in front of the filter) and an inner lens (behind the filter). These protection lenses are consumables and must be replaced if broken, damaged, or covered with welding spatter that impairs vision. They should be replaced regularly with certified ESAB spare parts.
- Replacing Outer Spatter Lens: To replace the outer spatter lens, the filter must be removed by unscrewing two retaining screws from inside the helmet. The old lens is then removed, and the new lens, light seal cradle, ADF, inner protection lens, and ADF retaining frame are inserted, followed by replacing the two retaining screws. Before first use, protective films must be removed from the front spatter lens.
- Cleaning: The filter should be cleaned when changing protection lenses. This can be done by:
- Wiping with a clean, dry cloth.
- Cleaning with a smooth cloth moistened with pure alcohol.
- Cleaning with a commercial disinfectant.
- General Care: The helmet should not be dropped, and heavy objects or tools should not be placed on or inside it to avoid damaging the electro-optical filter.
- Filter Replacement: If the filter needs replacement, only exclusively certified products (DIN-CE marks) should be used. ESAB recommends using their own welding filters.
- Disposal: The filter itself contains no special or toxic products and can be disposed of in the same way as other electronic devices.
- Water Exposure: The auto-darkening filters are not waterproof and will not work properly if they have been in contact with water.
- Heat Exposure: Welding helmets and filters only resist a certain amount of heat; they should not be placed near naked flames or hot work areas.
- Allergic Reactions: Materials in contact with the wearer's skin could cause allergic reactions in susceptible individuals.