©
2017 Escalade Sports
For Customer Service Call 1-888-996-2729
14
All Rights Reserved.
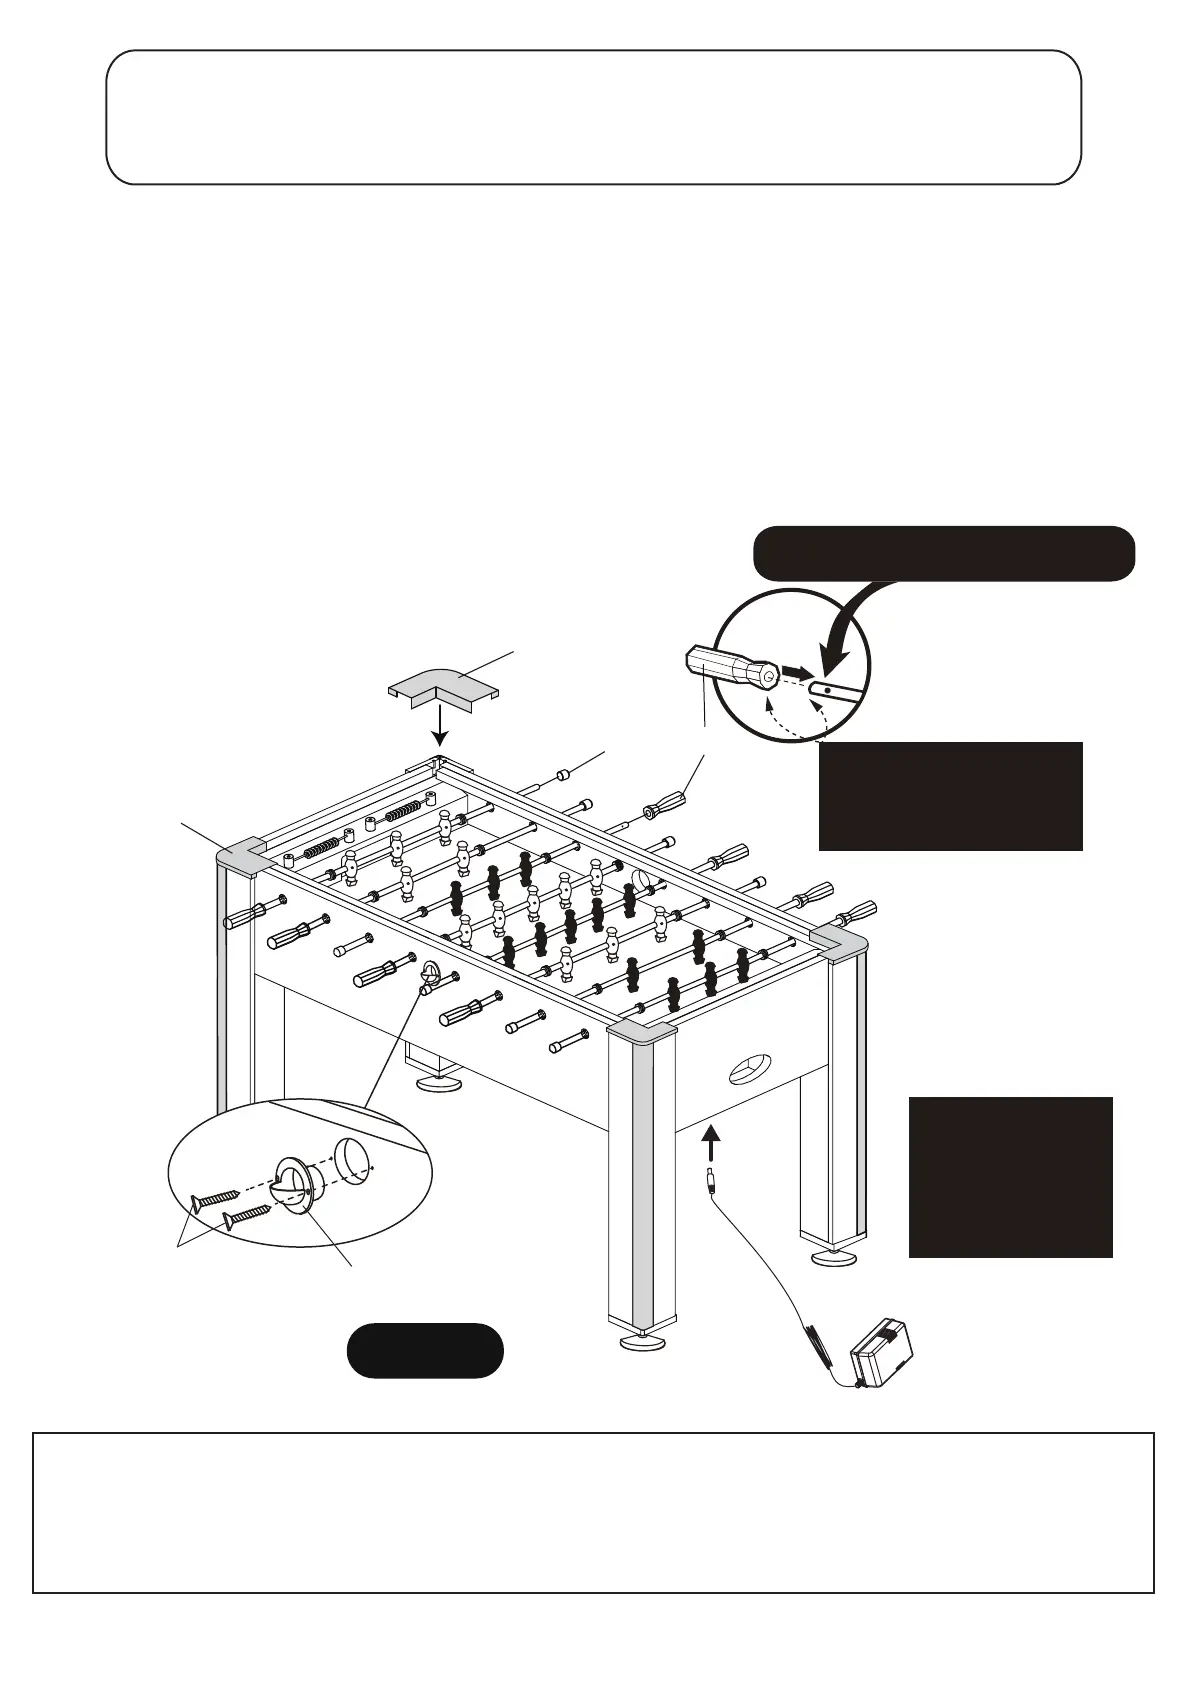
STEP 9
Insert the P17 Rod Handles onto the rods end with the hole.
Attach P8 Rod End Caps to the rods as shown in FIGURE 9.
Attach P16 Ball Entry Cups on Side Aprons using pilot holes with H9 Screws.
Tighten, but do not strip out H9 Screws.
Carefully peel paper protective coating from adhesive strips from the back of P11 Corner Caps
to reveal adhesive strips.
Attach P21 Left corner Caps P22 Right corner Caps to the table corners as shown in FIGURE 9.
Connect A4 A/C Adapter to C1 Junction box attached in the P4 End Apron - B. You can see
the ELECTRICAL CONNECTIONS & SPARE PARTS DRAWINGS in Page 10 for reference.
FIGURE 9
P16
P17P8
P21
NOTE: Rod Handle should be placed on
rod end WITH THE HOLE OR DIMPLE
NOTE: A small amount of
liquid soap will greatly help
installing the P17 Rod
Handle onto the player rods.
Please take special
consideration as
to the location of this
table as to not allow
the A/C adaptor cord
to be a trip hazard.
Note : All LED components of this table have been factory tested. Should some or all of the LED
components and scoring not operate properly, carefully inspect that all connections are made
into the correct port - and lightly push in on all connections to insure a good connection.
Also , make sure the A/C adaptor is plugged into the C1 junction box correctly .
Also , make sure your wall outlet is a live socket .
H9
P22
P4R
PARTS REQUIRED:
4 pcs - H9 3.5 mm x 12mm Phillips Flat Head Screw
8 pcs - P8 Rod End Cap
2 pcs - P21 Left Corner Cap
2 pcs - P22 Right Corner Cap
8 pcs - P17 Player Rod Handle
2 pcs - P16 Ball Entry Cup
A4- A/C Adapter
 Loading...