©
2017 Escalade Sports
For Customer Service Call 1-888-996-2729
7
All Rights Reserved.
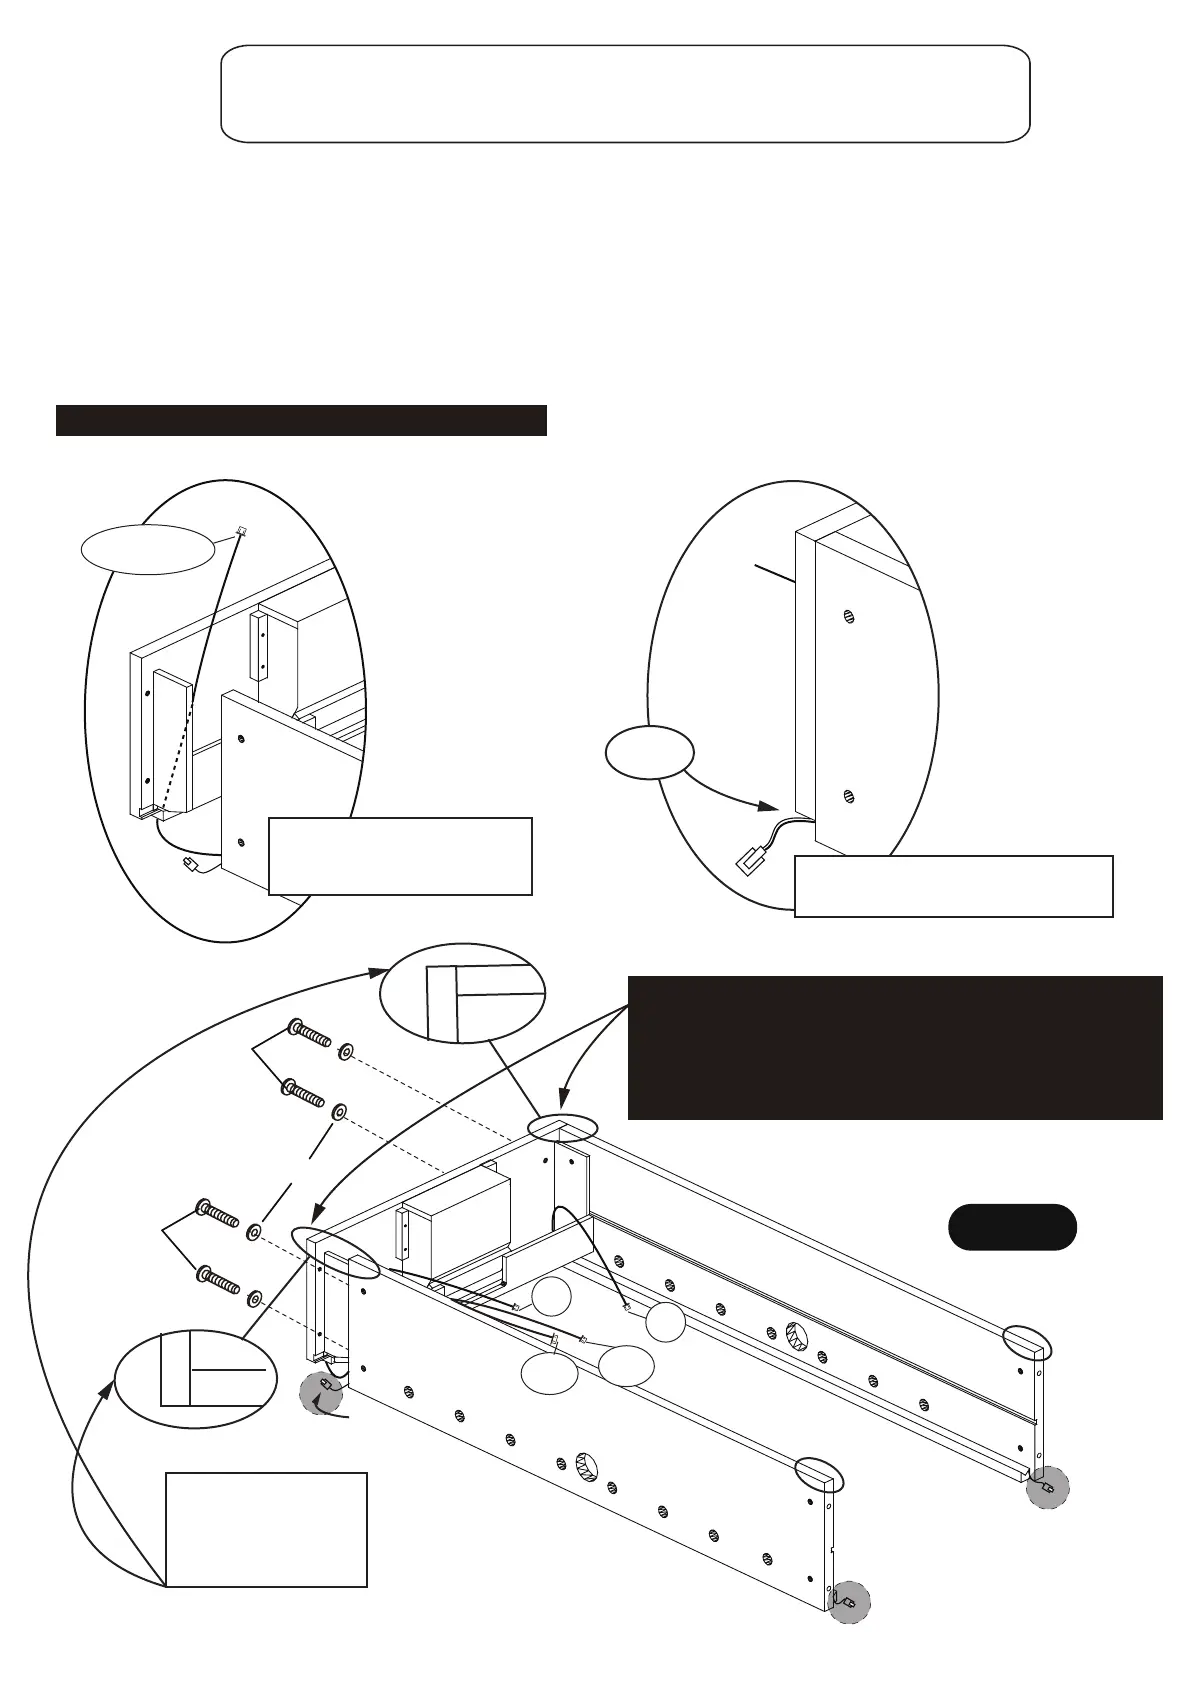
STEP 1
Find a clean, level place to begin the assembly of your soccer table. We recommend
building the table on the box top to protect the parts during assembly.
It is very important to assemble table on a level and flat surface. This will keep the
end aprons and side aprons “FLUSH” on the top and bottom edges.
Attach P1R Side Apron-A and P2R Side Apron-B onto P4R End Apron-B using countersunk holes
with H4 Bolts and H6 Washers by T1 Allen Wrench as shown in FIGURE 1.
Do not tighten H4 Bolts until STEP 3 is completed.
PARTS REQUIRED:
1 pc - P4R End Apron- B1 pc - P1R Side Apron- A
4 pcs - H4 6 mm x 50 mm Allen Head Bolt 4 pcs - H6 6.5 mm x 16 mm Flat Washer
1 pc - P2R Side Apron- B
C6-B
C6-A
C3
C7
FIGURE 1
H4
P1R
P2R
P4R
P4R
P4R
P1R
or P2R
P1R
or P2R
H4
H6
NOTE: Both P1 Rand P2R Side Aprons and P4R End Apron
must be square and flush in the corners.
H4 bolts thread into barrel nuts located inside of the side
aprons. Should the H4 bolts not want to "start" - look
inside the hole as it may be necessary to slightly adjust the
position of the barrel nut in order for the H4 bolt to start.
Do not connect any wires at this time.
1
1
2
2
1
1
3
4
2
2
NOTE :Use the 1-1,2-2,
3-3,4-4 – numbers on
the bottom corner of
each apron to correctly
orientate the 4 aprons.
Feed C3 and C7 wires through
the hole on the P4 End Apron
before installing aprons
C3 or C7
Leave these red and black wires in the
cut-out, and outside of P4 End Apron
Cut-out
Outside
Outside
Red and Black wires outside
 Loading...