©
2017 Escalade Sports
For Customer Service Call 1-888-996-2729
8
All Rights Reserved.
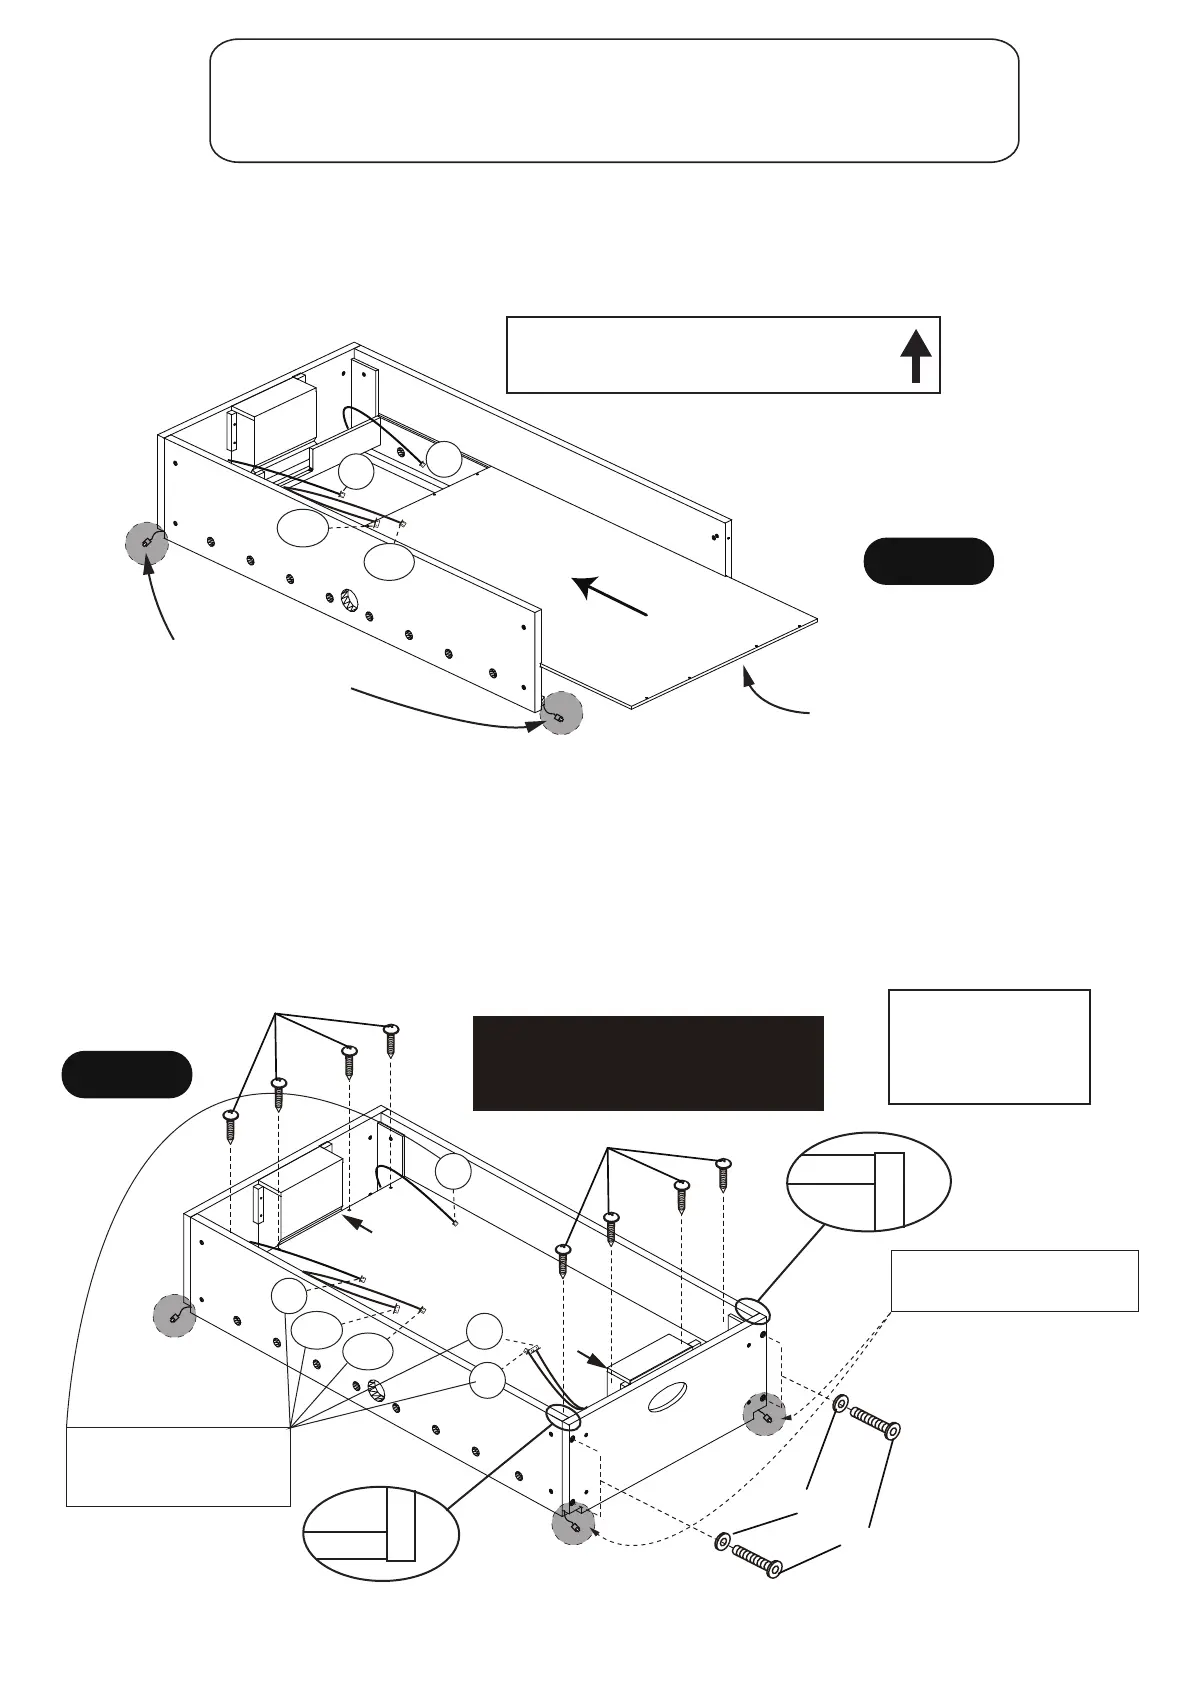
STEP 2
Then slide the P5 Playfield with the graphic facing down into the grooves of P1R and P2R Side
Aprons as shown in FIGURE 2.
STEP 3
Attach P3R End Apron-A onto P1R Side Apron-A and P2R Side Apron-B using H4 Bolts and
H6 Washers as shown in FIGURE 3.
Use T1 Allen Wrench to tighten all H4 Bolts in STEP 1 and STEP 3 now.
Center and attach P5 Playfield in the cabinet using pre-driled holes with H1 Screws as shown
in FIGURE 3.
Tighten, but do not strip out H1 Screws.
P5 PLAYFIELD MUST BE CENTERED
BEFORE INSTALLING H1 SCREWS
PARTS REQUIRED:
1 pc - P5 Playfield1 pc - P3R End Apron- A
4 pcs - H4 6 mm x 50 mm Allen Head Bolt 4 pcs - H6 6.5 mm x 16 mm Flat Washer
8 pcs - H1 3.5 mm x 35 mm Phillips Round Head Screw
FIGURE 2
FIGURE 3
H1
P1R
P5
P2R
P4R
P1R
P2R
H4
H6
P3R
NOTE:
Playfield Graphic on
the underside facing the floor
NOTE: C3, C6-A, C6-B and C7 wires
all stay ABOVE playfield.
Black and Red wires in
this correct position for
future leg assembly.
H1
IMPORTANT NOTE:
Please be sure to install H1 Screws
exactly as per FIGURE 3.
Screws must be screwed straight down.
Leave the red and black wires
in the cut out of P3R End Apron
Leave C3, C6-A, C6-B, C7
C8 and C9 wires inside of
aprons and above playfield
C9
C8
4
4
3
3
3
3
4
4
NOTE :Use the 1-1,2-2,
3-3,4-4 – numbers on
the bottom corner of
each apron to correctly
orientate the 4 aprons.
C6-B
C6-A
C6-B
C6-A
C3
C3
C7
C7
Outside
Outside
Outside