Do you have a question about the ESDDI PS-055 and is the answer not in the manual?
Adjust the bottom knob, unfold the tripod, and tighten the knob to adjust the height as needed.
Open the softbox and place the bottom of the softbox into the top of the tripod, locking the knob.
Adjust the bottom knob, unfold the tripod, and tighten the knob to adjust the height as needed.
Install lamp switch, insert umbrella handle, screw in bulb until secure, and adjust angle as needed.
Adjust the bottom knob, unfold the tripod, and tighten the knob to adjust the height as needed.
Assemble four crossbars (1.5-3m), placing tubes with mounting holes on outermost sides.
Pass crossbar through background cloth sleeve or clip cloth to crossbar using provided clips.
Insert crossbar into tripod, install screw pad and screw, and tighten securely.
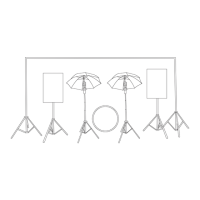
This document provides an installation guide for the ESDDI PS-055 Photography Lighting Kit, which includes components for softbox lighting, photography umbrella lighting, and a background system. The kit is designed to offer versatile lighting solutions for various photography needs. ESDDI provides a 12-month warranty for customers, with support available via email.
The softbox setup involves two main parts: tripod installation and softbox window installation.
To set up the tripod, users should first adjust the bottom knob. This allows the tripod legs to be unfolded. Once unfolded, the knob should be tightened to secure the tripod at the desired height. This adjustable height feature provides flexibility for different shooting scenarios and subject sizes.
After the tripod is set up, the softbox itself needs to be installed. This involves opening the softbox and carefully placing its bottom onto the top of the tripod. A locking knob is then used to secure the softbox in place, ensuring stability during use.
Once the softbox is mounted, the light bulb can be installed. The bulb should be rotated clockwise into the softbox socket until it can no longer turn. This ensures a secure connection and proper electrical contact for the bulb to function.
For certain lighting effects or to diffuse the light, a soft cloth can be attached to the front of the softbox. This is an optional step, allowing users to customize the light quality as needed.
The softbox setup allows for angle adjustment of the lamp head. Users can adjust a specific knob to select the appropriate position for the fixed softbox, catering to individual lighting requirements and creative preferences. This flexibility helps in directing light precisely where it's needed.
The photography umbrella setup also consists of tripod installation and the installation of the umbrella itself.
Similar to the softbox setup, the tripod for the photography umbrella is installed by adjusting the bottom knob, unfolding the tripod legs, and then tightening the knob to achieve the desired height. This consistent tripod setup method simplifies the overall installation process.
The installation of the photography umbrella involves a few steps:
First, the lamp switch needs to be installed. This involves taking out the umbrella switch, inserting it into the top of the tripod, and then locking it with a knob. This secures the switch, which is crucial for controlling the light.
Next, the umbrella and light bulb are installed. The umbrella should be opened, and its handle inserted into the socket of the lamp switch hole. Once inserted, it should be tightened to ensure it is secure. Following this, the light bulb is screwed into the lamp socket. It should be turned until it reaches the end and can no longer rotate, ensuring a firm connection.
The photography umbrella head also features an adjustable angle. Users can adjust the angle according to their individual needs, allowing for precise control over the direction and spread of light. This adaptability is key for achieving various lighting effects in photography.
The background system provides a backdrop for photographic shoots and involves tripod installation, crossbar installation, and background cloth installation.
For the background system, the tripod is installed by adjusting the bottom knob, unfolding the tripod, and tightening the knob to set the desired height. This standard procedure ensures a stable base for the background.
The crossbar is a crucial component for holding the background cloth. The kit includes four crossbars that can be assembled to create a length ranging from 1.5 to 3 meters, depending on individual needs. When assembling the crossbar, it is important to place the two tubes with mounting holes on the outermost sides.
To assemble the crossbar, the silver metal end of one tube should be snapped into another tube that has two small holes. A lock pin is then screwed into the crossbar to fit the hole, securing the connection. This modular design allows for flexible background widths.
Once the crossbar is assembled and mounted, the background cloth can be installed. There are two methods for this:
One method involves passing the crossbar through the hanging sleeve of the background cloth. This creates a smooth and even backdrop.
Alternatively, after assembling the cross frame and the tripod, the three clips provided with the kit can be used to clip the background cloth to the crossbar. This method offers quick attachment and removal of the background.
Finally, the assembled crossbar needs to be attached to the tripods. This is done by inserting the hole on the outside of the crossbar into the tripod. A screw pad and screw are then installed and tightened to secure the crossbar firmly to the tripod, completing the background system setup.
The reflector is another useful tool included in the kit. To install it, users simply need to remove the reflector from its bag and shake it to open it. Reflectors are used to bounce light back onto the subject, filling in shadows and adding highlights.
While specific maintenance instructions are not detailed, the 12-month warranty provided by ESDDI suggests that the components are designed for durability. In case of any issues, customers are advised to contact support via email. This indicates a focus on customer service and product longevity. The modular design of the crossbars and the straightforward installation processes for all components imply ease of assembly and disassembly, which can contribute to easier storage and transport, thereby extending the life of the equipment. The ability to adjust various parts like tripod height, lamp head angles, and crossbar length also suggests that the kit is designed for practical use and adaptability, which often correlates with robust construction.
| Power | 55W |
|---|---|
| Frequency | 50/60Hz |
| Luminous Flux | 4500LM |
| Lifespan | 50000 hours |
| Brightness | Adjustable |
| Input Voltage | 110-240V |
| Beam Angle | 120° |