7
Check for parts online at www.GetEskimo.com or call 800-345-6007 M-F 8-5 CDT
ENGLISHENGLISH
Operator’s Manual
38400
|
Eskape™ 2600 Flip-Style Sled Shelter
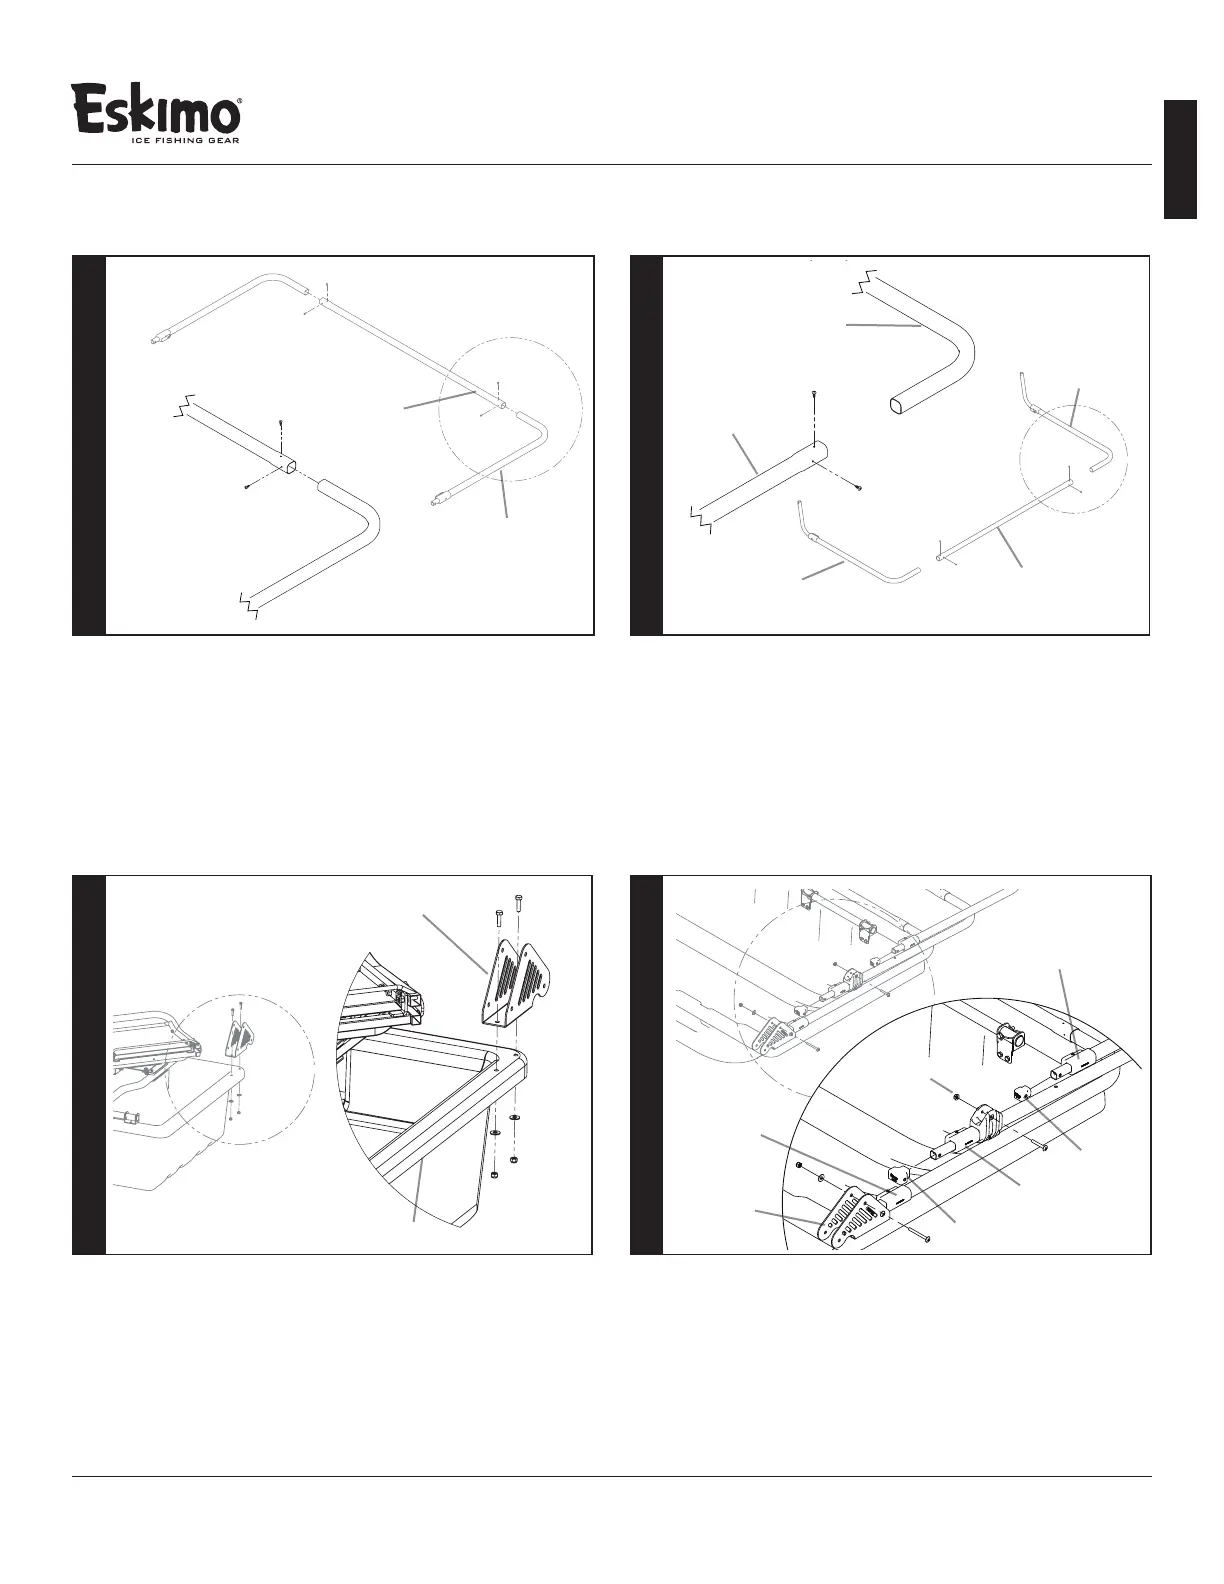
ALUMINUM FRAME ASSEMBLY
FIGURE 7
Assemble (2) #26539 assemblies to #33416 with the
included ½ IN sheet metal screws, (2) screws per side
at pre-drilled locations on #33416. Repeat this step for
(2) #36916 assemblies to #33416, and (36625/36626)
assemblies to #33416. There should be (3) total loop pole
nished assemblies when this step is complete.
#26539
#33416
SEE DETAIL
6
#33409
#36618
Assemble #36618 to #33409 using (2) 1 IN bolts,
(2) washers, and (2) nuts. Repeat step for remaining
#36618 component.
8
FIGURE 9
SEE
DETAIL
FIGURE 10
9
(A) Assemble (26539/33416) assembly to (36618) using (2) 2-½ IN Philips
drive bolts, (2) washers, and (2) nuts at the back bottom hole on #36618.
(B) Repeat above step to assemble (36625/36626/33416) assembly
(using middle top hole in #36618).
NOTE: #36642 push button should be face down.
(C) Assemble (36916/33416) to #36642 hinge on (36625/33416/36626)
using (2) #36858, (2) 1-¾ IN Philips drive bolts, (2) washers, and
(2) ange nuts.
SEE
DETAIL
(36916/33416)
ASSEMBLY
(26539/33416)
ASSEMBLY
(36625/33416/36626)
ASSEMBLY
FIGURE 8
Assemble #33636 and #33635 to #33416 with the
included ½ IN sheet metal screws, (2) screws per side
at pre-drilled locations on 33416.
7
SEE
DETAIL
#33635
#33416
#33416
#33636
#33635
#36618
#27821
FLANGE NUT
#36858