29
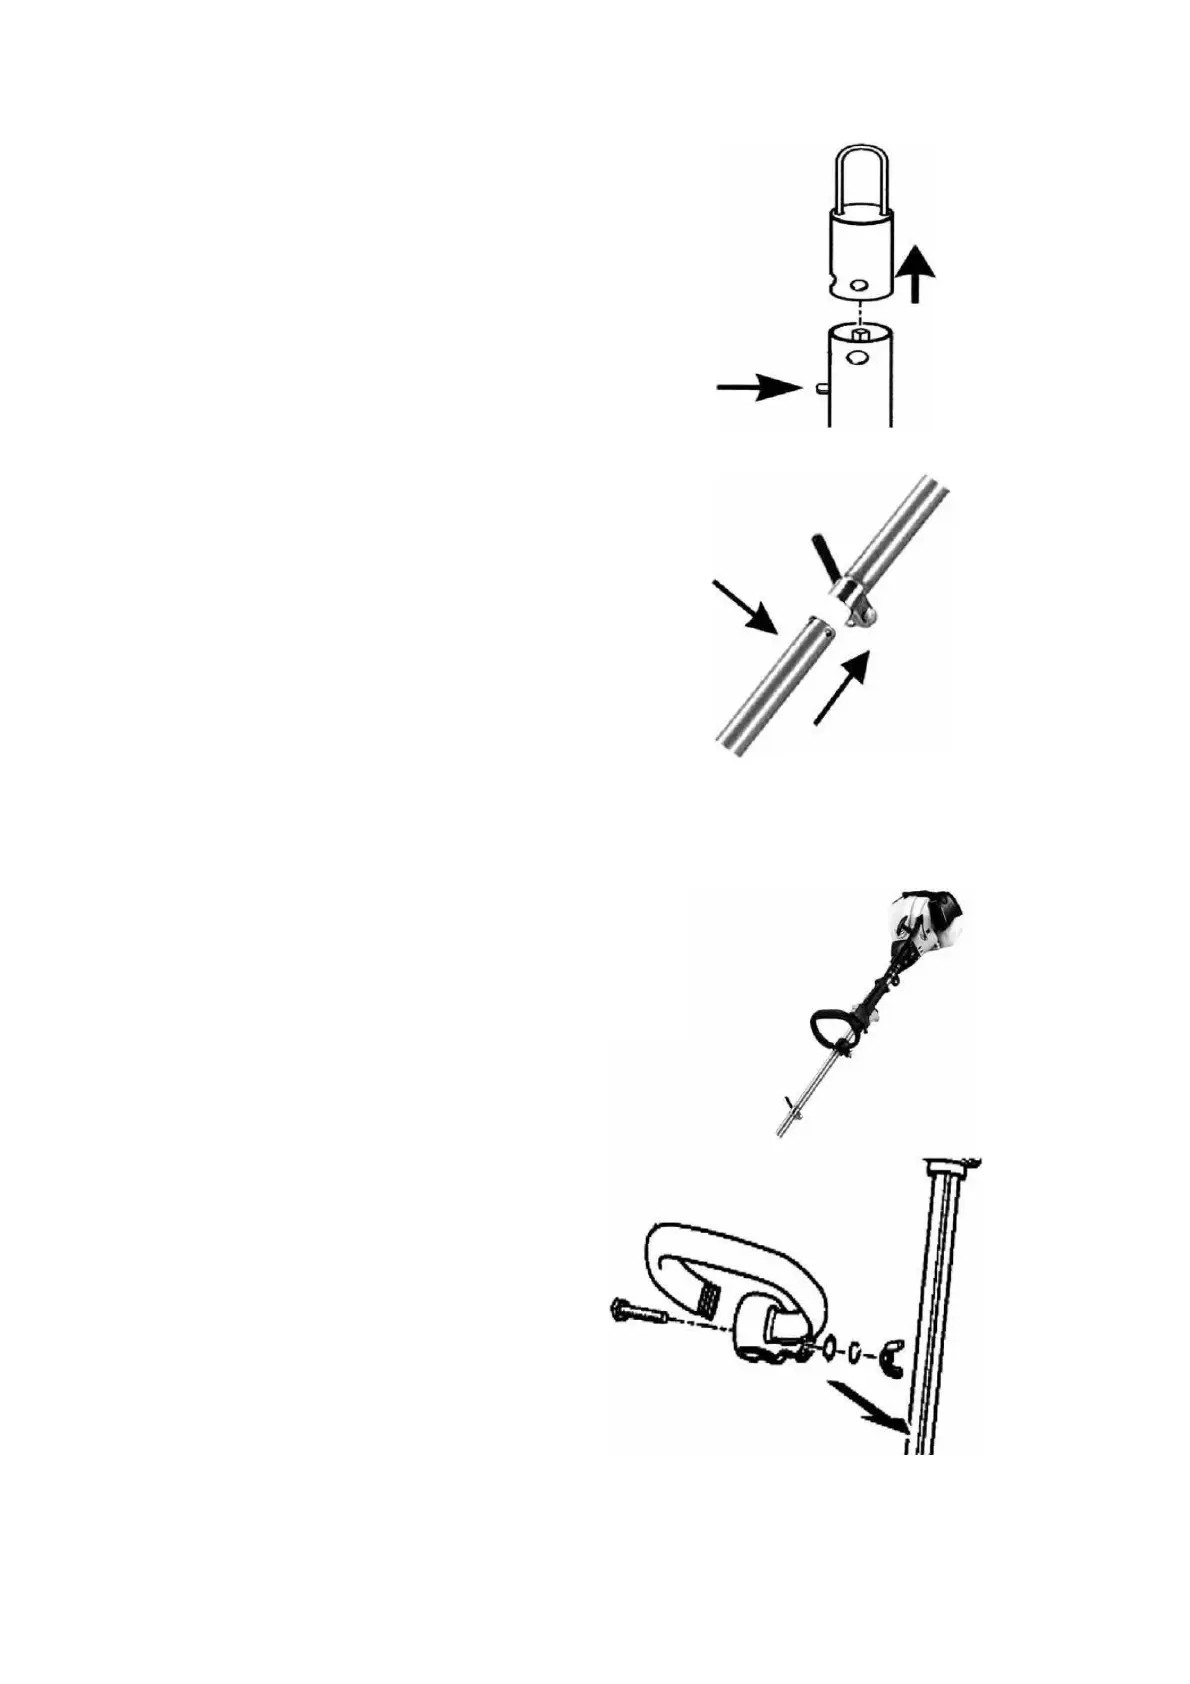
2. Connect trimmer shafts
-
Remove the covering cap from the lower
trimmer shaft: press the locking stud and
pull off the covering cap.
- Press the locking stud again and push the
lower trimmer shaft into the upper shaft so
that the engine and the trimmer head are
correctly aligned.
- If the trimmer shafts do not sit correctly:
Press the locking stud and twist the lower
trimmer shaft until the alignment is correct.
- Ensure that the locking stud has fully
engaged in one of the holes and its head is
clearly visible.
- Move the lower trimmer shaft a bit if needed
until the locking stud springs out.
- Hand-tighten the knob.
3. Front handle
- Remove the fixing parts from the front
handle.
- Attach the grip to the upper shaft
between the connection part and the
bolster.
- Push the bolt through the opening in
the holder.
The bolt head must sit in the
depression of the grip.
- Adjust the grip into a comfortable
position.
- Place first the lower washer and then
the locking washer onto the bolt.
- Hand-tighten with the wing nut.