EasyManua.ls Logo

Ethnicraft OAK NORDIC II BED WITH SLATS User Manual

Ethnicraft OAK NORDIC II BED WITH SLATS
3 pages
To Next Page IconTo Next Page
Page #1 background imageLoading...
Page #1 background image
ASSEMBLY INSTRUCTION FOR BED INSTALATION
IN YOUR PACKAGE :
ASSEMBLY INSTRUCTION
HARDWARE (AS LISTED ABOVE)
NOTICE
S MB NA S
E
L
Y INSTRUC TIO
X3
X
PARTS TO BE INSTALLED
1) HEADBOARD 1 piece
2) SIDE SUPPORT 2 pieces
3) FOOTBOARD 1 piece
4) CENTER SUPPORT 1 piece
5) CENTER LEG 1 piece
6) SLATS SUPPORTS 2 pieces
7) SLATS 1 set
TOOLS
RUBBER HAMMER
( Not included in package )
HARDWARE
SYMBOLS
OAK NORDIC II BED - WITH SLATS
(20X)
JCBC SCREW
Ø 5 x 60 mm
(12X)
NUT
Ø 5
WRENCH
( Not included in package )
SCREWDRIVER
( Not included in package )
DIRECTION NUMBER OF
PERSONS NEEDED
USE RUBBER
HAMMER
USE HANDUSE WRENCH
TO TIGHTEN
USE SCREWDRIVER
TO TIGHTEN
(8X)
L BRACKET
(4X)
JCBC SCREW
Ø 6 x 20
(1X)
JCBC SCREW
Ø 6 x 45 mm
(1X)
CROSS NUT
1
2 (L)
2
(R)
3
4
5
6
7
6
L KEY
( included in package )
USE L KEY
TO TIGHTEN
(12X)
WASHER
M5
1/3
Question and Answer IconNeed help?

Do you have a question about the Ethnicraft OAK NORDIC II BED WITH SLATS and is the answer not in the manual?

Ethnicraft OAK NORDIC II BED WITH SLATS Specifications

General IconGeneral
BrandEthnicraft
ModelOAK NORDIC II BED WITH SLATS
CategoryIndoor Furnishing
LanguageEnglish

Summary

Assembly Hardware and Tools

Hardware Components

Lists the specific hardware components required for assembly, including screws, nuts, and washers.

Tools Required

Identifies the tools needed for assembly, noting which are included and which are not.

Package Contents

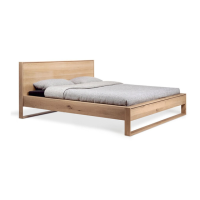
Details the parts included in the package, such as the headboard, side supports, and slats.

Assembly Notice and Symbols

Provides important notices and explains the meaning of various symbols used in the instructions.

Connecting Side Rail and Head/Foot Board

Step 1: Attach Side Rail to Headboard

Connects the side rail to the headboard using specified hardware, indicating proper orientation.

Step 2: Attach Side Rail to Footboard

Connects the other side rail to the footboard, mirroring the headboard connection.

Installing Center Support and Center Leg

Step 1: Position Center Support

Places the center support onto the side rails, aligning it with pre-drilled holes.

Step 2: Attach Center Leg

Secures the center leg to the center support, allowing for height adjustment.

Installing Slats Support

Step 1: Attach Slats Supports

Fixes the slats supports to the inner sides of the bed frame using screws.

Installing Slats

Step 1: Place Slats

Arranges the bed slats onto the installed slats supports.

Step 2: Secure Slats

Fastens the slats to the supports, ensuring stability and proper placement.

Related product manuals