12
11. NOTES FOR ENVIRONMENTAL PROTECTION
As the bicycle rack has a lighting system, it is subject to the
Ordinance on Waste Electrical and Electronic Equipment and
must be disposed of as waste electrical and electronic equipment
once its service life has expired.
The materials are recyclable. You make an important contribution
to protecting our environment by recycling, material utilisation
or other forms of reusing waste equipment.
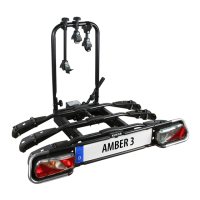
12. CONTACT INFORMATION
EAL GmbH
Otto-Hausmann-Ring 107
42115 Wuppertal, Germany
+49 (0)202 42 92 83 0
+49 (0) 202 42 92 83 – 160
info@eal-vertrieb.com
www.eal-vertrieb.com
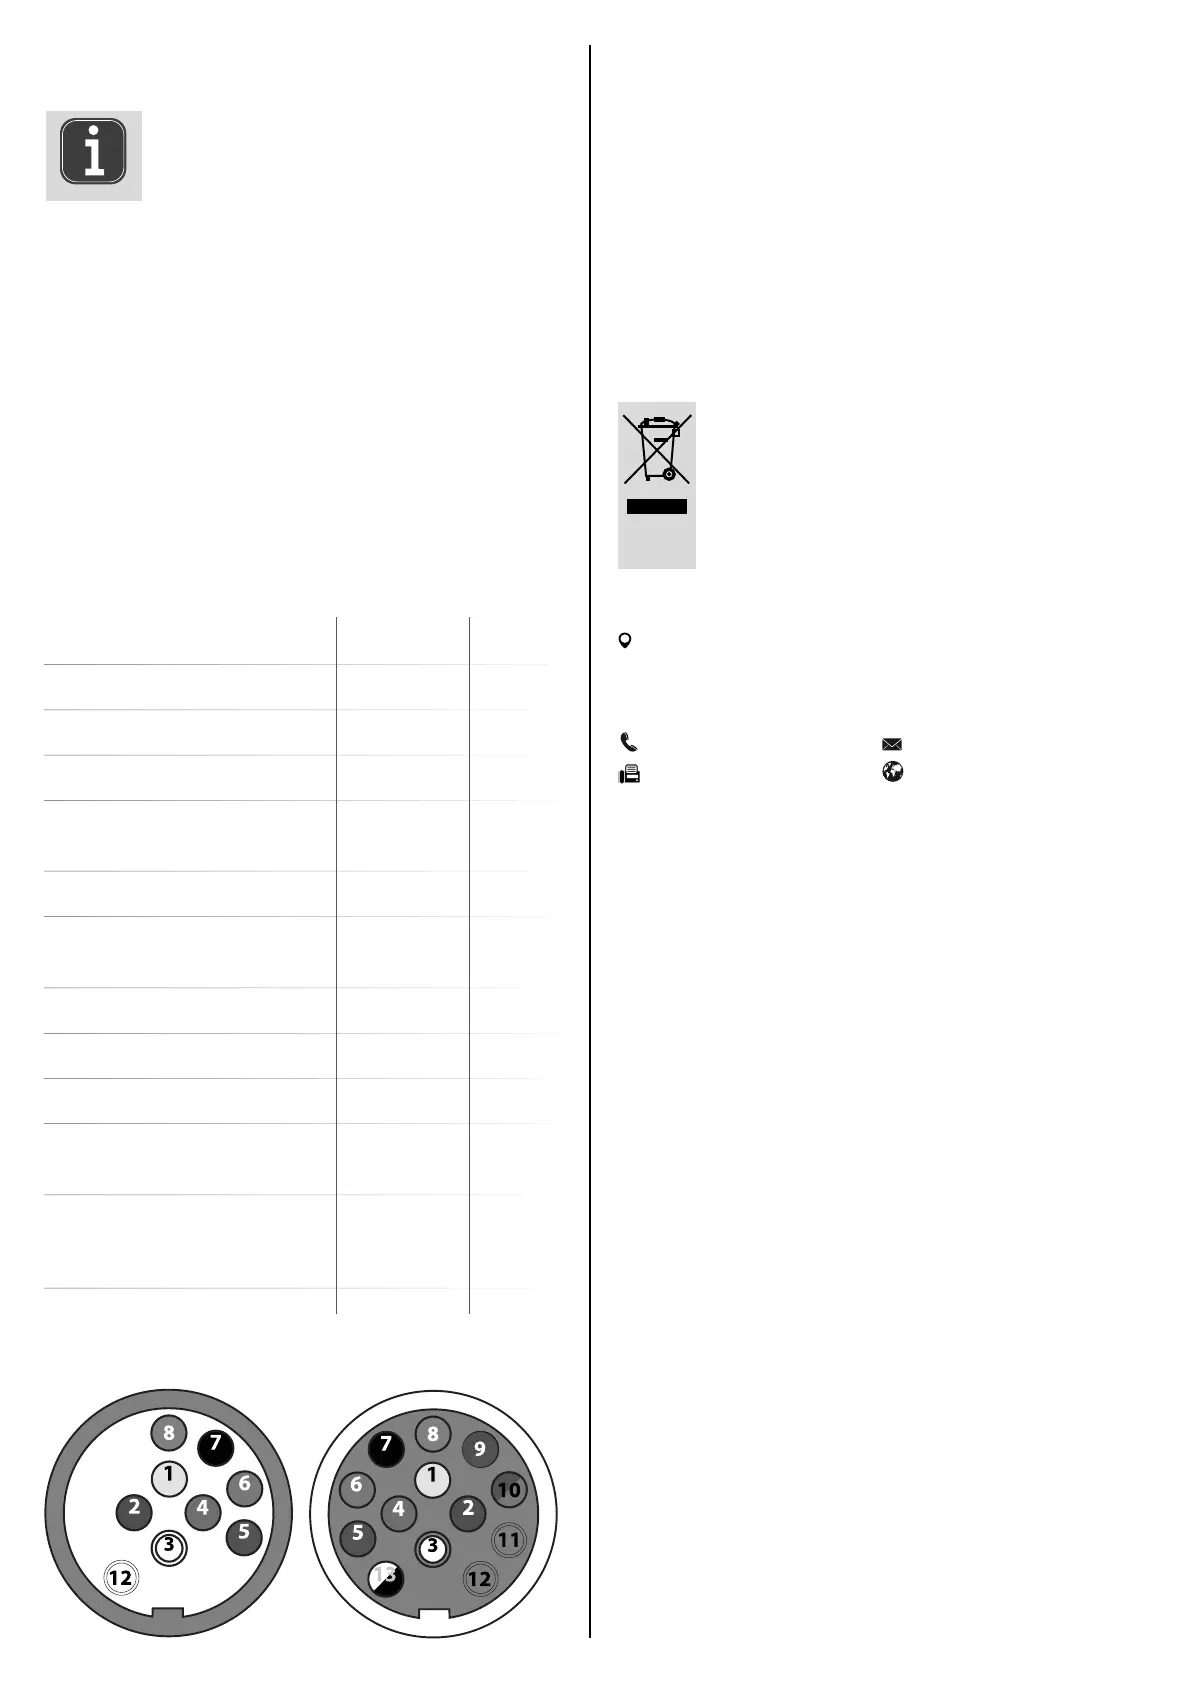
Right-hand tail light
(incl. marker light)
Pin 5, 58R
Left-hand tail light
(incl. marker light)
Pin 7, 58L
Charging cable -/ ground
(for battery in trailer)
Pin 11 not used
Control cable for trailer identi cation
(connection)
against ground pin 3 in trailer
Pin 12
Ground for contact 1 - 8
Pin 3, 31
Charging cable
Pin 10 not used
Brake light
Pin 6, 54
Right indicator
Pin 4, R
Left indicator
Pin 1, L
Reversing light
Pin 8
Rear fog light
Pin 2, 54G
Steady current (steady plus)
Pin 9 not used
Ground for contact (power supply)
Pin 13 not used
9. TIPS AND TRICKS
9.1 PIN ASSIGNMENT OF THE 13PIN CONNECTOR
yellow
blue
white
green
brown
red
black
grey
brown/blue
brown/red
white/black
Plug Socket
54G
R
58R
54
L
31
31
58L
54G
R
58R
31
L
31
58L
54
Required tools: Screwdriver of PH1 size. Unscrew the cross-head screws of the
lens and remove the lens. Press the bulb to be replaced lightly into the socket
and then turn it a quarter of a turn. Now remove the bulb from the socket.
Insert the new bulb in the appropriate position.
List of bulbs:
Brake light/ Rear light: 12 V 21/5 W BAY15d
Indicator: 12 V 21W BAU15S orange
Rear fog light: 12 V 21W BA15S
Reverse light: 12 V 21W BA15S
Licence plate illumination: 12 V 5W SV8,5 11 x 38 (So t)
10. CHANGING THE BULBS
8. MAINTENANCE
• After use, store the bicycle rack in a clean and dry place. Wash any mud or
other dirt o using water.
• Keep the trailer coupling clean and free of grease
• Keep the rack tow bar clean and free of grease.
• Check the bicycle rack regularly for damages. Damaged or worn parts must
be replaced immediately. Only original replacement parts may be used.
• Check the bolts and nuts of the bicycle rack regularly and tighten when
necessary.
• Immediately treat any damage to paintwork with paint.
• Regularly lubricate rotating and moving parts.
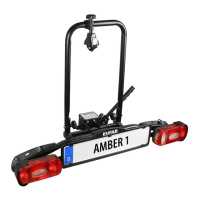
If you transport an e-bike on rails 1 or 2, the other bikes
must be correspondingly lighter so that the bike carrier is not
overloaded. Before loading, determine the weight of each
bicycle (e.g. using a personal scale).
Load the bike carrier so that the maximum payload is not exceeded. See
section 3. Speci cations.