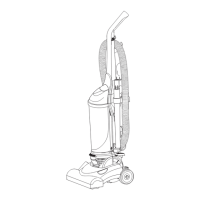
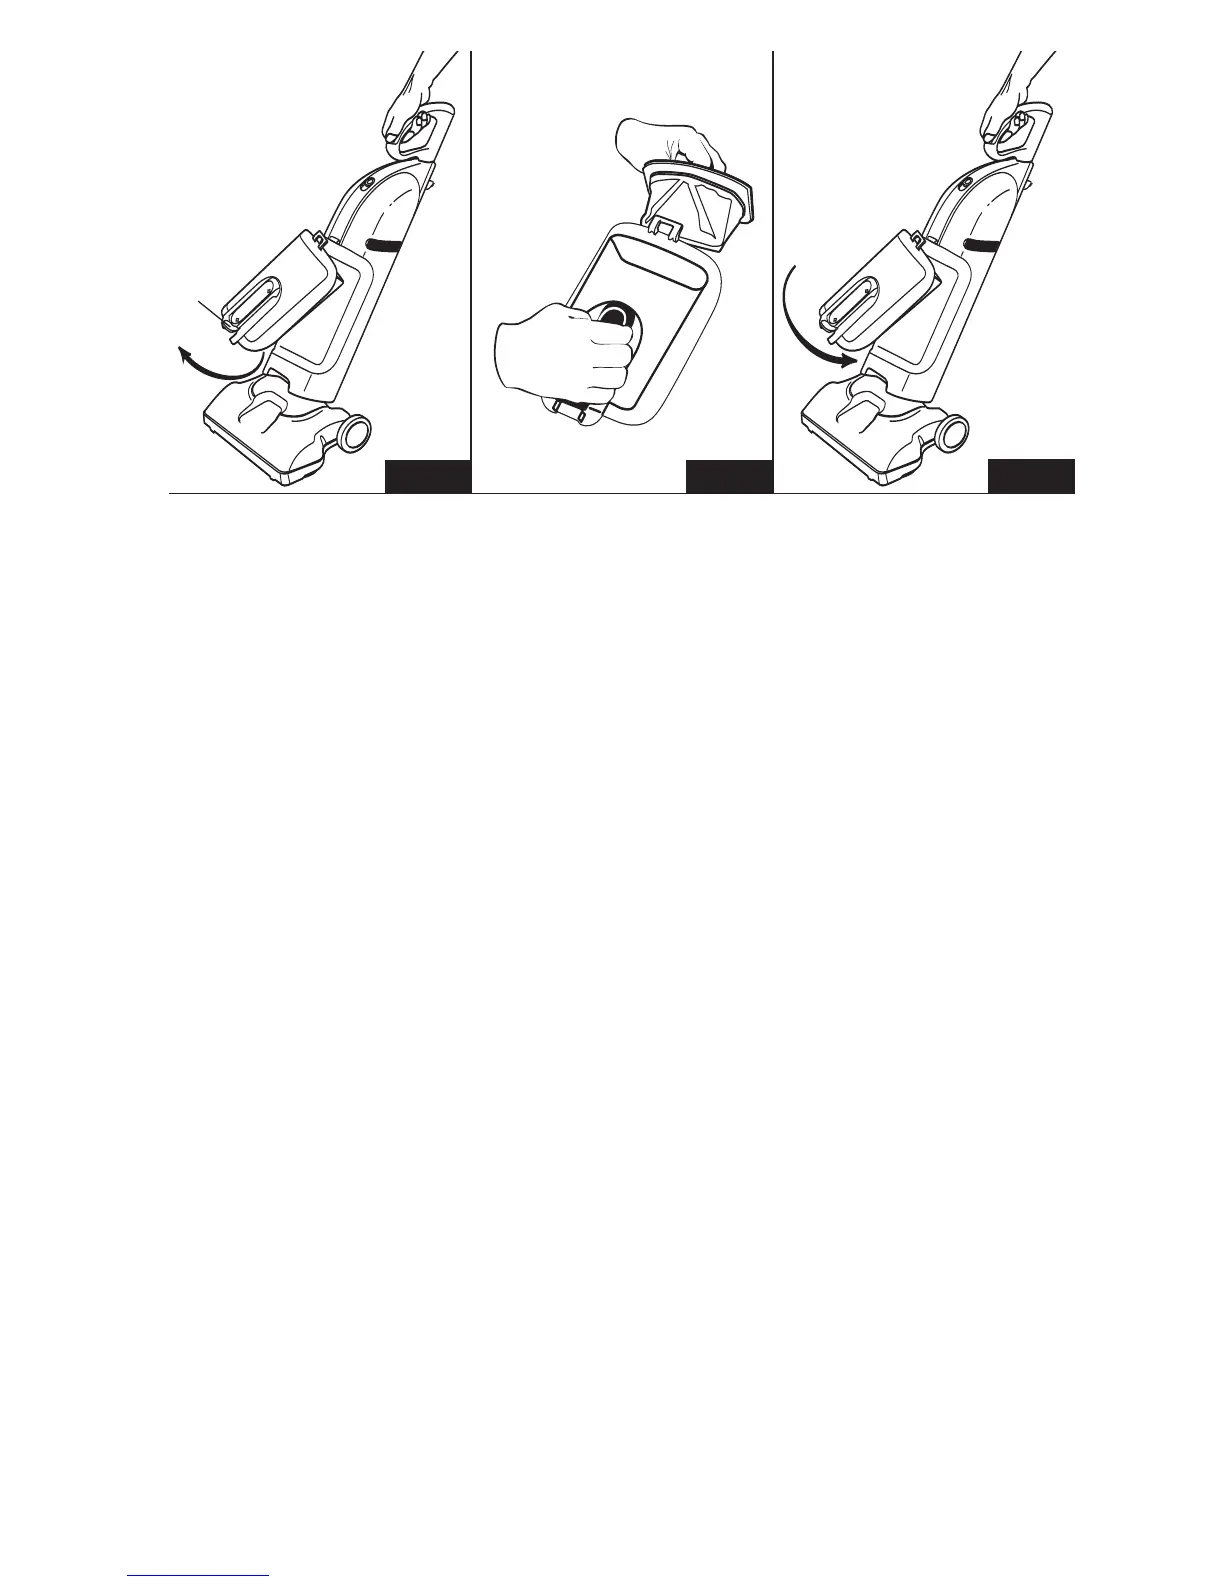
FIG. 5
7
ENGLISH
HOW TO MAINTAIN
The instructions given in this booklet serve as a guide to routine
maintenance. Keep the cleaner operating at top efficiency. Empty
the dust cup after each use.
Note: Turn off the power switch
●
D
and unplug the electrical
cord
●
J
to service.
Empty Dust Cup
Step 1: Pull dust cup latch
●
E
up.
Step 2: Swing dust cup
●
F
out from body and up off the dust
cup hook on the body (FIG. 4).
Step 3: Remove dust cup filter
●
G
from the dust cup
●
F
, shake
contents of dust cup into a waste container (FIG. 5).
Step 4: To replace dust cup
●
F
, fit dust cup down onto hook
(FIG. 6).
Step 5: Swing down and push gently into body
●
A
until dust cup
●
F
clicks into place (FIG. 6).
ESPAÑOL
MANTENIMIENTO
Las instrucciones de este folleto sirven como guía para el
mantenimiento de rutina. Mantenga la aspiradora funcionando
a máximo rendimiento. Vacíe el recipiente para polvo después
de cada uso.
Nota: Para realizar el servicio, apague la aspiradora con el
interruptor de encendido
●
D
y desenchufe el cordón
eléctrico
●
J
del tomacorriente.
Vacíe el recipiente para polvo
Paso 1: Jale la traba del recipiente para polvo
●
E
hacia arriba.
Paso 2: Gire el recipiente
●
F
alejándolo del cuerpo y hacia arriba
para extraerlo del gancho del cuerpo (FIG. 4)
Paso 3: Retire el filtro
●
G
del recipiente para polvo
●
F
y sacuda
el contenido del recipiente para vaciarlo en el recipiente
de residuos (FIG. 5).
Paso 4: Para volver a instalar el recipiente para polvo
●
F
,
colóquelo en el gancho (FIG. 6).
Paso 5: Gírelo hacia abajo y presiónelo suavemente hacia el
cuerpo
●
A
hasta que el recipiente
●
F
encaje en su sitio
con un clic (FIG. 6).
FIG. 4
FIG. 6
(CONTINUACIÓN)(CONTINUED)
●
E
●
F
●
G
●
F
●
A
●
F