5
HOW TO ASSEMBLE
CAUTION: Assemble the cleaner before using.
CAUTION: Moving parts, make sure on/off switch is in off position before plugging in.
NOTE: Features may vary by model yet all parts assemble the same.
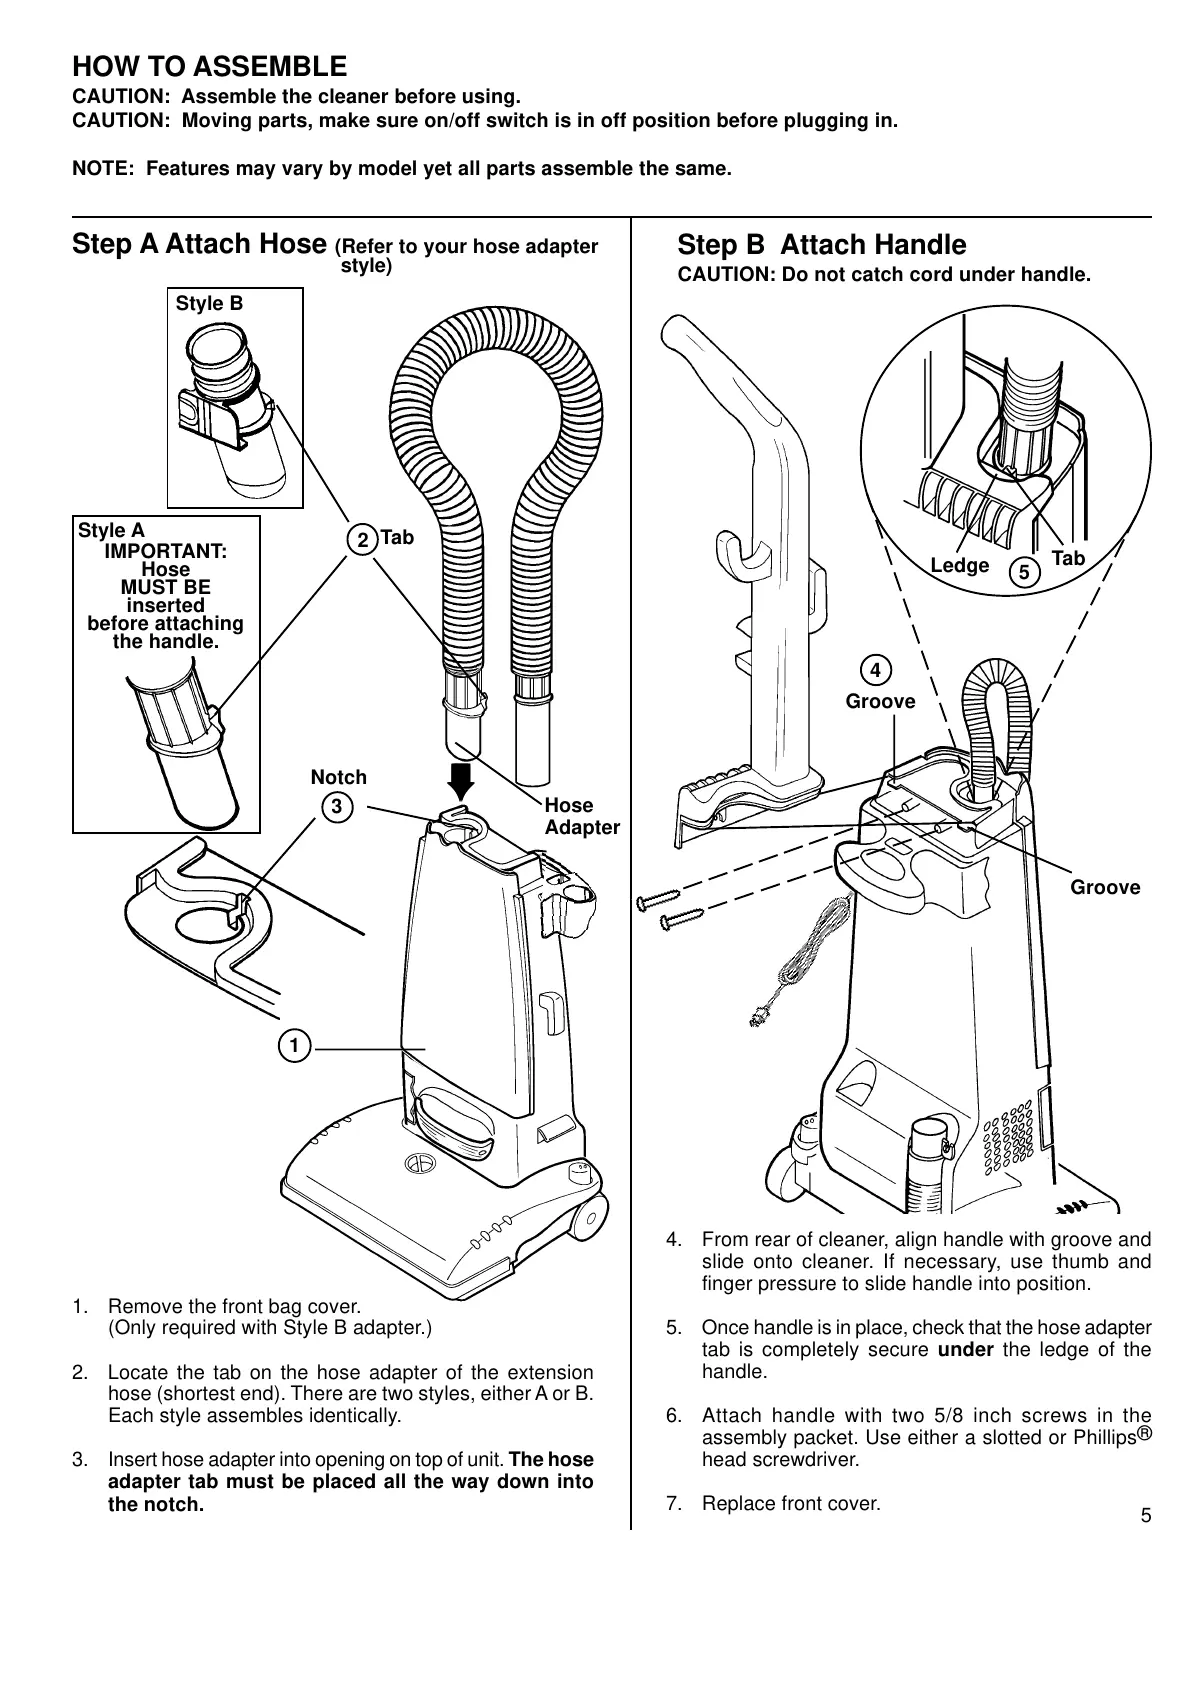
Step A Attach Hose (Refer to your hose adapter
Step B Attach Handle
CAUTION: Do not catch cord under handle.
Tab
Hose
Adapter
##
##
#
4. From rear of cleaner, align handle with groove and
slide onto cleaner. If necessary, use thumb and
finger pressure to slide handle into position.
5. Once handle is in place, check that the hose adapter
tab is completely secure under the ledge of the
handle.
6. Attach handle with two 5/8 inch screws in the
assembly packet. Use either a slotted or Phillips
®
head screwdriver.
7. Replace front cover.
1. Remove the front bag cover.
(Only required with Style B adapter.)
2. Locate the tab on the hose adapter of the extension
hose (shortest end). There are two styles, either A or B.
Each style assembles identically.
3. Insert hose adapter into opening on top of unit. The hose
adapter tab must be placed all the way down into
the notch.
Groove
4
Groove
Tab
Ledge
5
1
2
Style B
Style A
IMPORTANT:
Hose
MUST BE
inserted
before attaching
the handle.
3
Notch
style)