11
Assembling and charging robot
WARNING
Remove excess clutter and cables on the floor
before c leaning.
WARNING
Please do not add any detergent into the water tank
to prevent potential clog.
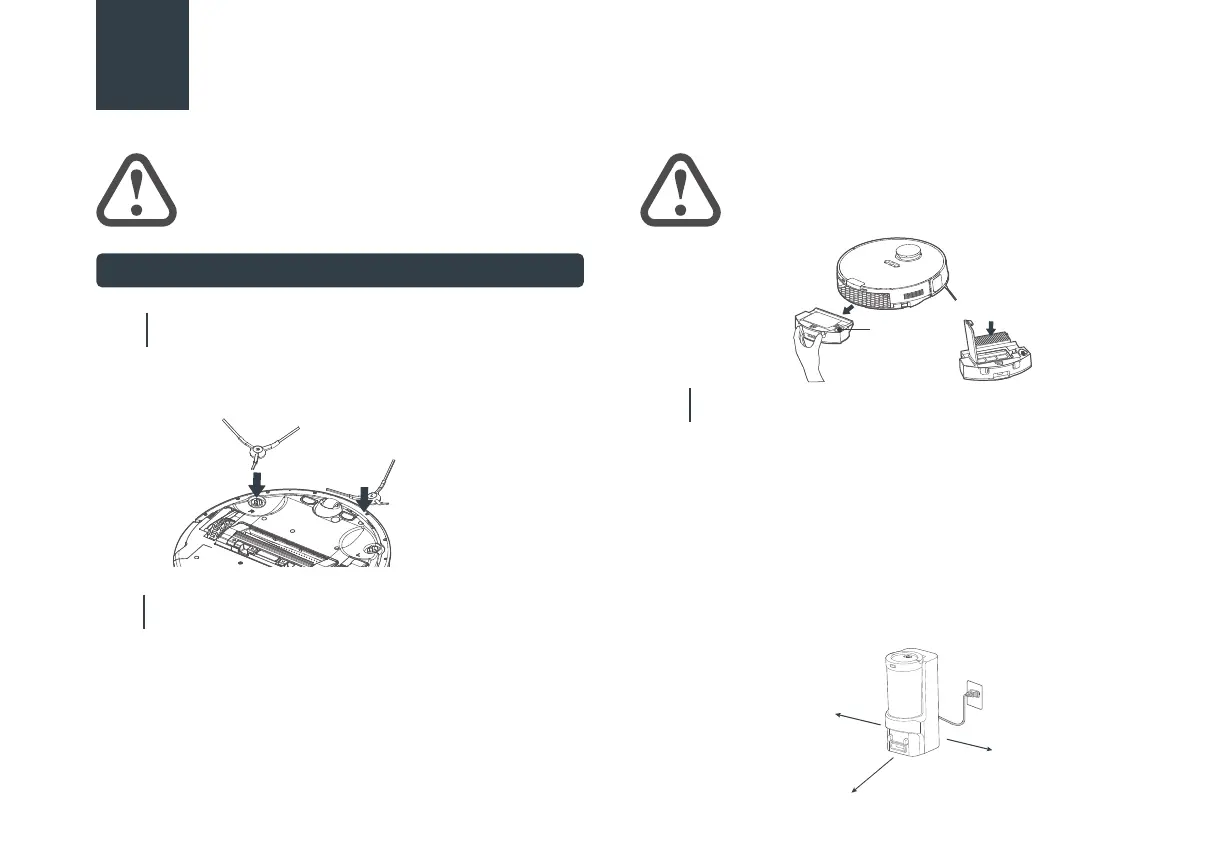
Installation of side brushes
Turn the main unit over. Attach the side brush to its
color-matched post and press down until they fit
into place.
01
Setting up self-emptying base
Place the self-emptying base flat against the wall on a
level surface. If there is any charging base for other
robot vacuum cleaners in the room, please put it
away before use of our self-emptying base to avoid
mismatching.
Place the self-emptying base in an area covered with
wireless network signal to ensure stable network
connection of the robot and proper function of the
App. Store the excess cables into the slot at the back
of the charging base to avoid affecting the proper
function of the robot vacuum.
Plug the power plug into a power outlet.
1.
2.
3.
03
Filter installation
Robot comes with filter installed. Before use, remove
dustbin from robot, pull up lid of dustbin and make sure
filter is installed well. Ensure dustbin lid is ecurely closed
and place back dustbin onto robot.
When using the mopping function, open the tank lid, fill
the water tank with cool tap water, and securely
close the lid.
02
Water Inlet
Quick Assembly
≥ 5 ft (1.5m)
≥ 1.5 ft (0.5m)
≥ 1.5 ft (0.5m)