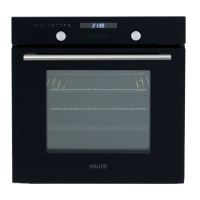
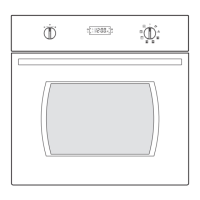
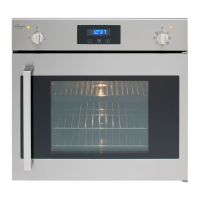
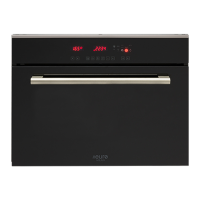
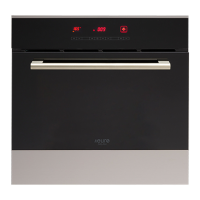
This document is a usage and care guide for Euro Appliances cooking ovens, specifically models EO608SX and EO608WH. It covers various aspects from safety warnings and installation instructions to product descriptions, operation, accessories, and maintenance.
Function Description
The oven offers a range of cooking functions, each indicated by a specific symbol:
- Oven Lamp: Enables the user to observe the cooking progress without opening the door.
- Defrost: Circulates air at room temperature to quickly thaw frozen food, making it suitable for defrosting time-sensitive items and ready-made dishes.
- Bottom heat: A concealed element at the bottom provides more concentrated heat, ideal for slow cooking dishes like casseroles, stews, pastries, and pizzas that require a crispy base.
- Convectional cooking: Both heating elements are active, providing pre-heated temperature and even heat distribution for single items, large cakes, and best results when placed in the center of the oven.
- Convectional with fan: Combines the fan and both heating elements, improving heat penetration and saving up to 30-40% energy. Dishes are lightly browned on the outside and remain moist inside. This function is also suitable for grilling or roasting big pieces of meat at higher temperatures.
- Radiant grilling: The infrared elements are working, providing intense heat for grilling.
- Double grilling with motor fan: The inside radiant element and top element work with the motor fan, ensuring even grilling.
- Double grilling: The inside radiant element and top element work together for intense, direct heat.
- Fan forced: An element around the convection fan provides an additional source of heat for convection style cooking. The fan automatically comes on to improve air circulation within the oven and create an even heat for cooking.
Important Technical Specifications
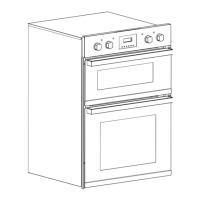
The oven requires proper installation and ventilation. The kitchen housing must be suitable, with panels next to the oven made of heat-resistant material (withstanding temperatures of at least 120°C). Electrical parts must be completely insulated. The hob must have a rear gap of at least 45 mm.
Installation Dimensions:
- Width (B595): 595 mm
- Height (A595): 595 mm
- Depth (C575): 575 mm
- Cabinet recess width (D606): 606 mm
- Cabinet recess height (E600): 600 mm
- Cabinet recess depth (F570 min.): 570 mm
- Fixing holes (G560): 560 mm apart
- Fixing holes (H560): 560 mm apart
Bulb Replacement:
- Only use 25-40W/220V-240V, T300°C halogen lamps.
Ventilating Openings:
- The cooling fan operates for 15 minutes if the oven's center temperature is over 75°C after cooking or during pause/waiting states. It stops earlier if the temperature drops below 75°C.
Usage Features
Setting the Time:
- Press "+" or "-" to adjust the hour.
- Press "M" to confirm the hour.
- Press "+" or "-" to adjust the minute.
- Press "M" to confirm the minute; the timer enters standby mode.
- If the display is not flashing, press "+" and "-" simultaneously for more than 3 seconds to adjust the time.
Oven On and Off:
- From standby mode, press "M" for more than 3 seconds to enter manual mode; the "S" symbol will light up.
- Set the desired cooking function and temperature.
- Set the time function to turn the oven on.
- If "Dur" or "End" is set, the oven will automatically turn off after cooking.
- For manual or minute minder modes, turn the cooking function and oven temperature knobs to "0". Press "M" and "+" simultaneously for more than 3 seconds to return to standby mode.
Time Function Setting (Manual Mode):
- Press "M" to cycle through: Manual mode, Minute minder, Dur, End, Manual mode.
- In manual mode, only the day's time and "S" light up. Cooking duration is user-controlled.
- If no button is pressed for 5 hours in manual mode, the timer flashes to warn of standby mode. After 10 hours, it enters standby mode.
- To reset the timer when flashing, press any button. To enter standby mode, press "M" and "+" simultaneously for more than 3 seconds.
Audible Warning Time Adjustment:
- Press "M" to select audible warning at completion. The relevant "S" symbol flashes.
- Use "+" or "-" to adjust the minute minder.
- Press "M" to confirm; the "S" symbol lights continuously.
- When the time is up, the timer gives an audible warning, and the "S" symbol flashes.
- Press any button for less than 3 seconds to stop the warning.
- Press "M" and "+" together for more than 3 seconds to enter standby mode.
Semi-automatic Programming (Cooking Period):
- This function sets a cooking period (up to 10 hours).
- Press "M" until "Dur" appears.
- Use "+" or "-" to adjust the cooking period.
- Press "M" to confirm; the day's time appears, and "A" lights continuously.
- At completion, the set duration, the timer stops, and "A" flashes with an audible warning.
- Press any button for less than 3 seconds to stop the warning.
- Press "M" for more than 3 seconds to set the oven to Manual mode.
Semi-automatic Programming (Finishing Time):
- This function sets a finishing time for cooking.
- Press "M" until "End" appears.
- Use "+" or "-" to adjust the finishing time.
- Press "M" to confirm; the day's time appears, and "A" lights continuously.
- At completion, the timer stops, and "A" flashes with an audible warning.
- Press any button for less than 3 seconds to stop the warning.
- Press "M" for more than 3 seconds to set the oven to Manual mode.
Full-automatic Programming:
- This function cooks after a certain period with a specific duration.
- Press "M" until "Dur" appears. Use "+" or "-" to adjust the cooking period. Press "M" to confirm; the day's time appears, and "A" lights continuously.
- Keep pressing "M" until "End" appears. Use "+" or "-" to adjust the finishing time. Press "M" to confirm; the day's time appears, and "A" lights continuously. The "S" symbol disappears until cooking starts.
- The oven starts by deducting the cooking period from the finishing time and stops at the set finishing time.
- The timer gives an audible warning, and "A" flashes.
- Pressing any button for less than 3 seconds stops the warning.
- Pressing "M" for more than 3 seconds sets the oven to Manual mode.
- Once set, all times cannot be changed. To change, cancel the current mode and reset.
General Specifications for Time Functions:
- Long press on "+" or "-" for more than 3 seconds for rapid increase/decrease.
- If no operation for 5 minutes during time function setting, it returns to manual mode.
- Pressing "M" for more than 3 seconds during time function setting cancels the current setting and enters manual mode.
- Pressing "+" and "M" for more than 3 seconds during time function setting beeps, cancels the current setting, and enters standby mode.
- It is suggested to run oven elements for 15 minutes at 200°C to burn off residues.
Maintenance Features
Cleaning and Maintenance:
- Ensure the unit is cool before cleaning.
- Disconnect power before maintenance.
- Remove all accessories and excess spillage before cleaning.
- Use a damp cloth, soft brush, or fine sponge with warm water and non-abrasive cleaning product.
- Do not use harsh abrasive cleaners, sharp metal scrapers, or steam cleaners on the glass or any part of the oven.
- Do not use acidic substances (lemon juice, vinegar) on stainless steel parts.
- Do not use a high-pressure cleaner for cleaning the unit.
- Baking pans may be washed in mild detergent.
Disposal:
- This appliance is marked according to European directive 2012/19/EU on Waste Electrical and Electronic Equipment (WEEE).
- The symbol on the product indicates it should not be treated as household waste.
- It should be handed over to the applicable collection point for the recycling of electrical and electronic equipment.
- Disposal must be carried out in accordance with local environmental regulations.
- Contact your local city office, your household waste disposal service, or the shop where you purchased the product for more information.
Accessories:
- Wire shelf: For grilling and roasting.
- Slider bracket: Shelf support rails on the right and left sides of the oven, removable for cleaning. (For specific models).
- Universal pan: For cooking large quantities of food (moist cakes, pastries, frozen food) or collecting fat/spillage and meat juices.
- Telescopic runner: Facilitates the use of oven shelves. These runners can be disassembled for cleaning by unscrewing the screws. (For specific models).
Shelf Placement:
- Shelves and the pan can only be used between the first and fifth layers.
- Ensure shelves are inserted in the correct direction to prevent hot food items from sliding out when removed.
Bulb Replacement:
- Disconnect power from the mains outlet or switch off the circuit breaker.
- Unscrew the glass lamp cover counter-clockwise (it may be stiff).
- Replace the bulb with a new one of the same type (25-40W/220V-240V, T300°C halogen lamps).
- Screw the glass lamp cover back in place.