Do you have a question about the Eurolux DW12VE - A++AA-6 and is the answer not in the manual?
This document describes the Eurolux DW12VE - A++AA-6 built-in dishwasher, providing details on its function, technical specifications, usage, and maintenance.
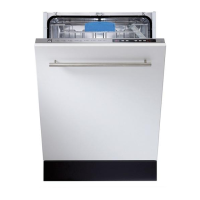
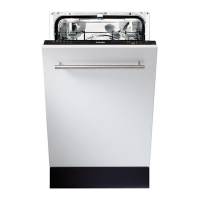
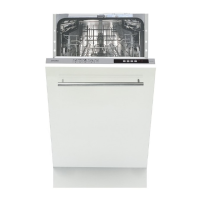
The Eurolux DW12VE - A++AA-6 is a built-in dishwasher designed for household use, aiming to provide efficient washing and drying performance while optimizing energy and water consumption. It features a water softening system to counteract hard water, ensuring dishes are free from lime residues and achieve optimal shine. The appliance includes two separate baskets for loading dishes, with an adjustable upper basket to accommodate various item sizes. An active drying unit enhances drying performance. The control panel offers multiple wash programs, a delayed start function, and indicators for salt and rinse aid levels.
Installation and Connection: The dishwasher should be placed on a suitable, safe, and level surface, ensuring easy loading and unloading. Avoid locations where temperatures might drop below 0°C. Packaging materials must be removed according to instructions. The machine should be positioned near a water tap or drain, ensuring hoses are not squeezed and the electrical cable is not underneath the machine. Adjustable feet allow for leveling. Electrical connections must match the rating plate values, and an earthed plug is essential for safety. A filter at the water inlet is recommended to prevent damage from contaminants.
First-Time Use: Before first use, ensure electrical and water supply specifications are met. Remove all internal packaging. Adjust the water softener system based on local water hardness, using a test strip if available. Fill the salt compartment with 1 kg of softener salt and water until it almost overflows. Fill the rinse aid compartment. For initial setup, the water hardness is factory-set to level 3.
Water Softening System: The dishwasher requires soft water for optimal performance. Hard water can lead to white lime stains on dishes and internal components, affecting washing, drying, and shining. The water softening system removes hardness-forming ions. The salt compartment needs regular refilling (approximately 1 kg every 20-30 cycles) with dishwasher-specific salt to regenerate the system. When filling salt, remove the lower basket, unscrew the cap, and use a funnel if available. After filling, replace the cap. If the salt warning light illuminates, refill the compartment.
Detergent and Rinse Aid: Use detergents specifically designed for dishwashers, available in powder, gel, or tablet form. Place detergent in the dispenser just before starting a program. Store detergents in a cool, dry place, out of reach of children. Overfilling the detergent dispenser can cause scratches on glassware and poor dissolution. Rinse aid prevents water drops, lime stains, and improves drying. To fill, remove the cap, pour in rinse aid until the indicator darkens, and replace the cap. The rinse aid dispenser has an adjustable setting (1-6), with a factory default of 3. Increase the setting if water stains appear, decrease if blue streaks are left. Only use dishwasher-approved rinse aids to avoid excessive foam and reduced washing performance.
Loading Dishes: Proper loading is crucial for energy efficiency and wash performance. The machine has two baskets:
Program Selection and Operation: The control panel includes:
To start a program: turn on the machine, select a program, choose additional functions if desired, and close the door. The program will start automatically. To change a program mid-cycle, open the door, select a new program, and close the door; the new program will continue from the previous point with its own parameters. To cancel a program, open the door, hold the program button for 3 seconds, and close the door; the machine will drain water and beep. After a program finishes, turn off the machine. For better drying, leave the door slightly ajar after the program ends or select an energy-saving drying option.
Regular Cleaning: Regular cleaning prolongs the machine's service life.
Filter Cleaning: The dishwasher has coarse, fine, and metal/plastic filters.
Spray Arm Cleaning: Check the holes of the upper and lower spray arms for clogging. If clogged, remove the spray arms and clean them under water. The lower spray arm can be pulled upwards. The upper spray arm nut can be removed by turning it to the left. Ensure the nut is perfectly tightened when refitting.
Hose Filter Cleaning: Periodically check and clean the hose filter to prevent yellowing and deposits. Turn off the water tap, remove the hose, take out the filter, clean it under running water, and then refit the filter and hose.
Troubleshooting: The manual provides a list of error codes (F1, F2, F3, F5, F6, F7, F8, FE) and corresponding solutions, such as checking water supply, filters, or contacting service. It also addresses common issues like programs not starting, detergent residues, water remaining in the machine, unusual noises, food wastes on dishes, whitish stains, rust stains, and poor drying, offering practical advice for each. If problems persist, contact an authorized service.
General Advice:
| Brand | Eurolux |
|---|---|
| Model | DW12VE - A++AA-6 |
| Category | Dishwasher |
| Language | English |