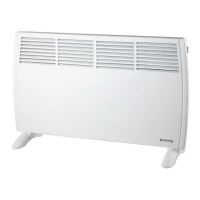
This document is an instruction manual for the Euromatic Convection Panel Heater, model JCPH-1500.
Function Description
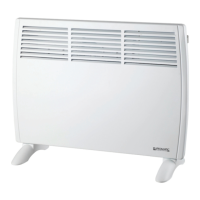
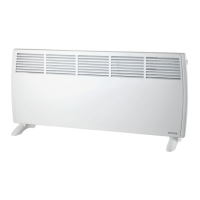
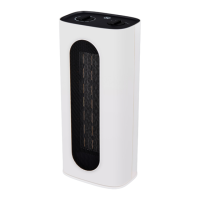
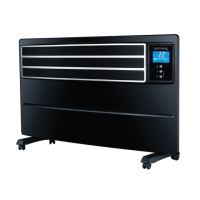
The Euromatic Convection Panel Heater is designed for indoor domestic use to provide space heating. It can be used either freestanding with supplied stands or wall-mounted using the provided wall-mounting kit. The heater operates by convection, warming the air in the room. It features a control panel with an LED display and various buttons for setting temperature and a timer. Safety features include a tip-over safety switch and an overheat protection mechanism.
Important Technical Specifications
- Model No: JCPH-1500
- Rated Power: 1260-1500W
- Rated Voltage: 220-240V ~ 50-60Hz
- Ingress Protection: IP24 – protected against ingress of solid objects up to 12mm (e.g., fingers), and against water sprays from all directions. This rating makes it suitable for use in bathrooms, provided specific installation guidelines are followed.
- Dimensions (with stand): 485 (H) x 747 (W) x 240 (D) mm
- Weight: 5.5kg
- Compliance: Fully tested and meets all requirements as set out by standards AS/NZS 60335.1 and AS/NZS 60335.2.30.
Usage Features
General Safety Precautions:
- Always read the manual thoroughly before first use.
- Ensure the outlet voltage and frequency match the appliance rating label.
- Do not plug the heater into a circuit that already has other appliances working to prevent overloading.
- Do not use with a power board, double adaptor, or extension cord due to overheating and fire risk.
- Never touch the heater with wet or damp hands or feet.
- Do not use if any part of it has become wet; call a qualified service technician immediately.
- Never spill liquid into the heater or immerse the cord, plug, or any part of the appliance in water.
- Do not operate with a damaged cord or plug, or if it malfunctions, has been dropped, or damaged. Contact after-sales support for repair.
- Ensure a tight fit between the AC outlet and plug to prevent overheating.
- Protect the power cord: do not twist, kink, let it touch heated surfaces, put stress on connections, or run it under carpeting/rugs.
- Operate only with the power cord fully unwound to prevent overheating.
- Always disconnect power when not in use, before cleaning, servicing, or moving. Grip the plug, not the cord, when disconnecting.
- Consider installing a Residual Current Device (RCD) with a rated residual operating current not exceeding 30mA for additional safety.
Usage Conditions and Restrictions:
- Intended for indoor household use only; not suitable for commercial or trade use, outdoors, wet surfaces, or near a swimming pool.
- Use only for space heating as described in the manual.
- Do not use as a drying rack for clothing.
- Avoid using accessory attachments not recommended by the distributor.
- Use only in a well-ventilated area. Do not block the space between the heater and the wall (if wall-mounted) as this space is required for air intake or exhaust.
- Keep ventilation and exhaust openings clear; do not insert objects or block them.
- Do not operate on a program switch, separate timer switch, or any other appliance for automatic operation to avoid fire risk if covered or positioned incorrectly.
- Do not use in the immediate surroundings of a bath, shower, or swimming pool. If wall-mounted in a bathroom, it must be installed at a safe distance from the bath or shower, ensuring controls are out of reach. Power outlets in bathrooms must be 3m from a bath or shower.
- Supervise children to ensure they do not play with the heater.
- CAUTION: Hot! Some parts become very hot. Avoid bare skin contact. Let the heater cool down before touching.
- Do NOT install or use: in front of or immediately below a power point; close to a radiant heat source; behind a door; on long pile carpet or flokati rug; near a window where it may get splashed with rain; near flammable materials (furniture, curtains, pillows, bedding, papers, clothes) or open flames (maintain 1m distance from front, sides, and rear); in areas storing petrol, paint, or other flammable liquids.
- If wall-mounting, ensure the wall is appropriate and sturdy. Do not mount on the ceiling.
- Do not cover the heater in any manner as it may overheat and become a fire risk.
Assembly:
- Can be used freestanding with supplied stands or wall-mounted with the supplied kit.
- For wall-mounting, choose a convenient, low position for easy access to controls.
- Wall-mounting instructions:
- Remove stand feet if attached.
- Mark positions for wall plugs (x = 300mm, y = 200mm) ensuring minimum clearances: 10cm above floor, 150cm below ceiling.
- Drill 4 holes (Ø8) for plastic wall plugs.
- Insert wall plugs and screws, leaving heads protruding 2-3mm.
- Position heater over large holes in brackets, slide left, then gently drop into place.
- Stand Assembly (freestanding use):
- Place a soft towel on a surface and carefully place the heater upside down.
- Attach a stand onto the base at each side, securing with self-tapping screws.
- Do not connect to power until securely mounted or stands are fitted.
Operating the Heater:
- Before first use, ensure it is fully assembled and undamaged.
- A "new heater" smell is normal during first use; ensure good ventilation.
- Connection: Ensure POWER switch is OFF [O], then plug into a dedicated power point.
- Switch on: Insert plug, switch POWER switch [I/O] on the side. Unit will beep, LED display shows ambient temperature. Press ON/OFF button to turn to standby; power indicator lights up.
- Temperature setting: Use UP ▲ or DOWN ▼ buttons to set desired temperature (5°C to 50°C). Press HEATER button to start heating; heater indicator flashes until set temperature is reached, then cycles on/off to maintain it.
- Timer setting: Press TIMER button; timer indicator lights up, [--] flashes on LED. Use UP ▲ or DOWN ▼ buttons to set off-timer (0-24 hours in 1-hour steps). Countdown starts after a few seconds.
- Turning off: Press ON/OFF button to turn off or cancel settings. Press POWER [I/O] button on the side to switch off the heater.
Extra Features:
- Temperature memory: Remembers the set temperature after a power failure. Timer settings are not memorized.
- Tip-over safety switch: Turns off if knocked over or not upright. Resumes operation when placed upright.
- Overheat protection mechanism: Shuts off automatically if overheating. Turns back on when internal temperature drops to a safe level. If triggered, switch off at POWER switch, unplug, let cool for 5-10 minutes, then plug in and operate normally.
Maintenance Features
Troubleshooting:
- If the heater fails or problems occur, contact after-sales support.
- Before calling, check: heater is plugged in, outlet is working, circuit breaker/fuse are working.
Cleaning and Maintenance:
- Always switch off and disconnect from power before cleaning.
- Allow heater to cool before cleaning.
- Wipe exterior with a damp (not wet) cloth to remove dust and dirt. Allow to dry thoroughly before reconnecting.
- Do not use detergents, abrasive cleaning powders, or furniture polish.
- Do not immerse the cord, plug, or heater in water or other liquid. Do not allow water to enter the heater.
- Use a vacuum cleaner to remove dust and fluff from around the grilles.
- To clean behind the heater (if wall-mounted), gently pull it up and towards you, clean, then reaffix securely.
- IMPORTANT: The most common cause of overheating is dust/fluff deposits. Regularly unplug and vacuum clean air vents and grilles. Ensure sufficient room around the heater and nothing is covering or obstructing air outlet/intake.
Storage:
- If not using for an extended period, clean and protect from dust.
- For long-term storage, dismantle from the wall (if wall-mounted) and store in its original carton (or cover) in a cool, dry place, out of children's reach.
Servicing:
- Contact after-sales support for servicing.
- If the power cord is damaged, it must be replaced by a service agent or equivalent qualified person.
- Do not attempt to open or repair the heater yourself; repairs must be carried out by a qualified technician.