InstallationProcedures
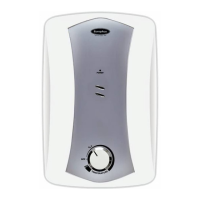
HeaterInstallation
1. Selectasuitablepositioninthebathroom.
2. RemovethescrewatthebottomoftheHeater.
3. RemovetheFrontCoverbyliftingthebottomupward.
4. Markthe3mountingpointsoftheHeaterBaseonthewall.
NOTE: TheHeaterpositionshouldbe1.5mabovethebathroom
floor.
5. Drillthe3holesto34mmdepthwith6mmdiameterdrillbit.
6. InsertthewallplugsandmounttheHeaterfirmlyinpositionwiththescrewsprovided.
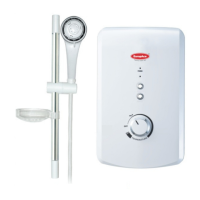
AccessoriesInstallation
1. FixtheSoapDish,AdjustableShowerHolderandRailSupports(topandbottom)ontheSliderRail.
2. Markthe2mountingpointsoftheSliderRailSetbesidetheHeater.
NOTE: ItisrecommendedthetopportionoftheRailSupportisinlevelornothigherthanthe
topof
theHeater.
3. Drill2holesandmounttheShowerAccessorieswithwallplugsandscrewsprovided.
4. InserttheRailSupportCoversontotheRailSupports.
HeaterInletandOutletConnection
ThisHeaterisasinglepointsystemandtheWaterOutletcanonlybefittedtothePVCHoseandHand
Showersetprovided.
NOTE: Nocontrolvalveorfittingcanbefittedtothewateroutlet.
1. ConnecttheStopValvetotheHeaterInletwithRubberWasherprovided.Use
propertoolsto
tightentheconnectionandbecarefulnottobreakthePlasticNut.
2. Connecttheincomingwaterpipe(1/2”BSP)totheStopValve.
MakesuretoputtheMeshFilterbetweenStopValveandincomingwaterpipe.
3. Ifinanycase,theStopValveisnot
usedoromitted,makesuretoputtheMeshFilterbetweenthe
heaterinletpipeandincomingwaterpipe.
4. Turnonthewatermainstodrainoutallplumbingdirtandtofilluptheheatertank.
NOTE: Donotusewhitetapeduringinstallation.
WARNING!
Theheatertankmustbefilledupwithwaterbeforethepowersupplyisswitchedon.
Thisistopreventdamagetotheheatingelement.
5. ConnectthePVCHoseandHandShowertothehea teroutlet.BesuretoputintheRubberWasher.
6. Hookthe
HandShowertotheAdjustableShowerHolderandadjustittoyourdesiredposition.
7. Checkforanywaterleakage.
 Loading...